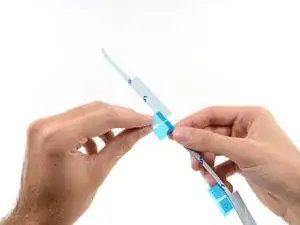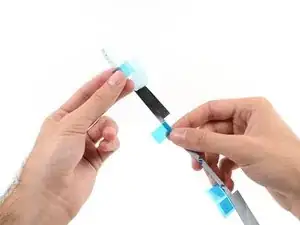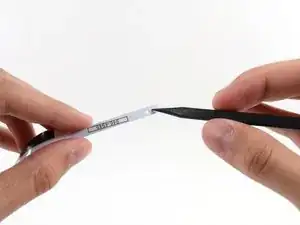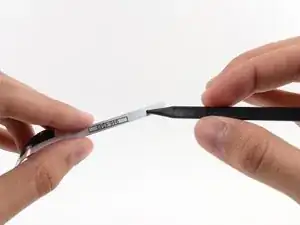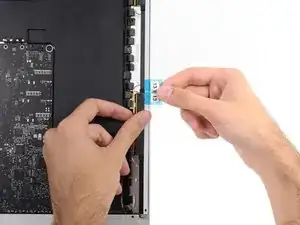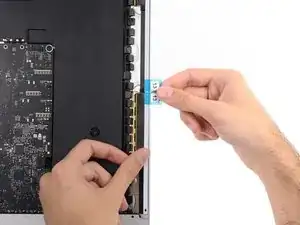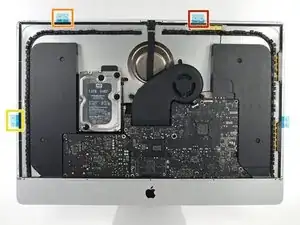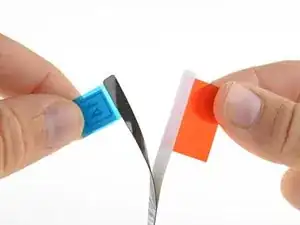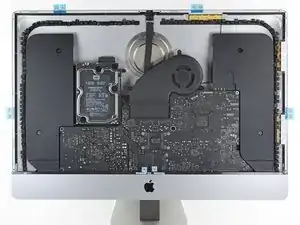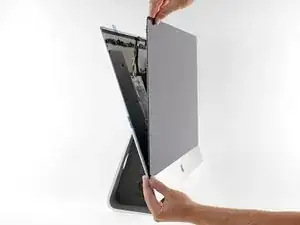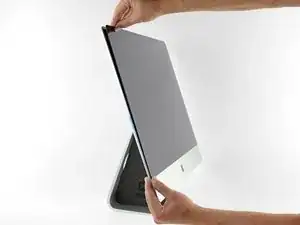
Einleitung

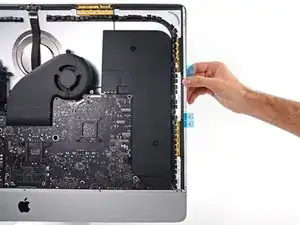
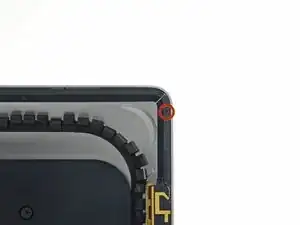
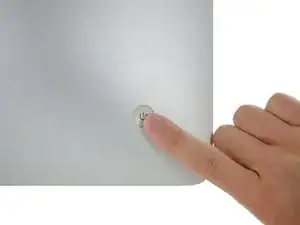
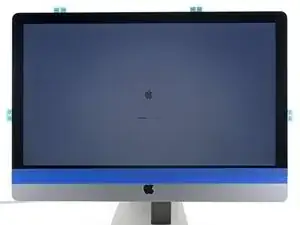
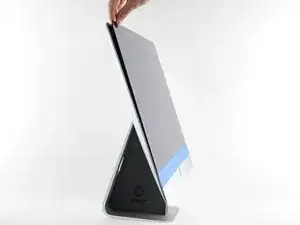
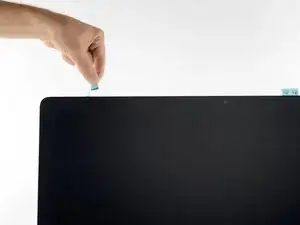
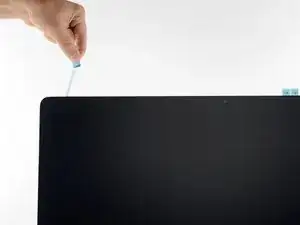
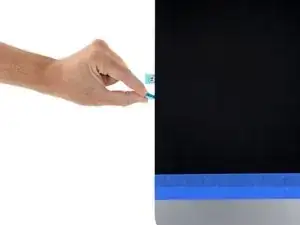
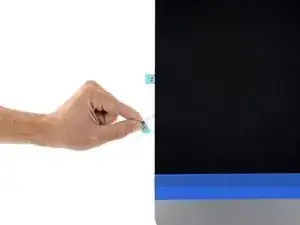
Wenn du das Display deines iMac 27" Retina 5k entfernt hast, wurden dabei die Klebebefestigungen am Rand durchgeschnitten. Sie können nicht mehr verwendet werden und müssen durch einen Satz neuer Streifen ersetzt werden.

  1. F1KWrrZ5cKsiZdjG
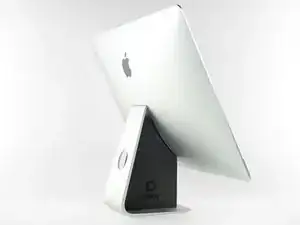
    • Wenn sich das Gelenk frei bewegen kann, ist der iMac schlecht ausbalanciert und es lässt sich schlecht an ihm arbeiten. Du kannst es, wie im Folgenden gezeigt, reparieren, es ist aber schneller und einfacher, wenn du eine iMac Reparaturhilfe verwendest.

    • Wenn du diese Reparaturhilfe nicht verwendest, dann musst du besonders achtsam und vorsichtig sein, wenn du hinter dem Bildschirm arbeitest. Er kann leicht herausfallen und zu Bruch gehen, wenn sich der iMac unerwartet bewegt.

    I found that using a couple of paperbacks (one larger than the other) performed the same function - taller one placed to the rear of the stand and the other one in front accommodated the curvature perfectly.
    robinsnaddon -
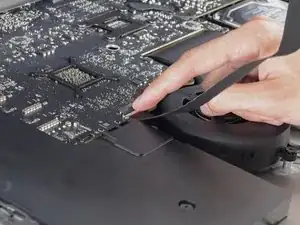
    For point 10 of this guide: iMac 27” 2017 has a relocated microphone position, so if you follow this guide, the mic ist not working after applying the tape.

    Make sure to let the microphone out, its located on the lower edge, right of the apple.

    Also the tape Stips on the upper edge are 2mm too long, and on the upper right it does not fit to the antenna area, so they have to be shortened and cut in the right shape.

    maccy -

  2. SXyZVVQNeM5hJWdI
    SXyZVVQNeM5hJWdI
    BDehN5GZ1IsguqTZ
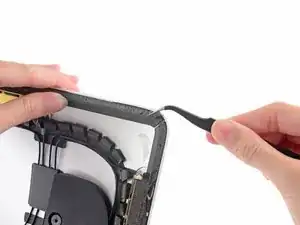
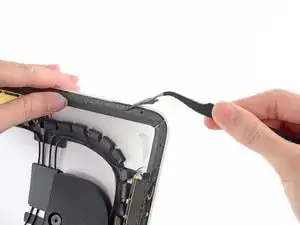
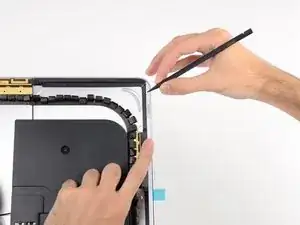
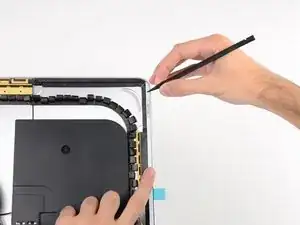
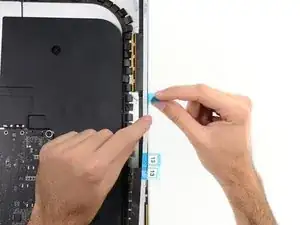
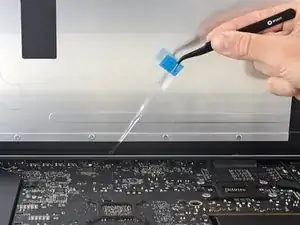
    • Bevor du die Klebestreifen anbringst, musst du erst die Reste der alten Streifen vom Rand des hinteren Gehäuses entfernen.

    • Wenn du dein altes Display wiederverwenden willst, dann musst du auch die Kleberreste auf der Rückseite des Displays beseitigen.

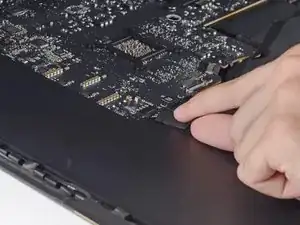
    • Ziehe die alten Klebestreifen mit den Fingern oder einer Pinzette ab. Beginne unten und ziehe nach oben in Richtung Oberkante des Gerätes.

    • Reinige nach dem Entfernen aller Kleberreste die Klebestellen mit 90%igem (oder mehr) Isopropylalkohol und einem fusselfreien Tuch. Wische nur in eine Richtung, nicht vor und zurück.

    • Überspringe diesen Schritt nicht. Die neuen Klebestreifen haften sonst nicht gut und dein Display könnte aus dem iMac herausfallen.

    I've done this on several iMacs now, but today I noticed another layer of thin black plastic stuck to the back of the display.

    It was really tough to remove and left a lot of clear, sticky goop under it.

    It's really thin, but it was strong enough to hold the screen in place by itself - I reconnected the display cables and tested before pulling the backing off the new adhesive strips - and it stuck together!

    I had to pry it apart again and it actually ripped my new glue strips in 2 or 3 places. I was able to still use them, but it did not go as smoothly as other iMacs I've upgraded. Everything was fine in the end, but I left some blue painters tape on the top of the screen overnight so the glue strips will set up without the screen falling off - just to be on the safe side.

    Does anyone know if this last layer of black plastic on the screen should be removed or left in place when replacing the glue strips?

    Daniel Cassel -

    That Black layer of plastic should not be removed. I found that on some segments, upon peeling back old adhesive remnants, the thin black plastic layer would also begin to peel off. STOP and cut off what has been removed, separate the black plastic strip from the adhesive remnant you are peeling off. The continue removing remnants.

    lamajr -

    Are you sure that you’re not supposed to pull the black backing all the way off? I removed all the black strips before getting to this step.

    Tom Tompkins -

    IMHO: The rubbing alcohol is clutch for this step. There’s plenty of residue after pulling up the old adhesive and the 99% Isopropyl Alcohol really took the tacky remnants off.

    Ben Hannam -

    To add on to the rubbing alcohol thing for removing residue, the alcohol doesn’t actually dissolve the adhesive residue, but softens it and makes it easier to get up. But you still have to actually remove it. I found that once you peel up the big pieces of adhesive, you’re still gonna have a some sticky residue. Here’s what worked for me:

    1) You want to go section by section, using a clean piece of non-linty cloth wet with alcohol to get the glue residue nice and wet. As it says in the instructions, don’t wipe back and forth, but wipe the residue along in one direction instead of just spreading it around.

    2) The plastic spudger that came with your repair kit (or the end of a credit card or something plastic that won’t cause damage) can be used as a little trowel to push the adhesive along and gather it up into a little booger-like hunk of goo.

    3) At that point, you can wipe it off with a clean, dry piece of cloth. Why dry? Because it won’t really stick to the alcohol-soaked one but will stick to a dry cloth.

    Damian Chadwick -

    It still took me a solid half-hour easily to go along all the edges and get them as clean as possible. I had to go over some sections a few times. This might have been overkill, but I really really didn’t want to go through all this and then find that the new adhesive strips weren’t holding because there was old gunk I hadn’t removed.

    Damian Chadwick -

    The careful removal of the adhesive is very, very important. Take that from a guy who didn’t carefully remove the adhesive and was awakened in the middle of the night by the screen coming off of the iMac and crashing to the floor. That was a bad night.

    Gary Bandy -

  3. NhARZqAwrCNG6ldL
    NhARZqAwrCNG6ldL
    esGcFVFstVoOTNLr
    aYFREHW16ZOIWUe4
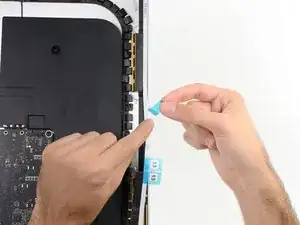
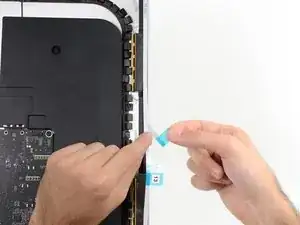
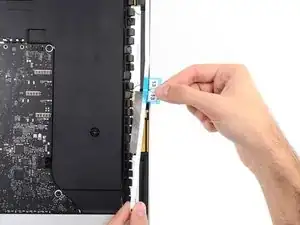
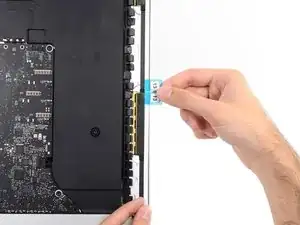
    • Beginne mit Streifen 13, der auf die rechte senkrechte Seite des hinteren Gehäuses kommt.

    • Bevor du die Schutzfolie abziehst, halte ihn passend an den Rahmen des iMac, um zu sehen, wo er angeklebt werden soll.

    • Ziehe den kurzen Schutzstreifen auf der Rückseite des Klebestreifens ab.

  4. HwAXmSQWVH4thVeq
    HwAXmSQWVH4thVeq
    rMoHuELKfAAOODvX
    • Setze die Spitze eines Spudgers in das Loch auf der Seite des Streifens, wo sich noch Schutzfolie befindet.

  5. XSCyxR2QnGYxELqs
    XSCyxR2QnGYxELqs
    DaBoHdGpJ1yEXNpv
    ySWFecPZaqQkEIlR
    • Lasse die Spitze des Spudgers weiterhin im Loch des Klebestreifens, und drücke sie in das entsprechende Loch im Rahmen des iMac.

    • Die Spitze verankert so die Position des Streifens, positioniere ihn korrekt an der rechten Kante, zieh vorsichtig am Spudger um den Klebestreifen zu spannen, und drücke ihn am Rahmen fest.

  6. BRhPTUPHdOKJ4tWv
    BRhPTUPHdOKJ4tWv
    YHNJh3TBLWSXIYIQ
    3lA2Kv5AMAdkNP4v
    • Wenn du sicher bist, dass die obere Hälfte des Klebestreifens gut sitzt, ziehe die Schutzfolie auf der Rückseite zwischen Rahmen und Streifen ganz ab.

    • Wenn die obere Hälfte nicht richtig sitzt, kannst du sie vorsichtig wieder abziehen und erneut aufkleben, wobei du mit dem Spudgers die Position sicherst.

  7. KI4taW5PfVnojg4k
    KI4taW5PfVnojg4k
    oL2xkPxJoJjnckPM
    • Richte den unteren Teil des Streifens an der rechten Kante aus und klebe ihn fest.

  8. lkauWjVS6huGUAWU
    lkauWjVS6huGUAWU
    NZ4xGBhA56fETs3R
    • Glätte den Streifen 13 mit deinem Finger. Achte darauf, dass er parallel zur rechten Kante ausgerichtet ist und glatt liegt.

    • Ziehe den Schutzstreifen auf der Vorderseite noch nicht ab!

  9. EAasL3saVmxoLrQT
    EAasL3saVmxoLrQT
    OVEeKfYDkMDMNyvV
    • Arbeite dich rings um den iMac herum, und füge drei weitere Klebestreifen auf gleiche Art und Weise hinzu.

    • Arbeite gegen den Uhrzeigersinn angefangen bei Streifen 13 und platziere :

    • Streifen 12 oben rechts

    • Streifen 11 oben links

    • Streifen 16 am linken Rand

    • Diese drei Klebestreifen haben jeweils ein Loch an einem Ende, benutze immer das kleinere Loch, um sie präzise zu platzieren.

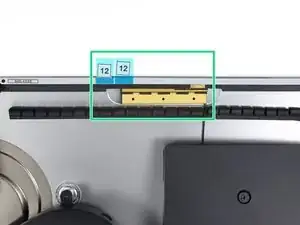
    • Beim iMac 27" Retina 5k Display passen die blauen Laschen des Streifen 12 nicht exakt auf die obere Antenne wie beim Normalmodell. Das ist völlig in Ordnung und hat keinerlei Einfluss auf die Funktion des Klebestreifens oder der Antenne.

    Number 11 is WAY too long and had to be cut. Not good.

    Brian Peixinho -

  10. vIyWHtlpwAHaNNJb
    vIyWHtlpwAHaNNJb
    kSGPpbtbP1AVgWyq
    AQxIu1sHvKupTqiH
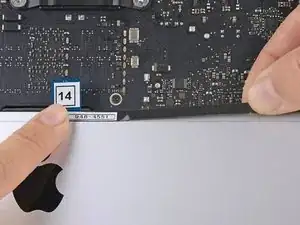
    • Die beiden verbliebenen Streifen 14 und 15 haben kein Führungsloch und sind etwas schwieriger als die vorhergehenden zu platzieren. Wir empfehlen, sie vor dem Festkleben erst einmal passend hinzuhalten, um den richtigen Sitz auf dem iMac zu visualisieren.

    • Fasse die rote Lasche an Streifen 14 an und ziehe damit die Schutzfolie auf der Rückseite ab.

    • Richte den Streifen an der Unterkante des hinteren Gehäuses aus, unmittelbar rechts von der Mittelschraube an dieser Kante.

    • Fahre mit den Fingern entlang des ganzen Streifens, damit er gerade und faltenfrei sitzt, drücke ihn dabei nach unten, damit er festklebt.

    Using iFixIt’s adhesive strips, i cannot strip off the white backing. Pulling on the tab pulls the wrong backing off, the black backing. I can:t figure a way to do this correctly!

    Charles Lindauer -

    Same with mine, but carefully using a razor blade to separate the white side from the adhesive, leaving the clear side attached, then remove the white side and place accordingly.

    Phill -

    The video shows the correct method - attach these strips to the back of the screen rather than the iMac itself.

    robinsnaddon -

    The Video can be found at macsales.com support site. Here’s the link:

    https://eshop.macsales.com/installvideos...

    got to 07:48

    lamajr -

    The instructions at this step need to be re-written. The Bullet point that says “Align the strip on the bottom edge of the rear enclosure” is misleading. Strips 14 and 15 are to be Placed on the Bottom Back Edge of the Display! Also note that the way these strips have been manufactured they are a bit funky. They will be placed with the DARK SIDE up, but the film covering the adhesive on these is tough to get properly separated, fortunately I had not cut my nails recently, so I was able to finally get it off after several minutes.

    steve -

    I did this step according to this written guide, and honestly the result was not good, plus it is much harder to put the display back on when the 14 and 15 strip adhesive is attached onto the computer.

    The video (also from ifixit) shows the correct way, putting strip 14 and 15 on the LCD itself. Have done it like this on a previous iMac I had and the results were much more pleasing.

    https://www.youtube.com/watch?v=hSChIAlX...

    robertdanielsson -

    There is a problem with step 10 of this guide for 27” iMac 5K Display 2019! If you follow step 10 as it is, the iMac microphone port is blocked with adhesive. After following this guide I had to buy an extra set of adhesive strips and reopen my iMac to fix the muffled microphone problem! The correct application of the adhesives in step 10 is described in iMac Intel 21.5" Retina 4K Display (2017) Adhesive Strips Replacement guide iMac Intel 21,5" Retina 4K Display (2017) Klebestreifen ersetzen

    Please do update this guide accordingly!

    Martins Medens -

    LEARN FROM MY MISTAKE: Yes, the video (https://www.youtube.com/watch?v=hSChIAlX...) IS right on this step, but I did something stupid. I based the rest of my screen re-install based on the video, instead of using the rest of this guide (I know, I know, I should have read the whole thing first… I assumed this was the easy part after replacing my hard drive). All that to say, the video doesn’t include any of the helpful painters tape stuff, so I ended up eyeballing the screen with active adhesive, and it ended up slightly misaligned. When I saw the mistake, it was too late to change anything. It’s a very small error, but a noticeable one if you run your finger along the top of the glass, but I am still kicking myself for messing the final step up after an otherwise successful install.

    BARRY RODRIGUEZ -

    Das Microphon befindet sich bei diesem Modell unten rechts über dem Apple Logo (3 Löcher): Nicht überkleben!

    Markus Kaempfer -

  11. AeFDLJJwHHx3PyyE
    AeFDLJJwHHx3PyyE
    j1bPhe5bYHXveHVD
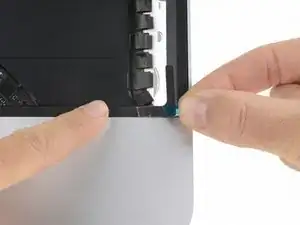
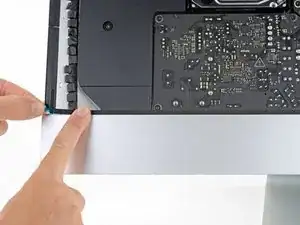
    • Wiederhole den vorigen Schritt für Streifen 15. Er wird an der linken Hälfte der Unterkante des iMac angebracht.

    • Wenn alle Streifen aufgeklebt sind, sollte der iMac so wie auf dem Bild gezeigt aussehen.

    You've really got to pay particular attention to exactly where to stick these - especially the short right-angle part as it doesn't go on the back of the glass as you might expect but actually over part of the edge of the LCD. It's also really difficult to remove and reposition the stickers since they will stretch when pulling them off.

    David -

    Note on the newer iMacs, the microphone is located on the right side of the lower edge. Make sure not to cover this up with tape or your microphone won’t work.

    veenenen -

    Das Microphon befindet sich bei diesem Modell unten rechts über dem Apple Logo (3 Löcher): Nicht überkleben!

    Markus Kaempfer -

  12. jWlGUmAVUDAVDcyP
    jWlGUmAVUDAVDcyP
    GeIOkUMXQv3djbrK
    • Lege das Display vorsichtig auf seinen Platz im iMac und richte es sorgfältig aus.

    Isn’t the step of peeling off the bottom sticker missing?

    alessandroteruzzi -

  13. Q6cmVLJt4LAGscky
    Q6cmVLJt4LAGscky
    f1RPGdP4bULqvKqx
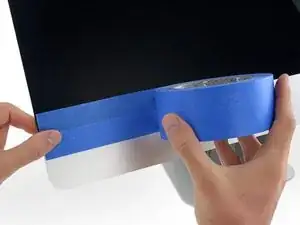
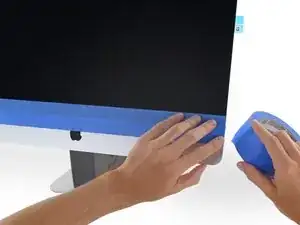
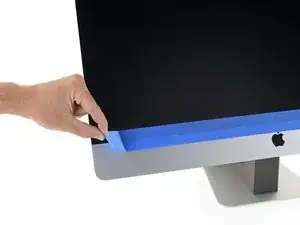
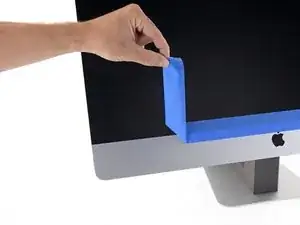
    • Nimm Maler-Klebeband und klebe die Unterkante des Displays am Gehäuse des iMac fest.

    • Das Klebeband soll das Display an der richtigen Stelle festhalten und ermöglicht es dir, das Display sicher aufzuklappen, so dass du von der Oberkante her an die Displaykabel gelangen kannst.

  14. BotQGgDKskPIPRUF
    BotQGgDKskPIPRUF
    AajvpY1ocF35cdGH
    4DQEIjDvb1yZnwXm
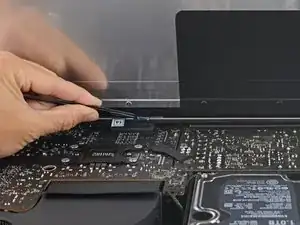
    • Jetzt solltest du deine Reparatur überprüfen, damit du wirklich sicher sein kannst, dass der iMac gut arbeitet, bevor du ihn wieder verschließt. In den nächsten drei Schritten wird gezeigt, wie du die Displaykabel vorläufig anschließen und den iMac starten kannst, bevor du die Schutzfolien von den Klebestreifen abziehst.

    • Wenn du schon überprüft hast, ob dein iMac richtig funktioniert und wieder verschlossen werden kann, dann gehe gleich zu Schritt 16 über.

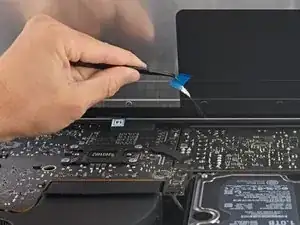
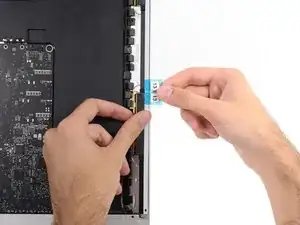
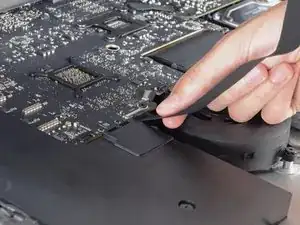
    • Verbinde vorsichtig den Stecker des Displaydatenkabels mit seinem Anschluss auf dem Logic Board. Achte daruf, dass er gerade im Anschluss steckt und schiebe ihn ganz ein.

    • Klappe den Sicherungsbügel des Displaydatenkabelsteckers im Anschluss nach unten.

    • Stecke den Stecker des Displayersorgungskabels in seinen Anschluss auf dem Logic Board.

  15. ksqZWna2nXm3MdyQ
    ksqZWna2nXm3MdyQ
    nfQSrf1XdZxnQO1I
    • Lege das Display zurück in das hintere Gehäuse des iMac.

    • Schalte jetzt den iMac ein und überprüfe deine Reparatur, bevor du den Computer endgültig wieder verklebst. Überprüfe wirklich alle Funktionen deines Computers und alle Bauteile, die du entfernt oder abgetrennt hattest.

    • Wenn du fertig bist, dann schalte den iMac aus und ziehe den Netzstecker, bevor du weiterarbeitest.

  16. lokGpWWG6QPW6Jjy
    lokGpWWG6QPW6Jjy
    CQc1RJRO2mKPeijC
    • Schaue nochmals nach, dass der iMac ausgeschaltet ist und der Netzstecker gezogen ist.

    • Wenn alle Funktionen des iMacs in Ordnung sind, dann löse die Displaykabel und klappe das Display vorsichtig nach vorne.

    • Greife von oben hinein und entferne den Schutzfilm von Streifen 15, indem du die Zuglasche gerade nach oben weg von der Unterkante des Displays ziehst.

  17. ufMeIpK2Vm4XZBT1
    • Wiederhole den vorigen Schritt für Streifen 14.

  18. PwPlLTlgt4HwQWet
    PwPlLTlgt4HwQWet
    hGYLCNqxJHtjAJGw
    QCBksaMXV56GEdPU
    • Verbinde zum letzten Mal die Versorgungs- und Datenkabel des Displays.

    • Denke dran, die metallene Halteklammer am Displaydatenkabel zu befestigen.

  19. nOGv2JVlxNs3hCWf
    nOGv2JVlxNs3hCWf
    SRYJcOvCSDvVEFGV
    iAf1f6RoZtRbjJCo
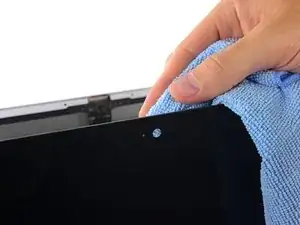
    • Überprüfe die Glasscheibe direkt an der Kamera auf Staub oder andere Verunreinigungen. Beseitige sie falls nötig mit einem Mikrofastertuch, bevor du das Display verklebst.

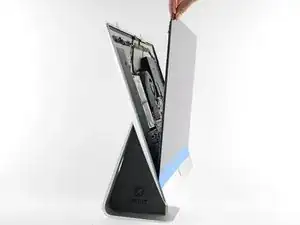
    • Stütze in den folgenden Schritten das Display beim Entfernen der Schutzfolie mit einer Hand ab, oder lehne das Display leicht gegen das hintere Gehäuse des iMacs an.

  20. HpRuStwLLDNOMWaC
    HpRuStwLLDNOMWaC
    byxN4exgLbgh54GD
    V2R4MMEdVAraGmqx
    • Entferne eine Seite des Schutzfilms von Streifen 11, indem du die Zuglasche direkt nach oben ziehst.

  21. BHYZQelEGiVlylZt
    BHYZQelEGiVlylZt
    QIeA1mUlFwFHZWfr
    • Entferne die andere Seite des Schutzfilms von Streifen 11.

  22. XEyNKvKCJSZj1pBJ
    XEyNKvKCJSZj1pBJ
    IYiAP6SwHSFKRLUK
    • Wiederhole die vorherigen Schritte und entferne die Schutzfolien von allen restlichen Klebestreifen (gekennzeichnet mit 11, 12 und 13).

    my number 13 stripe is broken in the middle. :( the last one. :(

    anonymous 8397 -

  23. pFVDvVUpi4xSPFTV
    pFVDvVUpi4xSPFTV
    26LYMptoCEeAo1kV
    • Entferne das Klebeband, welches das Display am hinteren Gehäuse befestigt.

    • Damit der Kleber gut hält, musst du den iMac flach auf seine Rückseite legen (mit dem Bildschirm nach oben) und sorgfältig, aber fest auf alle vier Kanten des Displays drücken.

    Cuidado en los iMac de 2017 y posteriores! Las dos entradas del micrófono están en la parte de abajo del marco (justo sobre la manzana). Si se dejan tapados por la cinta, los micros no funcionan! Hay que cortar la cinta justo por esos lugares, preferiblemente, solo sobre los pequeños orificios de entrada del sonido.

    javier -

Sam Goldheart

Mitglied seit: 19/10/12

449445 Reputation

24 Kommentare

This guide works great. Replaced a 2015 IMAC 27" screen without any difficulty especially since I purchased the Ifixit tape kit and removal tools. Thanks guys and gals. Couldn't do it without you.

gordywat -

will this work on late 2015 27"5k iMac

ffjones54 -

Hello, I got a Late 2015 iMac 5K, are the stripes the same?

filmore -

yes .it works

Walter Fontes -

Yes this adhesive strip replacement kit works for the Late 2015 Retina 5K iMac. As mentioned in step 8, the tabs for strip 12 won't line up exactly the same as shown in the guide but it does not matter. It still works and will not interfere with that antenna.

smudge -

Does this work with iMac 27 2017?

macdeutsche -

Used these guides to replace the cpu and ssd’s in my 2015 iMac 27”. Super easy! And yes with a late 2015 model, the cpu is replaceable with a regular Skylake cpu. I bought a 3.2 i5 model and replaced with a 6700K ! And yes these also take 64GB of DDR3. For the PCIE SSD you can get an adapter off of ebay…look for m.2 to iMac adapter…since they’re cheap I recommend getting like 2-3 and figuring out which one works best with your m.2 ssd. So yeah, you can get a 1TB m.2 AND a 1TB 2.5” ssd in this and have a nice little box for peanuts.

Michael Stram -

Friends! This manual and accessories are compatible with the iMac 27 5K 2017?

Anton Gudzuman -

Hi,

I done all of the above on my 2017 27inch iMac and now my microphone won’t work, when I tap the enclosure it reacts but it doesn’t hear my voice commands. Maybe the adhesive tape got stuck on the microphone somehow. where is the microphone located exactly? Help please……

Best regards, Henk

Henk -

I have the same problem. Were you able to fix it?

Andrew Blackman -

I know this is an old question, but I wanted to post a followup so hopefully, no one else makes this mistake. The microphone is located on the lower edge. Here’s the thread that covers this better. Microphone very muffled after sealing up iMac

veenenen -

ottimo complimenti per i dettagli

guida superlativa e precisa grazie del vostro aiuto

gennariello1966@gmail.com -

I did it! Be very careful when you place the tape at the bottom of the screen. The screen can fall off! Also important to keep the imac standing and not laying on it’s back because it will make it hard to remove the bottom adhesives.

Jonathan Meson -

After following to the letter, the screen came off and went back on just fine. 5 days later (while setting in a cool environment) the screen just came unstuck and fell out sometime during the night, Of course it tore the two cables badly in addition to the antenna wires that must have gotten in the way somehow. Took most all day, but was able to the wifi and bluetooth wires back in place and the power cable (4 connector) plug back in. The hardest part was the ribbon cable. With high magnification hood on, was finally able to get it back in it’s socket. Had to tape it down to the rest of the board so it would stay. Used new sealant strips, then CLAMPED with spring clamps (around 12 of um) then laid it flat, screen up, then put it near a baseboard heater for two hours. Temp gun was around 100* all around it. Hopefully that won’t happen again!!

avflyguy -

Excellent write up. Also, the detailed photos were super helpful in seeing the alignment.

The only hiccup I had was trying to remove the final tabs from strip 15 and 14 while the glass was blue taped down. I had to lift the weight of the glass panel off of the tab strips before they came off. Aside from that, a very smooth install, and very quality product. Thanks!

Jonathan Daiello -

Excellent guide. Many thanks.

jhlincoln -

Make sure you totally clean both surfaces. The back of the display can be a real pain. I know someone who told me he replaced the PCI SSD and it all went smooth (same thing I did plus a SATA SSD and new thermal paste) but a few weeks later to his HORROR the 5k display was smashed on his office floor. Make sure to really clean and press on all sides. Keeping some painters tape on the top corners wouldn’t hurt either for a few weeks to make sure it seats well.

Brian Peixinho -

Thank you! Just completed this after an SSD upgrade to my 2015 iMac. Much appreciated Sam!

Kaiser Soze -

would be REALLY nice to have this linked on every single repair page. there was NO MENTION of replacing the adhesive strips at the end of the hard drive replacement guide, and i am now staring at a smashed LCD display that will set me back $600 to replace. very frustrating as I usually love ifixit guides. please consider adding a heavily red-flagged link to this guide and information to every guide that requires removing the display.

Coleman Howard -

This was a super useful guide that formed the closing stage of repairing my old iMac 27” (late 2012). I replaced the power supply and upgraded to an SSD. Thank you so much for taking the time to prepare and improve these guides. They are invaluable and enabling.

Nickie Daniel -

very good - thank you

manxman -

Se me acaba de despegar a las 4 semanas de haberlo utilizado.

Miquel Vera Pedrosa -

Works it in an iMac18,3?

javier -

These instructions add a couple of steps that a well-known Mac accessory vendor's instructional video lacks: taping the screen closed to allow functional testing before you seal the adhesive, the upright positioning using the wedge, that makes it easier to set the bottom edge of the screen fully against the frame, and cleaning the backside of the camera opening before you close it up. All of these are valuable refinements.

Bill S -