Einleitung

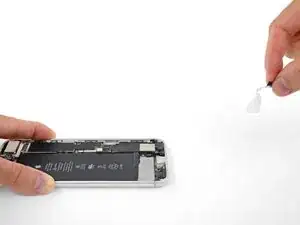
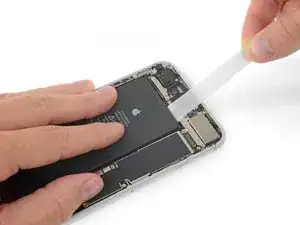
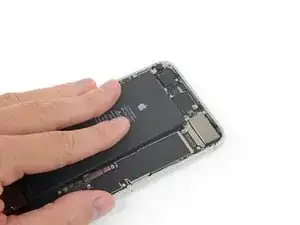
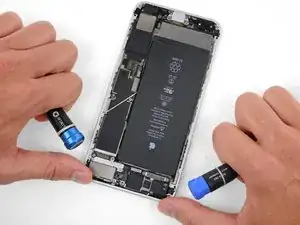
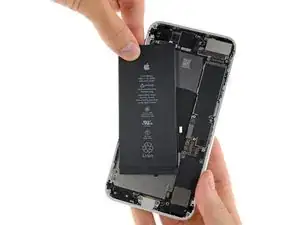
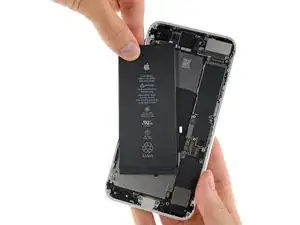
Mithilfe dieser Anleitung und einem neuen Akku kannst du deinem iPhone 8 Plus neues Leben einhauchen. Wenn dein Akku aufgebläht ist, musst du entsprechende Vorsichtsmaßnahmen treffen.

In dieser Anleitung wird die Displayeinheit komplett ausgebaut, um Schäden an den Displaykabeln zu vermeiden. Wenn du dich sicher genug fühlst, den Austausch meistern zu können, ohne die Displaykabel zu überlasten, dann kannst du die Schritte mit dem Ausbau des Displays einfach überspringen.

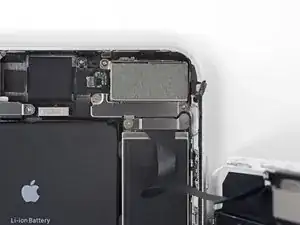
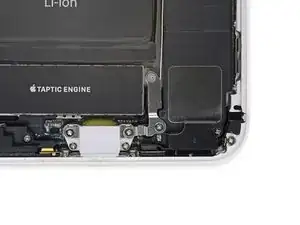
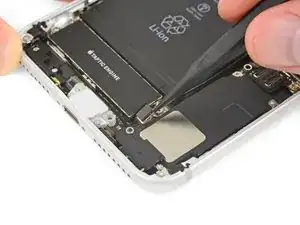
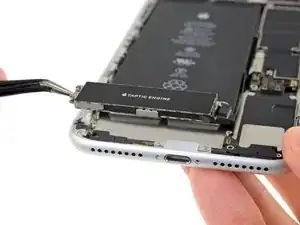
Obwohl es durchaus möglich ist, die Klebestreifen, mit denen der Akku befestigt ist, sofort nach dem Öffnen des Gerätes zu entfernen, wird in dieser Anleitung empfohlen, erst die Taptic Engine auszubauen. So wird vermieden, dass der untere Klebestreifen versehentlich reißt, entweder weil er an der Taptic Engine hängen bleibt, oder weil der Klebestreifen in einem zu steilen Winkel herausgezogen wird.

Für eine optimale Leistung sollte der neu eingebaute Akku nach Abschluss der Reparatur kalibriert werden: Lade ihn auf 100% auf, und lasse ihn mindesten zwei weitere Stunden laden. Benutze dann dein iPhone bis es sich aufgrund eines leeren Akkus ausschaltet. Lade den Akku dann erneut ohne Unterbrechung auf 100% auf.

  1. OqdAPX1NfcxJgNbg
    • Bevor du anfängst, entlade den Akku deines iPhones auf unter 25%. Ein geladener Lithium-Ionen Akku kann Feuer fangen und/oder explodieren, wenn er versehentlich beschädigt wird.

    • Schalte dein iPhone aus, bevor du daran arbeitest.

    • Wenn du ein iPhone öffnest, werden die Dichtungen des iPhones beschädigt. Halte eine Ersatzdichtung bereit, bevor du mit diesem Schritt fortfährst, oder achte darauf, dass keine Flüssigkeit eindringt, wenn du dein iPhone ohne Dichtung zusammen baust.

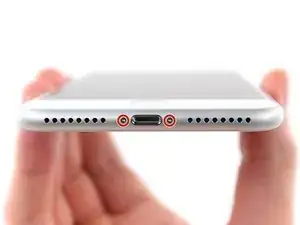
    • Drehe die beiden 3,5 mm Pentalobe Schrauben an der unteren Kante heraus.

    what do I do about super stripped screws?

    Ean Palacios -

    I’m sorry, your comment slipped past my radar earlier. For future fixers that might see this and ask the same question, you can check out our stripped screw guide for some detailed advice.

    Adam O'Camb -

    Do you need a toolkit like the essential toolkit

    Adam Palmer -

    Hi Adam. Having a tool kit with all of the listed parts above is best. The screw heads are very small and each set of screws needs a very specific type of driver to remove them without stripping any of them.

    Kyle Luksa -

  2. EXTwOVVOnkGXlAiy
    • Es ist leichter das iPhone zu öffnen, wenn du das untere Ende erwärmst. Du weichst so die Verklebungen auf.

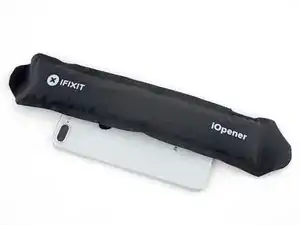
    • Du kannst das untere Ende des iPhones mit einem Haartrockner oder einem iOpener erwärmen. Wende die Wärme 90 Sekunden lang an, um den Kleber aufzuweichen.

  3. 1SUHNLjLanp2x1y2
    1SUHNLjLanp2x1y2
    G2AloSCafqypVhRk
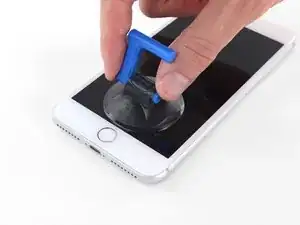
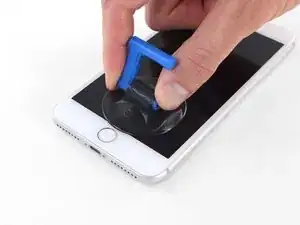
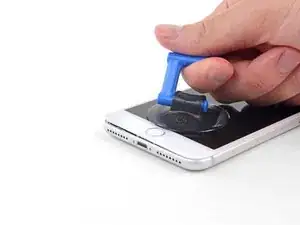
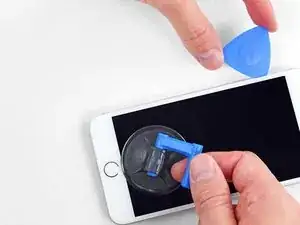
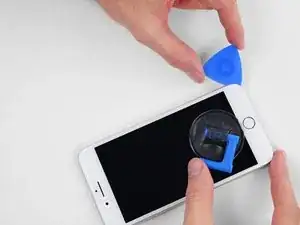
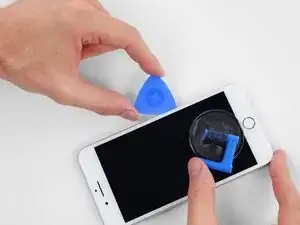
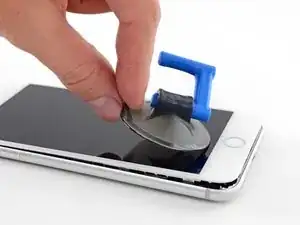
    • Setze einen Saugnapf auf die untere Hälfte der Vorderseite , direkt über dem Home Button.

    • Passe dabei auf, dass der Saugnapf nicht den Home Button bedeckt. Er kann sonst nicht dicht abschließen.

    • Wenn dein Display stark gesplittert ist, dann haftet der Saugheber vielleicht besser, wenn du die Scheibe mit durchsichtigem Paketband abdeckst. Du kannst anstelle des Saughebers auch sehr kräftiges Klebeband benutzen. Wenn das alles nicht hilft, dann klebe den Saugheber mit Sekundenkleber an der zerbrochenen Scheibe fest.

    Warning ! If you pull too hard (reheat the underside of the display again), you create an gap of air between the glass and the lcd display !

    When you replace the display assembly you end up with gray stains on the display.

    Result: you have to buy a new display (assembly).

    Arnoud -

    Using just the single suction cup that is included in the battery replacement kit probably wouldn’t open the device. An iOpener and an iSlack should be the recommended method. However, you can get it open with just the single suction cup and iOpener, but does take a lot of time.

    Get an iOpener and iSlack with the battery replacement kit.

    Chris -

    I used a flat x-acto (#18) blade knife tool to gently pry back the screen enough to allow me to insert the pick near the bottom corner. I then worked the pick under the screen as mentioned in steps 5 & 6 below then. This worked really well for me.

    Kyle Luksa -

    I used the suction cup without heating the phone - the adhesive came away quite easily without applying any heat. Maybe due to age of phone (nearly 4 years old). Worth trying.

    Ben Vinnerd -

    I can’t get the single suction cup to work. Hate being stuck on the simplest step!

    Donny -

    My screen was very shattered, and was quite hard to get suction, as my tape was very low quality. However, after pulling it up a little bit, I was able to insert a regular razor blade into the very small gap and used that as a lever.

    Michael Scroop -

  4. mrEFNcgfVQWurjTW
    mrEFNcgfVQWurjTW
    rErHmkOhfvSITnGD
    TohvbXinCCnyfcK6
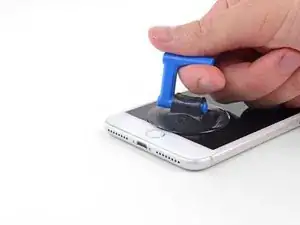
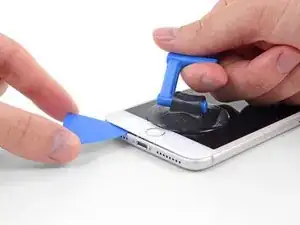
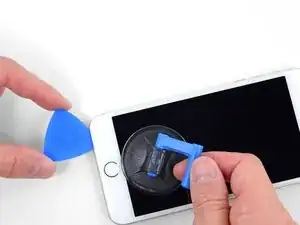
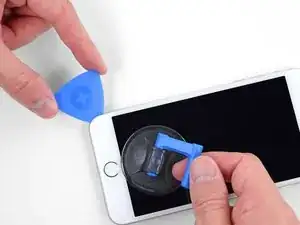
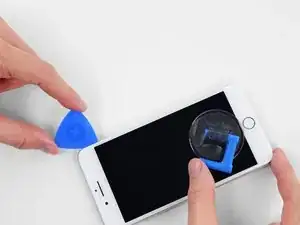
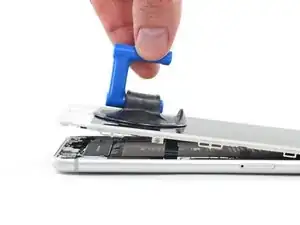
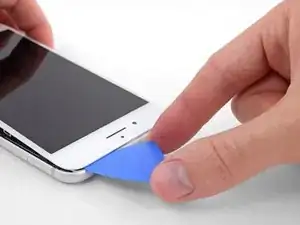
    • Ziehe gleichmäßig und fest am Saugnapf. Es sollte sich ein kleiner Spalt zwischen Front Panel und Rückgehäuse bilden.

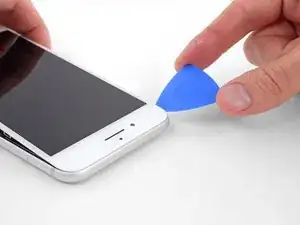
    • Setze ein Plektrum oder ein dünnes Hebelwerkzeug ein paar Millimeter in den Spalt ein.

    • Die wasserdichte Verklebung am Display ist sehr stark. Um den Spalt zu öffnen, musst du recht viel Kraft aufbringen. Wenn du Schwierigkeiten hast den Spalt zu erzeugen, solltest du nochmals Wärme anwenden, dann die Scheibe hoch und runter ruckeln, um so die Klebeverbindung zu schwächen.

    After multiple tries and using a very hot iOpener, it will not open.

    Kenneth Ewald, Sr. -
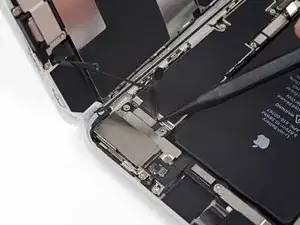
    In sheer frustration, I pulled out my trusty pocket knife and managed to lift the bottom of the screen slightly, but in the process, cracked the glass from the bottom to the home button. The case is open now.

    Kenneth Ewald, Sr. -
    this was by far the most difficult part. be diligent and follow the “firm and constant pressure” guide... the “gap” will be extremely “slight”. you will be able to slide a corner of the pry tool even if you cannot see the gap.

    Colleen V -
  5. AOHSGnMOFMrHBNmQ
    AOHSGnMOFMrHBNmQ
    pBblekYxOTaMfuJJ
    GvMBDIHTcivkDvXO
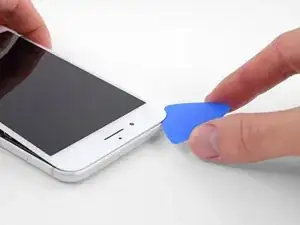
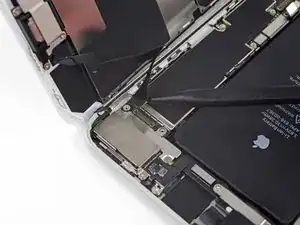
    • Schiebe das Plektrum um die Ecke und entlang der linken Kante nach oben in Richtung der Tasten für die Lautstärkeregelung und des Stummschalters. Trenne so die Klebeverbindung des Displays auf.

    • Halte vor der oberen linken Ecke an.

    Do not go over the top otherwise you can crack the screen. Sadly happened to me :(

    The instruction should be:

    “Stop near BUT BEFORE REACHING the top left corner of the display”

    Leonardo Piga -
  6. iiGOsaDUPLVF3bpu
    iiGOsaDUPLVF3bpu
    xIUoq1psydvfJCrU
    WRDGbKd2rpx3JRwL
    • Setze das Plektrum an der rechten unteren Ecke ein. Schiebe es um die Ecke herum, dann entlang der rechten Kante nach oben. Trenne dadurch die Verklebung.

    • Setze das Plektrum nicht zu tief ein, du könntest auf dieser Seite diverse Displaykabel beschädigen. Schiebe es nur wenige Millimeter tief ein, ungefähr in der Breite des Displayrahmens.

    I had really good luck using a hairdryer on some of the more stubborn portions of adhesive.

    Jessica Kirsh -

  7. dlBIvSNLXKCnX4B6
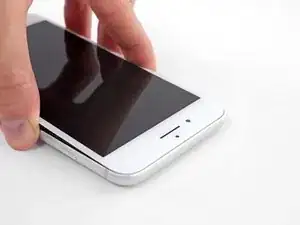
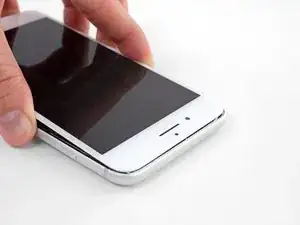
    • Hebe vorsichtig den Saugnapf an und mit ihm den unteren Teil des Displays.

    • Hebe das Display maximal 15° an. Du könntest sonst die Flachbandkabel des Displays überdehnen und beschädigen.

  8. STTnPPfiiKNEokvD
    • Ziehe an der kleinen Lasche am Saugnapf, um ihn vom Front Panel zu lösen.

  9. FWPXimHpMQKpmZZu
    FWPXimHpMQKpmZZu
    MGZUVhY6gplY6qCc
    voQbuSeunKejF3ic
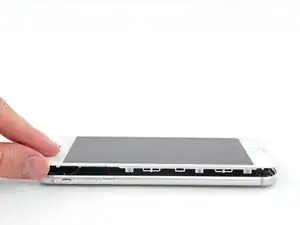
    • Schiebe das Plektrum unter das Display und die Oberkante entlang, um die letzte Klebeverbindung zu trennen.

    Be very careful at this step. The glass at the top will break very easy when the display is lifted too much.

    Gerdschi D -

  10. Y3wG53ZtiZEQdGYY
    Y3wG53ZtiZEQdGYY
    FNyyLxBTwBhIDlrI
    • Schiebe die Displayeinheit leicht nach unten, weg von der Oberkante, um die Rasten, mit denen sie am Rückgehäuse gehalten wird, zu lösen.

  11. 4NykCXCCyRd5enLv
    4NykCXCCyRd5enLv
    mFZBjHhOBBSSbDKG
    yGLgglmNotb5obSH
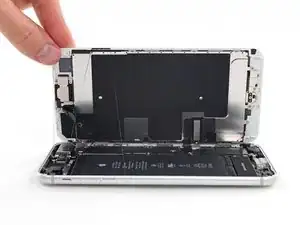
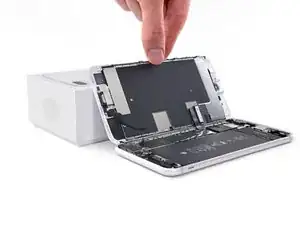
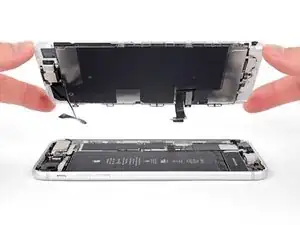
    • Öffne das iPhone, indem du das Display von der linken Seite her aufklappst, so wie man die Seite eines Buches umschlägt

    • Versuche noch nicht, das Display ganz zu trennen. Verschiedene empfindliche Flachbandkabel verbinden es noch mit dem Logic Board.

    • Lehne das Display an einen geeigneten Gegenstand, um es gut zu stützen, während du weiter am iPhone arbeitest.

    Das “links” ist auf dem Foto rechts.

    Matze Diamond -

    Das ist falsch. Wenn man auf das iPhone sieht, ist der Home Button unten. Auf dem Photo ist deutlich sichtbar, dass die linke Seite angehoben wird.

    Hans -

  12. gdf4RAku2FO4NKSD
    gdf4RAku2FO4NKSD
    RrJOlSmc4jTe2Wsm
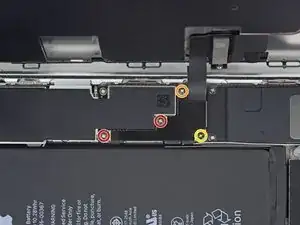
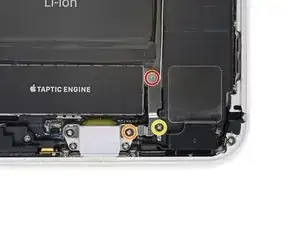
    • Entferne die vier Kreuzschlitzschrauben (JIS) mit denen die untere Display Kabel Halterung auf auf der Platine angeschlossen ist:

    • Zwei 1,3 mm Schrauben

    • Eine 1,4 mm Schraube

    • Eine 2,7 mm Schraube

    • Behalte in dieser Anleitung deine Schrauben sorgfältig im Auge, so dass jede Schraube beim Zusammenbau wieder dorthin zurückkehrt, wo sie hergekommen ist. Die Installation einer Schraube an der falschen Stelle kann dauerhafte Schäden verursachen.

  13. FVmDfbaakEqqPyM5
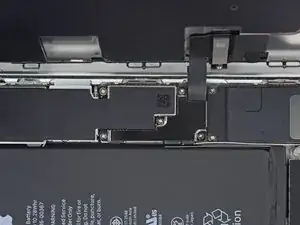
    • Entferne die Halterung am unteren Displaykabel.

  14. xCtNERRx2CKlovLn
    xCtNERRx2CKlovLn
    6OqRktbAd2XLTrpP
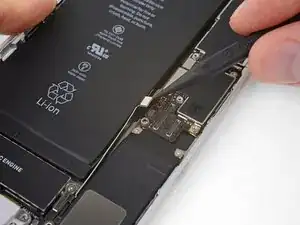
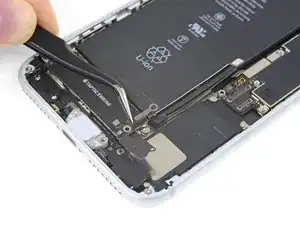
    • Hebele den Akkuanschluss mit der Spudgerspitze aus seinem Sockel auf dem Logic Board.

    • Biege das Akku Anschlusskabel etwas weg vom Logic Board, um zu verhindern, dass es sich versehentlich wieder mit dem Akku verbindet und das iPhone während der Reparatur unter Spannung setzt.

    When I reassembled the iPhone 8 Plus, I had to plug it into a Lightning cable to wake it up (just pushing power button wasn’t sufficient).

    browniestarmite -

  15. hSevVTlWDAgGghXZ
    hSevVTlWDAgGghXZ
    xRZuRojAQGBGB3jM
    • Hebele den breiten unteren Displayverbinder mit der Spudgerspitze oder mit dem Fingernagel gerade aus seinem Sockel.

    • Um Druckverbinder wie diesen wieder anzuschließen, musst du erst auf einer Seite herunterdrücken, dann auf der anderen. Drücke nicht in der Mitte. Wenn der Verbinder auch nur ein bisschen daneben sitzt, kann er sich verbiegen und irreparabel beschädigt werden.

    I got hold of a iPhone 8 Plus with cracked screen that I am planning to fix.

    Here is my problem:

    When I tried to take out the screen from my phone, (step 15-18) I was curious about the new screen, so I tried to connect it. It was completely dead! Then I tried the old cracked one, and suddenly that was dead to! This is a phone that some fool has been inside earlier and changed battery, but I suspect he has done some more really stupid things. The Taptic Engine is living its own life and vibrating every time I slightly touch the home button. (I have a new Taptic Engine) The phone is also full of dust and small particles that does not belong there. One tri-point Y000 screw (step 18) is even missing! Now the biggest problem is that both screens are black! I know the phone is on, because I hear voice command speak when I turn on the power. The screen worked before I tried to change it? And one last thing: My new LCD screen came with new flex cables. Is it possible to switch over, so I can use the old ones?

    smikalsen -

    Hi,

    Is your problem solved?

    Daniel Leprince -

  16. aWkRBoqdn5JLDxut
    aWkRBoqdn5JLDxut
    NNsd3K6mmfCyvmLZ
    • Löse den Verbinder am zweiten unteren Displaykabel mit der Spudgerspitze. Er ist direkt hinter dem eben gelösten.

    I used the other end of the spudger on this connector and it seemed to work a little better for me. I came in from underneath the top-right edge instead of the bottom right.

    Jessica Kirsh -

  17. oJa4BeNCiLydYrFd
    oJa4BeNCiLydYrFd
    GA64GXyHWNMhEGK5
    • Entferne die beiden TriPoint Y000 Schrauben, welche die Halterung über dem Verbinder der Sensoreinheit am Front Panel befestigen:

    • Eine 1,0 mm Schraube

    • Eine 1,2 mm Schraube

    una vite da 1mm e due viti da 1.2 mm???

    Matteo Carachino -

    Ciao Matteo! Grazie per l’osservazione. Ho appena modificato il testo :) La traduzione è aperta a tutti. Hai quindi la possibilità di fare le tue suggestione direttamente nel testo e sei il benvenuto se vuoi usare di questa possibilità nel futuro. Grazie ancora per la vigilanza! Saluti, Claire

    Claire Miesch -

    The tool kit does include a 1.0 or1.2mm screwdriver! How am I supposed to remove those screws?

    peter frommer -

    Bought the screwdriver that supposedly fits these screws and it still doesn’t work.

    hypercarduser -

    My bracket looks different. Can’t get these screws out.

    Ray Rushing -

    kit came with wrong bit. i received 2x P02 (penta tips) and no tri point y000.

    Christopher Shane Gripp -

  18. hBRGDcEYEQNRA2A1
    • Entferne die Halterung, welche den Verbinder der Front Panel Sensoreinheit bedeckt.

  19. GacqUhpZexRIIL1r
    GacqUhpZexRIIL1r
    gTmxBknJLSOFdNJx
    • Löse den Verbinder der Front Panel Sensoreinheit mit der Spudgerspitze oder dem Fingernagel von seinem Sockel.

  20. AVYiAe5OJSrbfHdg
  21. WCaxo3BGkjxOEdgo
    WCaxo3BGkjxOEdgo
    AUkubFnnLQIa2AJE
    • Entferne die drei Schrauben, welche die L-förmige Halterung neben der Taptic Engine befestigen:

    • Eine 1,3 mm Y000 Schraube

    • Eine 2,6 mm Kreuzschlitzschraube

    • Eine 3,5 mm Kreuzschlitzschraube

    De Y000 schroef nam meteen ook de  2.4 mm standoff-schroef aan de achterzijde mee. Wat lastig om die uit elkaar te halen.

    nilsplackle -

  22. 6d3fHeGCOLMXrDif
    • Entferne die Halterung.

  23. DFBBDfUmIWeEKUjL
    DFBBDfUmIWeEKUjL
    RWDskoH2EBsx1yhK
    xB11Y4PRLF2OXwUj
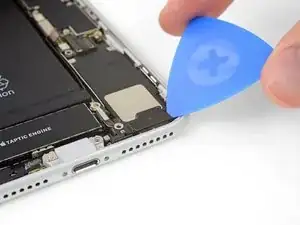
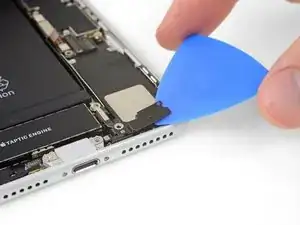
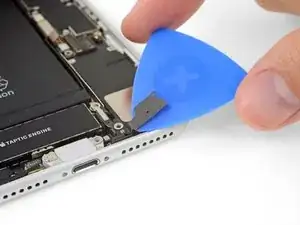
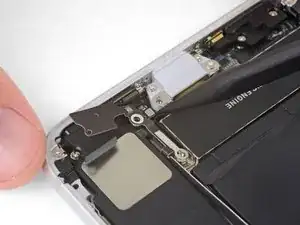
    • Trenne den verklebten Teil des Antennenflexkabels mit einem Plektrum von der Oberfläche des Lautsprechers.

    • Dieser Teil des Flexkabels ist leicht festgeklebt. Falls nötig, musst du es mit Hilfe eines iOpeners etwas erwärmen, um den Klebstoff aufzuweichen, ein Haartrockner geht auch. Dies erleichtert das sichere Ablösen (und wieder Befestigen) des Flexkabels.

    should i be worried if the piece with the two holes broke off

    Robert Quinn -

  24. vvOOoFAmmbASeNCN
    vvOOoFAmmbASeNCN
    GCLiDlktfSvveIjc
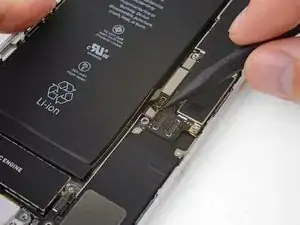
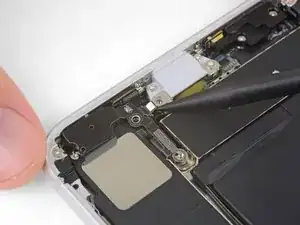
    • Heble das Antennenflexkabels mit der Spudgerspitze hoch und löse es vom Logic Board ab.

  25. VsduvZZnGIWNXXkS
    VsduvZZnGIWNXXkS
    wkZ23mfXWbWi34X4
    nCxYacnrqCRk33ad
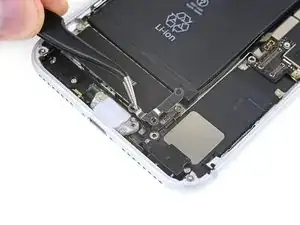
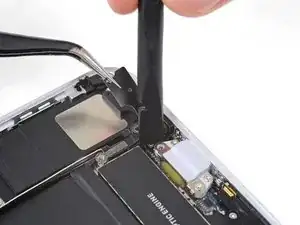
    • Heble das andere Ende des Antennenflexkabels mit der Spudgerspitze hoch und löse es aus seinem Anschluss neben dem Lightning Port.

    • Das Kabel wieder anzuschließen kann knifflig sein. Erleichtere dir diese Arbeit und halte das Flexkabel so mit einer Pinzette, dass der Stecker auf den Anschluss passt. Drücke dann vorsichtig den Stecker mit dem flachen Ende des Spudgers herunter, bis er einrastet.

    I was unable to plug this back in when re-assembling. My home button doesn’t work anymore. The connector it was supposed to plug into seems to spin around.

    Dan Putnam -

    I had a similar experience during this repair. My problem was that the nib on the ribbon that actually connects in to the socket came off the ribbon cable when I initially detached the cable. I didn’t realize this until after the repair, but I also had to replace the Wifi Diversity cable entirely. A tell-tale sign is that you don’t receive good cell reception.

    Lucas -

    I did not notice until reassembly, but the antenna socket pulled off the board. I have no micro-soldering tools. The friction of the connector was greater than the solder holding it in place.

    David Hampson -

    The little connector in the first picture ripped the component off the circuit board when trying to pry it up so be careful. I’m guessing it’s like a previous poster said and the socket is stronger than the glue/material that holds the component to the PCB. This was on a new board during disassembly trying to locate a potential problem. Phone still workings with WiFi and cellular normally but the cellular signal is down about 1/3 on average wherever I am.

    J.Garrecht Metzger -

  26. ICJgunKoBJ6LEXMF
    • Entferne die Wi-Fi Antenne.

    This had a little adhesive on the metal band. Couldn’t just pluck it out as shown. What I did worked but what I should’ve done is run my blue puck up and down the length.

    Mark Hintze -

  27. ihmJZqssPBXO2qXW
    ihmJZqssPBXO2qXW
    6aHZVX2GXwlZC1yt
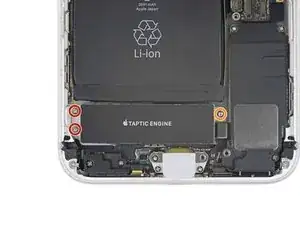
    • Entferne die drei Schrauben, welche die Taptic Engine befestigen:

    • Zwei 1,5 mm Kreuzschlitzschrauben

    • Eine 2,4 mm Abstandsschraube

    • Abstandsschrauben lassen sich am Besten mit dem Abstandsschrauben-Bit und dem passenden Bithalter herausdrehen.

    • Zur Not geht es auch mit einem kleinen Flachschraubendreher - sei aber sehr vorsichtig und rutsche nicht ab, damit keine umliegenden Bauteile beschädigt werden.

  28. OjZ4vHLPiHQIAra1
    OjZ4vHLPiHQIAra1
    UMecLjXrJlTCxdcr
    • Heble mit der Spudgerspitze das Flexkabel zur Taptic Engine hoch und löse es ab.

  29. hDiqTTJ5Uiihvesu
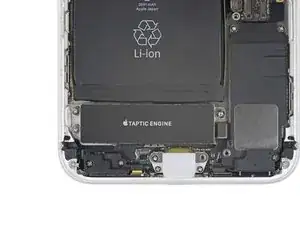
    • Entferne die Taptic Engine.

  30. kGxbJ5FUjH25Lnd3
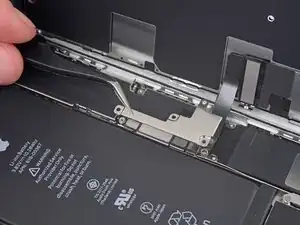
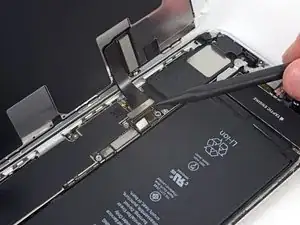
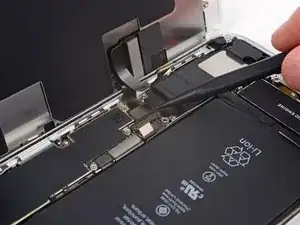
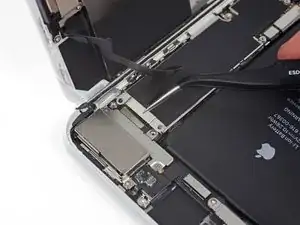
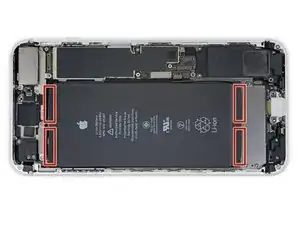
    • Der iPhone 8 Plus Akku ist mit vier elastischen Klebestreifen befestigt, zwei oben und zwei unten.

    • Jeder Klebestreifen verfügt über eine schwarze Zuglasche am Ende, die leicht auf der Vorderseite des Akkus angeklebt ist.

  31. UsDkDsQ1aSWpRw2I
    UsDkDsQ1aSWpRw2I
    WttOp6DVlKlTRhQQ
    XuKfeHJRRQVMy2Ak
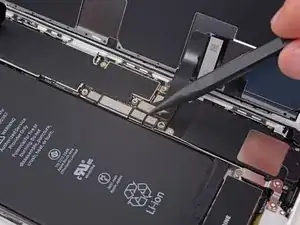
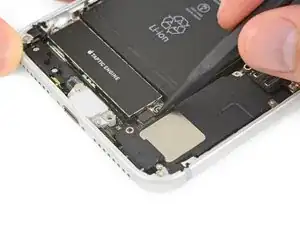
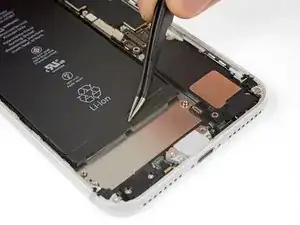
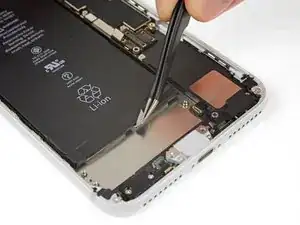
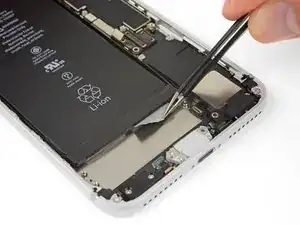
    • Löse die erste Akkuklebelasche von der unteren rechten Kante des Akkus.

    • Benutze deine Fingernägel oder eine stumpfe Pinzette. Vermeide es, scharfes Werkzeug zu benutzen, es könnte den Akku beschädigen.

  32. aicQhEBXE4UDY1gi
    aicQhEBXE4UDY1gi
    GMKAmYKhayWGDKLg
    hpO3hEZTBrXX6kc1
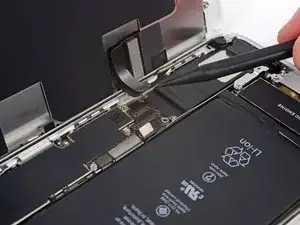
    • Halte die Streifen immer glatt und faltenlos, denn verknitterte Streifen werden sich verkleben und reißen, statt sich sauber herausziehen zu lassen.

    • Drücke den Akku nicht nach unten, während du die Streifen herausziehst. Wenn du auf den Akku drückst, entstehen Druckstellen , die sich verhaken können und den Kleber beschädigen.

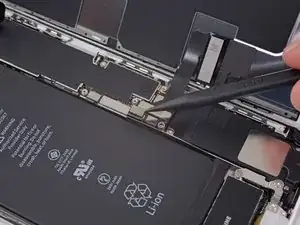
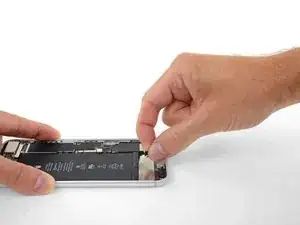
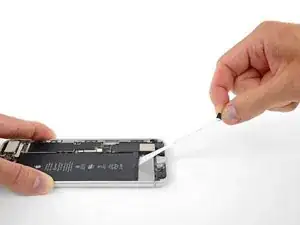
    • Ziehe langsam die Akkuklebelasche weg vom Akku, in Richtung Unterkante des iPhones.

    • Ziehe gleichmäßig und halte konstanten Zug auf den Streifen, bis er zwischen Akku und rückseitigem Gehäuse herausrutscht. Es gelingt am Besten, wenn du den Streifen im möglichst kleinen Winkel ziehst, ohne dass er sich an anderen Bauteilen des iPhones verfängt.

    • Der Streifen wird sich auf ein Vielfaches seiner ursprünglichen Länge dehnen. Ziehe immer weiter und fasse, falls nötig den Streifen am Akku nach.

    • Wenn der Akkuklebestreifen bei diesem Verfahren reißen sollte, dann hole das restliche Stück des Streifens mit den Fingern oder einer stumpfen Pinzette heraus und mache mit dem Ziehen weiter.

    • Wenn einer der Streifen unter dem Akku abreißt und nicht geholt werden kann, entferne dann zuerst die restlichen Streifen und fahre wie im Folgenden beschrieben fort.

  33. GTqWdDVGgaJICjUV
    GTqWdDVGgaJICjUV
    m2lJEPGkLMg5QLy6
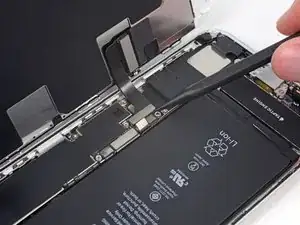
    • Wiederhole die vorigen Schritte, um die restlichen drei Streifen zu entfernen.

    • Achte darauf den Akku festzuhalten, wenn du den letzten Streifen herauslöst, den er könnte den Akku unerwarteterweise herausschleudern.

    • Wenn du es geschafft hast, alle Klebestreifen erfolgreich zu entfernen, dann kannst du den nächsten Schritt überspringen.

    • Falls einer der Klebestreifen unter dem Akku gerissen ist, und nicht herausgeholt werden konnte, dann mache mit dem nächsten Schritt weiter.

    the upper ones usually break off. be advised to heat the phone up a little before trying

    hardijs -

    I can’t even find the upper ones. Tore into the battery cover trying.

    Kenneth Ewald, Sr. -

  34. 6iyYOvSXUI5rbvh6
    6iyYOvSXUI5rbvh6
    DYCaKkvFUy3WWM5t
    • Falls einer der Klebstreifen unter dem Akku gerissen ist und der Akku am Rückgehäuse festgeklebt bleibt, dann bereite einen iOpener vor oder benutze einen Fön, um das Rückgehäuse direkt hinter dem Akku zu erhitzen. Dadurch wird der Kleber aufgeweicht.

    • Erhitze das Rückgehäuse bis es etwas zu heiß ist, um es noch bequem anfassen zu können. Überhitze das iPhone nicht, denn sonst könntest du versehentlich den Akku entzünden.

    • Drehe das iPhone um, und fädle einen starken Faden (wie zum Beispiel Zahnseide oder eine Gitarrensaite) unter den Akku.

    • Ziehe den Faden über die ganze Länge des Akkus wie eine Säge hin und her, um den Kleber zu lösen. Verforme oder beschädige auf keinen Fall den Akku.

    • Schütze deine Finger und trage Handschuhe oder Schlinge die Enden um ein Werkzeug (z.B. Schraubendrehergriffe, so wie im Bild gezeigt).

    • Falls du Hebelwerkzeug benutzt, um den Akku aus den iPhone zu heben, sei extrem vorsichtig, damit du die Flachbandkabel oder die kabellose Ladespule direkt unter dem Akku nicht beschädigst.

    If you use isopropyl alcohol, use it very sparingly. The black (insulating?) paint on the wireless charging coil is readily alcohol-soluble.

    Scott Boyce -

  35. vkPFaWoOJ5IN1fIm
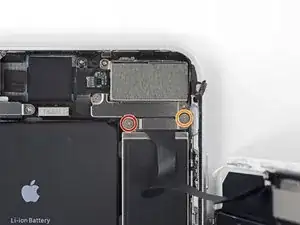
    • Entferne den Akku vom iPhone.

    • Sollte dein Ersatzakku in einer Plastikhülle geliefert werden, entferne zuerst die Plastikhülle vom Akku, indem du die Hülle vom Flachbandkabel abziehst, und setze erst dann den Akku ein.

    • Wenn dein neuer Akku keine Klebestreifen hat, benutze diese Anleitung, um die Klebestreifen zu ersetzen.

    • Führe einen erzwungenen Neustart nach dem Zusammenbau durch. Das kann einigen Problemen vorbeugen und macht die Fehlersuche einfacher.

    I managed to remove the battery after taking the display off saving the time and trouble of removing all of the other items. If you try and fail, then follow the instructions and remove all of the parts. I did this by pulling on the white strips at the taptic engine end. The outside one is most important. Pull the strip with your entire finger and thumb on the white strip (don’t pull the black part). Pull slowly and gently out and move left and right. Very slowly. I was able to remove it. The inner one tore out - all the better if you can get both out. You can do this on the other end as well. Both mine tore out. Use an old credit card, cut it the width of the battery. Push under the corner until you’re under the battery. Do NOT pry up on the battery but let the credit card bend flat to the bottom. You can minimize how much the battery bends. As you push under 1/4 the way to 1/2 way it’ll get easier. If you get the strips off the other end, all the better. Apply heat from underneath the entire process.

    Bill Auerbach -

Abschluss

Vergleiche dein Ersatzteil mit dem Originalteil. Möglicherweise musst du fehlende Teile übertragen oder Schutzfolien vom Neuteil abziehen, bevor du es einbauen kannst.

Um dein Gerät wieder zusammen zu setzen, befolge die Anleitung in umgekehrter Reihenfolge..

Entsorge deinen Elektromüll fachgerecht.

Die Reparatur verlief nicht wie geplant? Auf unserem Antwortenforum findest du Hilfe bei der Fehlerbehebung..

Adam O'Camb

Mitglied seit: 11/04/15

159624 Reputation

19 Kommentare

Do I have to remove the display to replace the battery? Or can I leave the display in

Peter -

You can leave the display connected and skip steps 15-20, as long as you’re careful to support the display so as not to damage the display cables while you work.

Jeff Suovanen -

Don’t do it,you can EASILY RIP LCD RIBBON CABLE

Vegeta Barrett -

Are there any statistics or even educated guesses about how many people are able to successfully complete this repair? Although it is rated as “moderate” in terms of difficulty, I would rate it as more than just moderate. I tried to replace the battery on a much older iPhone and wound up with a brick. Is an 8 plus easier than an iPhone 3 or 4? Where might one find such statistics?

d10boe -

The new internal configuration was a little more difficult but take your time and have a rice bag or iOpener for the additional adhesive in these models.

The battery adhesive is always problematic for me but the dental floss tip in this guide worked great!

Russ Rehm -

Can I make my own adhesive tape by trimming standard 3M double-sided tape to fit?

Joel -

Home Button Not Working After Battery Replacement

Bacon -

Just finished my battery replacement.

My thoughts:

Nerve racking regarding the delicate hardware and the danger of lithium battery, but i’m glad I read through the guide and did each step slowly.

The guide is very well written, I think the video tutorial is too quick, and could be a bit more in depth and at a pace we can follow along with. I used a youtube tutorial to complement the written guide.

The suction cap didn’t work well so had to run the pick around a bit until I could get under, I think a heavier duty clamp would have been better.

I used a wheat heat bag however please be warned it does create condensation so have paper towel as a barrier between the heat pack and the phone, I’m unsure if the iFixit brand one behaves the same once heated..

My phone is 5 years old so with all the heating in the world the battery adhesive would not release as a peel, heaps of points for the last resort method of using dental floss, it worked flawlessly

Thanks iFixit :)

Jamie LB -

Second major repair, battery, after screen last year, I term IFixIt “The Best”.; not only parts with appropriate tool kits, but also detailed, accurate instructions. Parts are the EASY part of this type repair, the kit approach with well written, illustrated, instructions make this a do-it-yourself capable repair. Well, Done, IFixIt!

joewilliamsco -

I’ve replaced batteries on several different iPhones/ipads and the ONLY problem I’ve ever had with a repair is the $#$?! adhesive strips. it doesn’t matter how much heat or patience I use, they always tear and snap back under the battery.

Louis Lamoureux -

Just made it in 100 minutes. Most of the time was spent in removing battery itself, due to adhesive stripes. They torn from the center, I could see the tear growing from inside. Dental floss and iOpener have been very successful even though very long. I never thought that my dental floss would have such an use. Like many users, a flawless removal of those $@$*!& battery strips never happened to me, whatever the care I take, or the veeeeeeery slow speed I pull.

Before to attach the final brackets on screen connectors, I dared turn on and checked the antennas (I had a doubt with this antenna strip reconnection and the front camera connector) so I tested the screen, the touchID, the front camera and checked that all signals were present. Then shut off again and closed the device.

works fine, no flaws like battery not recognized or anything like this. I now have a faster iPhone probably because iOS does not slow down anymore due to weaker battery capacity. Thanks to iFixit team for offering this opportunity.

farreyrol -

After replacing the battery, the audio from games is not audible over speaker. All other apps using the speaker seem to work: Phone, Clock (alarm), FaceTime, Skype, and YouTube are all audible. Could the issue with games be caused a poor seating of any of the connectors detached and re-attached in the battery replacement process?

dv30fps -

Problem solved: The external sound switch (near the volume up/down buttons) had flipped to off when I removed or re-installed the drop protection case. Why it affected only games seems strange.

dv30fps -

Touch ID stopped working and battery won’t show that it’s charging after replacement. Removed and replaced all connectors multiple times, but nothing has changed. None of the ribbon cables were damaged

Kevin Beyers -

thankfully i bought a spare waterproof seal and the iopener , i screwed up the first seal. my iphone 8+ can live much longer now in the hands of my parents. now i got spare tools i can add to my arsenal of tools.

Kevin Chung -

Do the bottom screws strip often when opening this phone? Wondering if I really need the replacements listed in this guide.

Aj Fangman -

I replaced my battery successfully, but 3D touch to longer works, and reachability freaks out every time I'm asked for a touch ID prompt.

The only damage I did was ripping open the wireless charging coil sac, then gently placing it back. The coil itself was unaffected, but whoever replaced the battery last used the wrong adhesive; it stuck to the sac. (it was me; I was the last guy)

Does anyone know what might have gone wrong?

Replaced the seal pretty solidly, so I'm not sure if there's a cable I need to try plugging in again, or to check if I nicked something during repair.

Kyorbi -

Great guideline, but this was a challenge for my 66 year old eyes and shaky hands. The screws are VERY tiny! Never the less, following every step worked and my wife's iPhone 8 Plus is working just fine. I read the detail about replacing the water seal / gasket after putting the phone back together.

I'm not going to bother taking it apart again for this item as my wife stays away from the water hazards. - She is happy, so I am happy.

Thank you for a great product and great instructions.

Ed Vander Ryd -

I might rate this as more difficult too. No display on my iPhone 8 Plus. RIP.

Aaron Gleason -