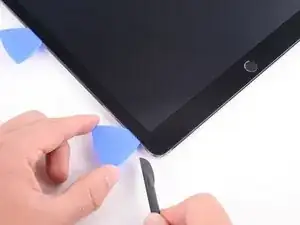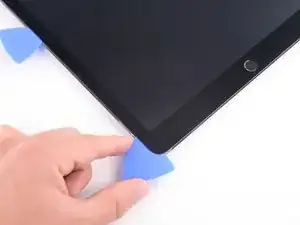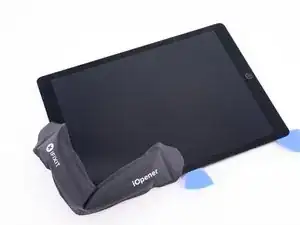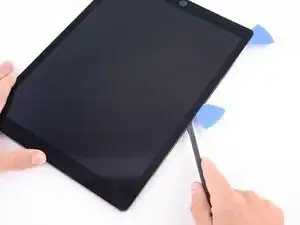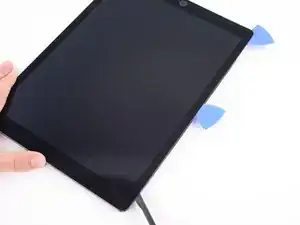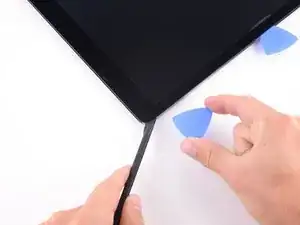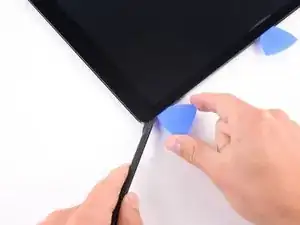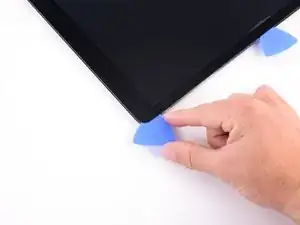
Einleitung

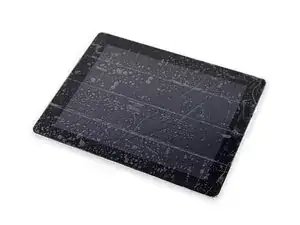
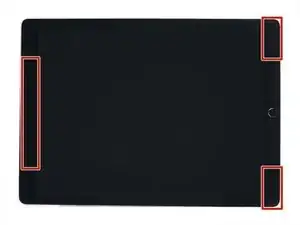
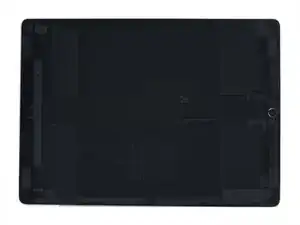
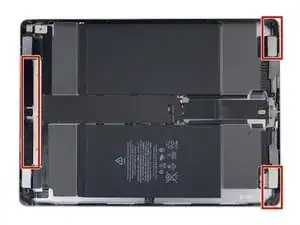
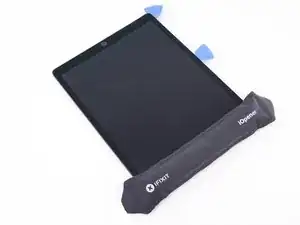
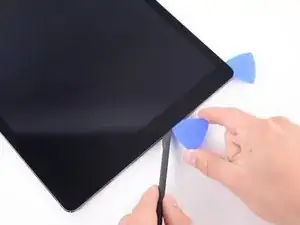
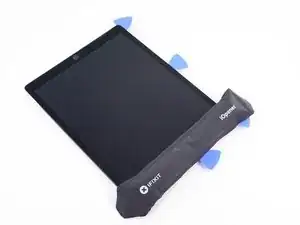
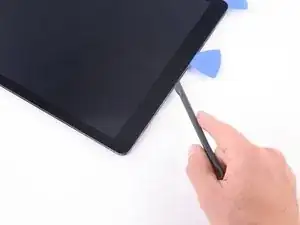
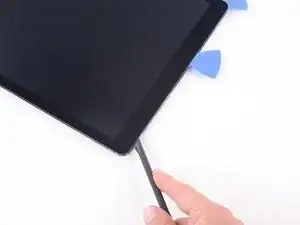
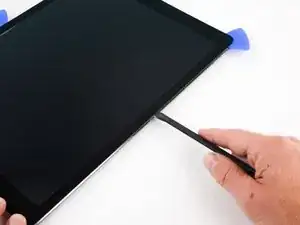
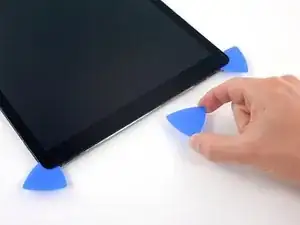
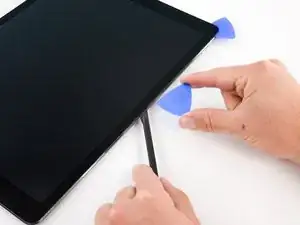
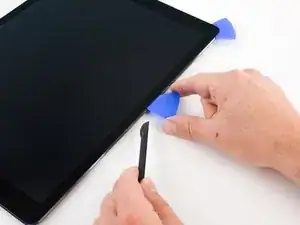
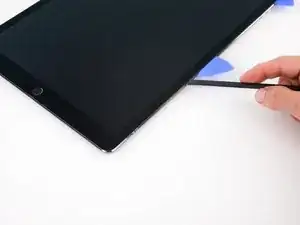
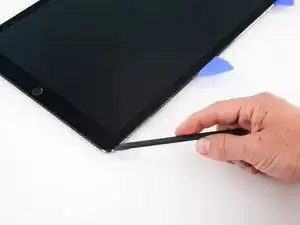
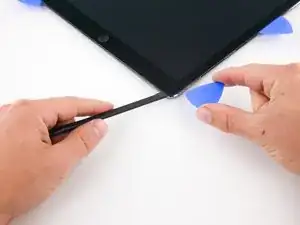
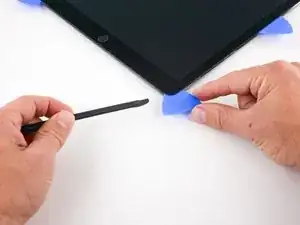
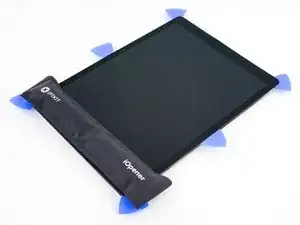
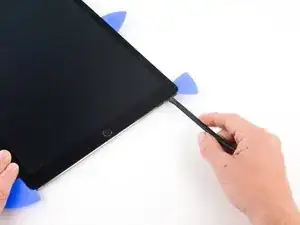
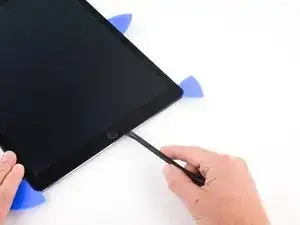
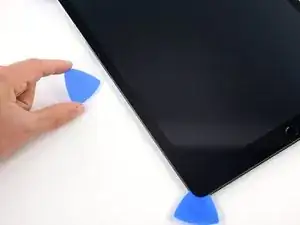
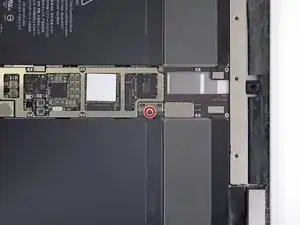
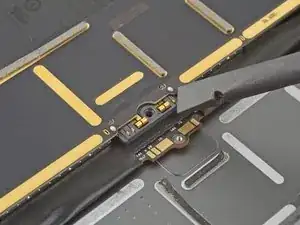
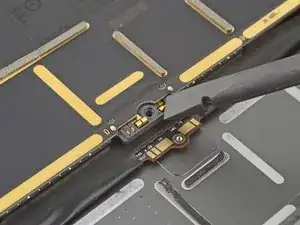
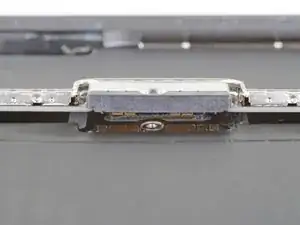
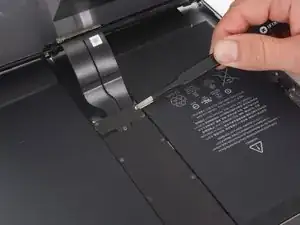
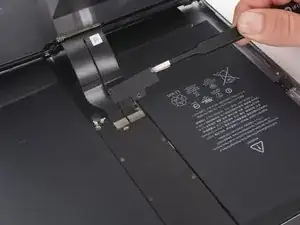
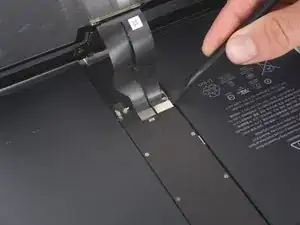
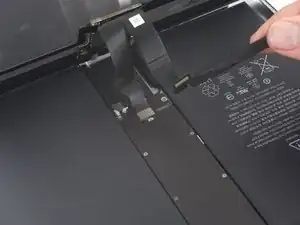
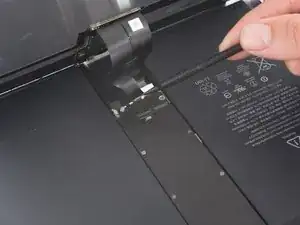
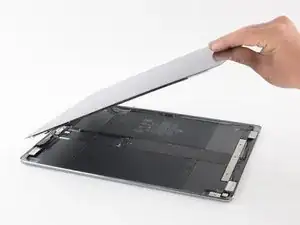
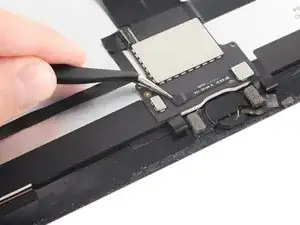
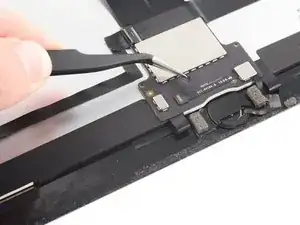
Hier wird der Austausch des Home Buttons am 12,9" iPad Pro gezeigt.

Einige Bilder in dieser Anleitung wurden am WiFi-Modell erstellt und können sich leicht vom LTE-Modell unterscheiden. Die Reparatur geht aber grundsätzlich genauso, außer wo speziell vermerkt.

Warnhinweis: Die in der Anleitung beschriebene Methode zum Isolieren des Akkus ist überholt. Du kannst mit ihr die Akkukontakte dauerhaft beschädigen. Wenn du trotzdem den Akku auf diese Weise isolieren willst, dann befolge die Warnhinweise ganz genau und arbeite sehr sorgfältig. Wenn du aber weiterarbeitest, ohne den Akku zu isolieren, dann vermeide den Gebrauch von Metallwerkzeugen, außer wo unbedingt notwendig (z.B. um Schrauben zu entfernen). Dadurch beugst du einem Kurzschließen des Akkus und der empfindlichen Elektronik vor.

  1. PFpjwVSYrnq3JQap
    PFpjwVSYrnq3JQap
    RFsyoneYVYQDPSht
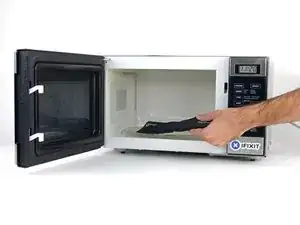
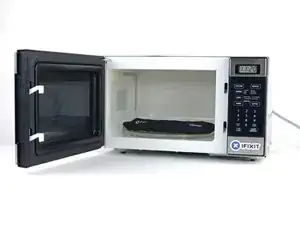
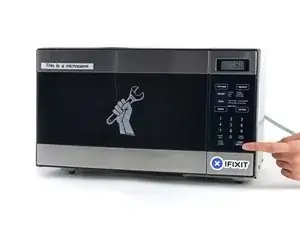
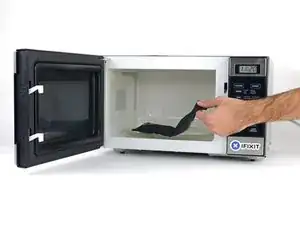
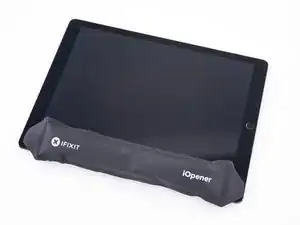
    • Wir empfehlen die Mikrowelle vor dem Gebrauch zu reinigen, da sonst Essensreste oder Ähnliches am iOpener hängenbleiben können.

    • Lege den iOpener in die Mitte der Mikrowelle.

    • Für sich drehende Mikrowellen: Stelle sicher, dass der Teller sich drehen kann. Wenn der iOpener hängenbleibt kann er sich überhitzen und sogar Feuer fangen.

    I didn't find this to be as hard as I had built it up in my mind to be; HOWEVER, saying that I need to say years ago I was the local Nokia service center in my town. But many years ago right after they got rid of analog times. Yeah. A classic installer/repairer mistake when starting something they haven't fixed or installed before is picking up the instructions, flipping through them; maybe even reading a section that is new-then tossing the instructions over the shoulder. "I got this." This usually comes right before something major gets broke. And I can tell you when you try to do it yourself and then mess it up horribly then take it to the repair shop. Well we called that "I can do it myself" syndrome and charged extra to put back together what they brought in in the box. Now knowing all this - I can't stress this enough because I am stupid, stupid, stupid. COVER YOUR SCREEN IN CLEAR BOXING TAPE AND READ ALL THE INSTRUCTION BELOW THROUGH TO THE END BEFORE EVEN ATTEMPTING THIS FIX. Take my advise.

    windizy -

    I didn't have an iOpener, so I used a wheat type heat bag. If you do this though, make sure you put a layer of plastic between your Mac and the bag, or you'll get condensation in places you don't want it.

    Martin Gray -

    I started out using the iOpener but switched to my wife's hairdryer. A heat gun or hair dryer proved to be much more convenient and is a time saviour. You can heat more and the glue becomes more fluid make the next steps with the opening picks much easier

    Jan Van Puymbroeck -

    I know this is obvious, but backup your iPad with iTunes before you start. I'd also turn off your passcode if you have one.

    Laurie Higgins -

    Ther first time you heat up the iOpener for this repair when its room temperature I had to heat it up for more than 30 seconds. I remember I had to heat it up for around 45 seconds. However, after that when you need to reheat it again during the repair 30 seconds will be enough.

    Yousef Ghalib -

    I used the wheat bag in a sensor microwave heating up to 65-70 deg C (155 def F).

    ian cheong -

    Get yourself a cherry pit bean bag the size of your iPad. Heat it, put the iPad on it for 3 to 5 minutes or so, reheat the cherry pit bean bag, again put your iPad on it. Then heat the iOpener and start working. The cherry pit bean bag will have to be reheated several times, but it will soften the adhesive so you have less problems with the iOpener

    Tim Feyaerts -

    The heating can be done very effectively (and quickly) with 3d printer heated bed. Make sure the bed is clean. Set the temperature to 60c, (130f ) and put the ipad face down for +/- 10 minutes. Repeat as needed throughout the “gentle prying” stages.

    polleyphony -

    The iOpener did not work at all for me.

    I had to use a heat gun and bring the edges of the case up to ~200 degrees (used an infrared thermometer to measure) before the glue would weaken. This obviously superheated the metal frame, so I also had to wear gloves to handle the phone while prying the back off with the included picks.

    Mike Jeanette -

    Repair instructions worked like a charm. Had to be patient with the iOpener and getting the screen off. I tried repeatedly without success until shifting the suction cup a bit to the left side where perhaps the glue had loosened up a bit more.

    Kyle -

    The iOpener, in my opinion, is of no help. Many warnings to say “don’t warm it too much”, but the glue doesn’t melt if not warm enough. As a result, a complete waste of time and energy. In addition, too much liquid in it, so it doesn’t lay on the device on a sufficient surface. I took a hairdryer and it worked much much better.

    laurentvidu -

    I used an immersion bath to heat this to 180F and applied it to the device until the outside temperature of the opener read 150F with an IR thermometer. Removing the screen took very little force with this method.

    breadandbits -

    My experience. I was replacing the screen which had been cracked and a little shattered in some places. The iopener is pretty much useless, so was the suction cup. The suction cup would probably be more useful if I was doing something besides the screen. Also you probably want the clean the screen before using it so it can get good suction. I used a hair dryer on high for a couple of minutes at a time (someone on this tread suggested that). I used my exacto knife and a razor blade to get into the adhesive. First the exacto to get the initial cut, then the razor blade to go a little deeper. Could have probably just used the razor blade, but the exacto has a little more finesse. I got the razor blade in and a little under the glass then I used the picks to wedge in. I didn’t want to risk anything using the razor blade too much. Used tape to keep the shattered glass together.

    trebor65 -

    My experience pt2

    Fortunately the shattering was mostly on the edges and most of it had adhesive on the back so it stuck together. Just take your time and work your way around following the guide to get the screen off. Have some goof off or goo be gone to clean the frame when putting the new glass on or putting the existing one back. (someone suggested that also, very good idea). Be careful of the LCD (you should know that). The cable on my LCD was pretty tight, so I propped it up while taking the cable cover off and when I put it back on I did the same thing. I just put a bottle on the battery and leaned the back of the LCD on that while attaching the cables and putting the screws back on the cover. Also be careful with the home button and the bracket on the back of it. I had enough old adhesive on left on the bracket that it stuck back to the new glass fine. So far only 12 hours in, so we will see how that holds up when the kids get at it.

    trebor65 -

    Another alternative if you do not have the iopener is to use a bed time hotwater bottle. Do not over fill it though. Just put enough hot water in to support the phone while you work around the adhesive.

    I use both the hot water bottle and iopener together on Samsung's. It makes life easier

    gazza667 -

    I followed the directions and heated my iOpener for 30 seconds in a 1000 watt microwave, and it came out at 160 degrees F, as verified by a infrared thermometer. This allowed me to separate the last bit of the back of my Samsung S8, which was already coming off due to a swollen battery (hence the reason for the repair).

    Dennis -

    Hallo,habe den Akku erfolgreich getauscht.Doch seitdem gibt es bei Telefonaten eine Rückkopplung für den anrufenden.Bei mir ist alles normal.Woran liegt das?Mfg

    Manu R -

    If you follow these instructions, you will crack your screen like I did. Heating the iOpener for 30 seconds, using it to melt glue, then waiting 10 minutes to reheat is useless. The iOpener can be used to maybe warm the glue on whatever side you aren’t working on. You need a hairdryer and/or a heat gun to melt the glue and separate the glass from the iPad.

    Anyone want to buy an old iPad with broken glass and a dead battery?

    mpulliam -

    Not everybody has a microwave. You should provide a target temperature for the iOpener and instructions for a conventional oven, or pot of warm water, or whatever. Although I will probably use a heat gun …

    Esmond Pitt -

    Three times heating opener and no luck. Tried pressing down gently on opener with a towel, and the opener broke. Wondering if I now replace table mats, fancy table cloth, etc. or will this stuff wash out.

    Not impressed so far. Maybe the hair dryer next.

    doug -

    I support the comments about the iOpener. Everyone has a hair drier, FHS, so get a cheap IR thermometer (£18) and blow heat until the area is 60+ deg C. Still takes w while, and getting the screen off is v scary, but just add more heat if you feel resistance.

    The rest of the kit is good, esp the magnetic screwdrivers.

    Richard O'Brien -

    No, everyone does not have a hairdryer. Some of us don’t even have hair. Thank goodness I already had an IR thermometer, though.

    nin10doh -

    #### WARNUNG WENN MINIMALSTER SPRUNG IM DISPLAY IST FUNKTIONERT DAS NICHT!!! ######

    Hatte einen winzigen, minimalen Sprung im Display. Ich dachte es könnte gehen, weil der Sprung “abgeschlossen” war. Er hat in einer Ecke ein winzige Glasteil rausgeschnitten. NEIN! Geht nicht. Habe alles mit viel Geduld dem iOpener und einem Föhn erhitzt. Es ist trotzdem sofort über das komplette Display zersprungen…

    T z -

    I’ve started with iOpener but changed very quickly to a heatgun. That was more efficient.

    Mizzoo, s.r.o. -
    I could not get the iOpener hot enough to melt the glue on my ipad 6. I heated for 45 seconds once and it was boiling and it still never worked. Thank goodness contributors mentioned using a hair dryer. Using an 1700w hair dryer on high did the trick to get the screen off. Still took some time and the case got pretty hot but be patient. It took twice as long and a lot more patience to get the battery out.

    Randal Haufler -
    I have an Ipad with touch screen issue, if i replace this part it should be Ok?

    janderson martin -
    WARNING - DO NOT MICROWAVE ON A METAL MICROWAVE RACK

    The metal microwave rack can heat up and melt through the iOpener cover letting the contents leak out.

    Not a big issue for me as I have a heat gun and used that instead.

    Run Up A Tree -

    I opened my iPad with the iOpener. Be patient! It may take quite a bit longer to it the iOpener in the microwave than it says in the guide. My microwave can only do 800W and I had to put the iOpener in several times (maybe a total of 90-120 seconds). I recommend that you have the transparent side up an watch the bag carefully. As long a the bag doesn't bloat up and the liquid doesn't start bubbling you should be fine. But I recommend to take the iO out from time to time to check it. (More comments in Step 6.)

    marcelflueeler -

  2. ylYXoFMbBeXNAIyj
    • Erhitze den iOpener für dreißig Sekunden.

    • Im Verlauf der Reparatur kühlt sich der iOpener wieder ab. Erhitze ihn dann noch einmal für dreißig Sekunden.

    • Achte darauf, den iOpener während der Reparatur nicht zu überhitzen. Eine Überhitzung bringt den iOpener möglicherweise zum Platzen.

    • Berühre niemals den iOpener, falls er aufgeschwollen aussieht.

    • Falls der iOpener in der Mitte immer noch zu heiß ist, um ihn anzufassen, dann benutze ihn weiter, bis er ein wenig herunter gekühlt ist, bevor du ihn erneut erhitzt. Ein ordnungsgemäß erhitzter iOpener sollte für bis zu 10 Minuten warm bleiben.

    I had to heat mine up for more than 30 seconds. After 30 seconds on high it was only warm. It had to keep trying different times and checking it until it got hot. I think the initial time that I put it in for was over a minute.

    whale13 -

    DO NOT USE IN NON ROTATING MICROWAVE! It will pop a hole. I had it in for 45 seconds the first time. It wasn't very hot inside and I saw it started to leak on the paper towel I put under it. Just a fair bit of advice. I think I will just stick with the heat gun. Loud but useful.

    Alex Jackson -

    I heated mine up for 30 seconds, tested, then again for 30 seconds. It felt adequately hot. Leaving it on the left side, per the instruction, for a minute did not loosen the adhesive. I ended up pulling the suction cup hard enough to shadder the old screen. Moral of the story, I don't think it gets hot enough safely to have an affect.

    Travis Dixon -

    There is a clear problem here with the heating part using the iopener things....no details are given. Whoever is testing them needs to make it clear - What temperature does it need to be? And for which phone models, because they differ in what's needed. It's only £10-15 for a laser guided temp sensor unit, and the designers/repairers should have one of those already for doing these kinds of repairs. Explaining half a repair, is worse than not explaining at all :-(

    assortedrubbish -

    All phones/devices differ it’s unrealistic and unsafe to put a exact time/temperature needed to soften the adhesive. It’s really quite simple you warm the device evenly and in a controlled manner just enough to enable pry tools and picks to begin separating. Best tool in my opinion but again this is because I have experience is a hot plate and heat gun both of which are used at nearly the lowest settings and I can handle flat palming the plate for almost 10 seconds I leave the device to conduct heat until approx it’s about 110 at most 120 ish this will be plenty to soften all the adhesive if any problem areas I use heat gun while prying. Again you need go slowly and learn with a throw away phone

    Greg Latta -

    I used a hot water bottle, works well as it covers the whole screen and stays hot for longer.

    dave -

    If I may suggest include your microwave wattage so people can get an idea on time for there own

    Patrick Storey -

    I ended up using a hair dryer. That iOpener thing took forever.

    mark fitzgerald -

    30 seconds sure isn’t cutting it… 45 didn’t get the screen of my iPad air 2 to budge either… even after resting on the ipad for 4 minutes.

    60 seconds in the microwave, the iOpener burst.

    I’ll get a new one and try once more with heating it 45 seconds and repeat that for 30 minutes like others have said here. If that doesn’t work it’ll have to be the heat gun.

    K

    Karl Marble -

    I can’t recommend the microwave. If the the iOpener becomes too hot, it bursts. Better put the opener in cooking water. Dry it and use it. Instead of an iOpener you can use hot/cool packs as well.

    Bernhard Keim -

    Great idea with using the heat packs. I will try that next time. Thank you

    Collins -

    Trust the directions! I forgot and left it in the Microwave too long and after 1 minute I had Mt Vesuvius - the iOpener burst and spewed the goodies out. The problem is, the Digitizer can be damaged by a hot air gun, so I had to tough out and remove the glue the hard way. I made it … with lots of patience! Tough lesson.

    Larry Bennett -

    I also used a hairdryer. I used it on the low setting and I cut a piece of carboard to protect the rest of the screen. The iFixit tool and method is vert tedious and very time consuming in comparison. With the hairdryer method you can literally have the display apart in a few minutes. Using your other hand nearby the area you are heating it should be very hot but not enough to burn your hand. You only have to heat metal part of case near glass edge. If you have a cellular model then you need to be very careful because the black antenna area is plastic. So less heat and work your way up in adding heat just enough to separate around the area but not so much you melt the plastic!

    Fixrights -

    iOpener was the worst part of the kit. Followed directions for :30 in microwave and took 4 trips to the microwave to loosen adhesive on left side of home button. I thought I was figuring it out and it was working well… even set a timer to wait 10 minutes between heating it up. Was on the right side and was on my 12th heat up when it exploded in the microwave. My only tip is that if you set it clear side up, as soon as you see any bubbles or boiling in the liquid, STOP! If you put a pot holder over the iOpener and press slightly to make good surface contact, that seemed to help. I finished heating with a “Corn Sack” that held heat better than the provided iOpener.

    digital_only -

    Mon iopener n'a pas tenu une réparation. Je ne vous conseille pas ce produit

    Berard Romain -

    Bonjour,

    Nous sommes désolés que votre réparation ne se soit pas déroulée comme prévu. Il se peut que le produit était défectueux. Veuillez contacter notre service client support@ifixit.com (boutique américaine) ou eustore@ifixit.com (boutique européenne) en décrivant ce qui s’est passé.

    Claire Miesch -

    Readers looking for temperature advice might check the comments of the previous instruction, as there are more there. I used an immersion bath to heat this to 180F and applied it to the device until the outside temperature of the opener read 150F with an IR thermometer. Removing the screen took very little force with this method.

    breadandbits -

    Thank you for posting some actual temperatures. I have a heat gun with a very fine self-temperature regulation setting capability.

    I will set it for 150-180 F, and use that to soften the adhesive.

    G Trieste -

    Get a heat gun.

    alesha adamson -

    I followed the directions and heated my iOpener for 30 seconds in a 1000 watt microwave, and it came out at 160 degrees F, as verified by a infrared thermometer. A second heating about 15 minutes later in the micro and it came out at 190 degrees F. Plenty hot enough to soften the adhesive for removing the back on my S8. Based on the comments above I think people just need to use more patience.

    Dennis -

    I used various time settings. It got very hot. It would soften the glue but not a whole lot. If my screen had been intact and I was replacing something that was not a digitizer, it may have worked. A broken screen makes the process significantly more difficult. I ended up breaking the home button cable. Good bye TouchID…

    cvela90 -

    After reading previous comments I didn't even use the i-opener. Used the heatgun ( hairdryer ) which works great for me. Maybe I was lucky as this is my first attempt at replacing a cellphone battery. Motoz 3

    Collins -

    It appeared 30 seconds were not enough, so I heated it more, by 5 seconds at a time until I got the right temperature about 70 degrees Celsius (measured with infrared pistol) to get the screen heated up to 60 C, the best for softening the glue. But the heat was quickly dissipating by the big aluminum back cover, so the best I got in 2 minutes of applying iOpener was around 45 C, which made the procedure difficult and having risk of breaking the screen. So I eventually abandoned iOpener and user a hot air gun with precise temperature setup. I set it to 90 C, which allowed me to open my iPad quickly and safely.

    Sergey Kofanov -

  3. Q3OPkaQyxV6cdnx3
    • Halte den iOpener an einem der flachen Enden und vermeide die heiße Mitte, während du ihn aus der Mikrowelle nimmst.

    • Der Beutel wird sehr heiß, sei vorsichtig beim Gebrauch. Lege dir am besten einen Topflappen bereit.

    I did this repair. I used a hair dryer, I think it works better: gets very hot fast.

    Cobus de Beer -

    I did too, you get far more control and no expense on fancy equipment.

    Billinski -

    Readers looking for temperature advice might check the comments of the previous instruction, as there are more there. I used an immersion bath to heat this to 180F and applied it to the device until the outside temperature of the opener read 150F with an IR thermometer. Removing the screen took very little force with this method. I don’t know how much microwaves vary in heating consistency with these pads, but knowing how inconsistent the temperature of a bowl of plain rice gets in my microwave, I wasn’t interested in even trying to use it for this.

    breadandbits -

    I used an electric griddle set to the lowest setting. It seemed to work very well.

    John -

    I vote for the hair dryer. The other methods work too but if you aren’t having any luck, switch to the hair dryer. While holding the iPad in my hand, I found that I am aiming the dryer at my finger at the same time and it gauges how hot it is. I stop when my finger can’t take it - maybe five seconds up close. Repeat as needed like I did.

    Robin -

    This thing melts when placed up side down in the microwave…

    Mark -

  4. 2Nj3CEcEUHn2EtLQ
    2Nj3CEcEUHn2EtLQ
    lgRIBJjmHo2vTdda
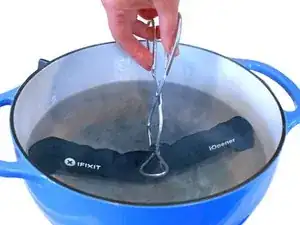
    • Solltest du keine Mikrowelle haben oder benutzen wollen, folge diesem Schritt, um den iOpener in kochendem Wasser zu erhitzen.

    • Fülle einen Topf oder eine tiefe Pfanne mit ausreichend Wasser, um den iOpener komplett damit bedecken zu können.

    • Erhitze das Wasser (ohne den iOpener) bis es kocht. Schalte die Wärmezufuhr (Platte) aus.

    • Lege den iOpener für etwa 2-3 Minuten in das heiße Wasser. Stelle sicher, dass der iOpener komplett mit Wasser bedeckt ist.

    • Nimm den iOpener mit einer Küchenzange aus dem Wasser heraus.

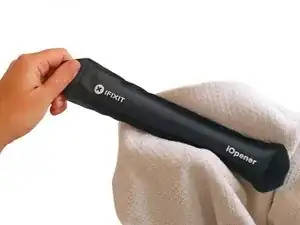
    • Trockne den iOpener gründlich mit einem Küchen- oder Handtuch ab.

    • Der iOpener speichert die Hitze, und ist daher sehr heiß. Sei vorsichtig, und halte den iOpener nur an den Endlaschen, nicht in der Mitte.

    • Der iOpener kann jetzt verwendet werden. Solltest du den iOpener erneut erwärmen müssen, erhitze das Wasser nochmal bis zum Siedepunkt, schalte die Wärmezufuhr aus, und lege den iOpener wieder für 2-3 Minuten vollständig in das Wasser.

    What do I do if I don’t have a iopener?

    alexdelarge103@gmail.com -

    Use a hair dryer

    Edited To the max -

    2 or 3 cups Rice in a sock, heat for about 2 minutes. But, I recommend the iopener.

    Robert Garcia -

    When boiling in water you can put the iopener in a ziplock to keep it dry.

    Robert Garcia -

  5. xUapwHBISCGUkkSV
    xUapwHBISCGUkkSV
    C3lIO2OnLdLSgyRO
    fJ444exNZJxY1sTM
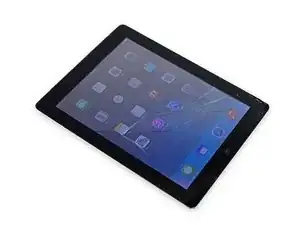
    • Schalte dein iPad komplett aus bevor du beginnst.

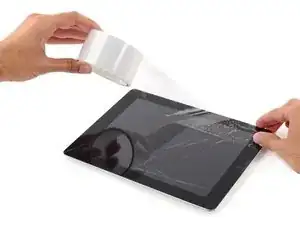
    • Wenn dein Display gebrochen ist, vermeide weitere Brüche oder Verletzungen, indem du die Glasscheibe mit Klebeband abklebst.

    • Befestige sich überlappende Streifen Paketklebeband auf der gesamten Oberfläche des iPads.

    • Das Klebeband deckt Splitter ab und hält das Display während des Entfernens zusammen.

    • Bitte befolge die restliche Anleitung wie beschrieben. Wenn das Glas einmal gebrochen ist, wird es während der Reparatur weiter brechen. Eventuell benötigst du einen Metallspatel, um das Glas zu entfernen.

    • Trage eine Sicherheitsbrille, um deine Augen zu schützen. Sei vorsichtig und beschädige nicht das LCD.

  6. ejrJKa1u3aPeb2ij
    ejrJKa1u3aPeb2ij
    1NWo1pGOSpdT2PdK
    MgAs5RIkspBhSmpT
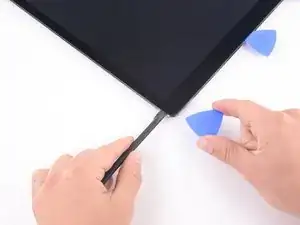
    • Zum Entferne der Displayeinheit benötigst du einen speziellen Spudger mit hellebardenförmiger Klinge oder ein Plektrum, um die Klebeverbindung aufzutrennen, welche das Display am rückseitigen Gehäuse befestigt.

    • Schaue immer wieder auf diese Fotos, während du arbeitest, damit du weißt, wo der meiste Kleber ist und wo du am tiefsten mit dem Schneidwerkzeug eindringen musst.

  7. aJBeJMOgBCcMHno4
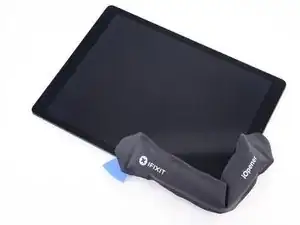
    • Erhitze den iOpener und lege den ihn auf die linke Seite des iPads, um den Kleber aufzuweichen.

    • Du kannst stattdessen die Umrandung des iPads auch mit einem Haarfön auf niedrigster Stufe, einem Heißluftgebläse oder einem Heizkissen erhitzen.

    • Warte ungefähr zwei Minuten, damit der Kleber aufweichen kann, bevor du zum nächsten Schritt übergehst.

  8. AlZDU3orr6ufwCCU
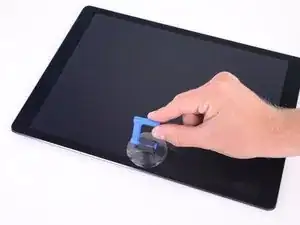
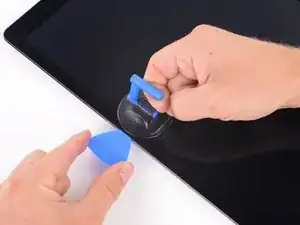
    • Bringe einen Saugheber in der linken Seitenmitte des Displays an, in gleichem Abstand zur oberen und unteren Ecke.

  9. kKRQsRqfvXDPZOQO
    kKRQsRqfvXDPZOQO
    ojbgpm4RcYSYNY3R
    GrcJWPaTSorvslJJ
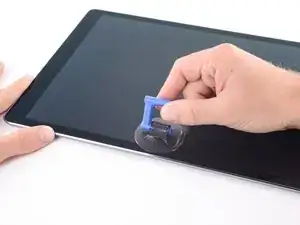
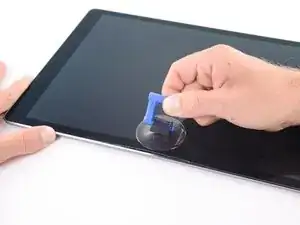
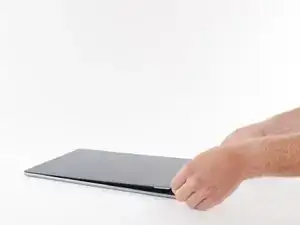
    • Halte die Ecken des Geräts nach unten und ziehe gleichzeitig das Display wiederholt nach und schiebe es zurück, so dass die Klebeverbindung geschwächt wird.

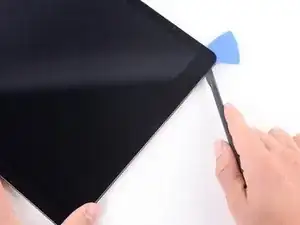
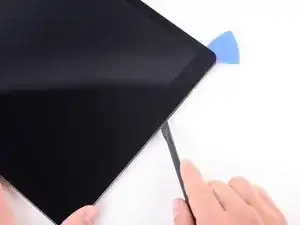
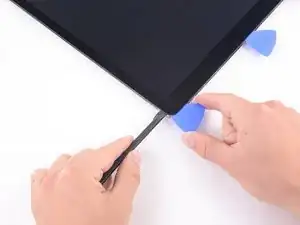
    • Wenn es dir gelungen ist, einen kleinen Spalt zwischen Frontpanel und rückseitigem Gehäuse zu öffnen, dann setze dort einen Spudger mit Hellebardenklinge oder ein Plektrum ein.

    • Setze das Werkzeug nicht tiefer als 2 mm ein. Wenn du es tiefer einschiebst, kannst du die Displayeinheit dauerhaft beschädigen. Wenn du die Hellebardenklinge benutzt, dann wähle die kürzeste Seite.

  10. 1I5gTHDkIFPGtCKq
    1I5gTHDkIFPGtCKq
    MaeO3RTJcdcEYRGQ
    fQIwEQmTmGTaDmNx
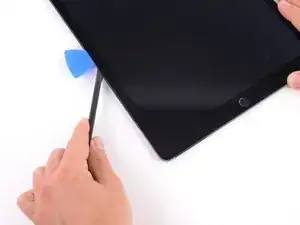
    • Lege einen heißen iOpener um die linke untere Ecke des iPad, er sollte vom Plektrum bis zum Home Button reichen.

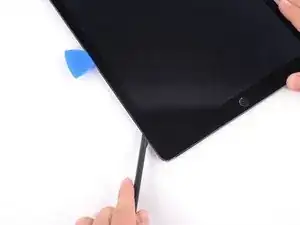
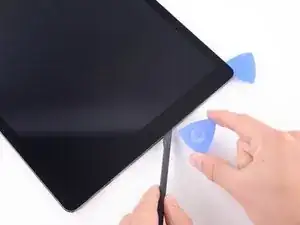
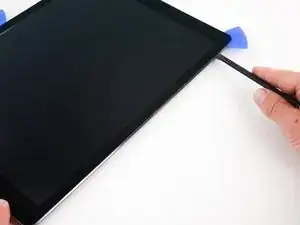
    • Lasse den Kleber aufweichen und setze dann einen Hellebardenspudger neben dem Plektrum in das iPad ein.

    • Anstelle eines Hellebardenspudgers kannst du auch ein Plektrum verwenden. Du musst dabei aber besonders aufpassen, das Plektrum nicht zu tief einzustecken, dies könnte sonst die Displayeinheit beschädigen.

    • Trenne den Kleber an der unteren linken Seite des iPad mit dem Hellebardenspudger auf. Wahrscheinlich musst du die Kante mehrmals wieder aufwärmen.

    • Schiebe den Hellebardenspudger vor und zurück, bis der meiste Kleber aufgetrennt ist.

  11. ss1OaZTtBfqm5FUW
    ss1OaZTtBfqm5FUW
    TRTFVF4nfQDiGPR6
    • Setze ein Plektrum in die linke untere Ecke ein, damit sich der Kleber nicht wieder verbindet.

    • Entferne den Hellebardenspudger.

  12. cJSs2NAwdFpvPTgU
    cJSs2NAwdFpvPTgU
    qvVKSR1EkTBZVlEN
    ZFqoWOhhVvCPmZZY
    • Lege einen heißen iOpener um die linke obere Ecke des iPad, er sollte vom Plektrum bis zur Frontkamera reichen.

    • Lasse den Kleber aufweichen und setze dann einen Hellebardenspudger über dem Plektrum in das iPad ein.

    • Trenne den Kleber an der oberen linken Seite des iPad in Richtung Frontkamera mit dem Hellebardenspudger auf. Wahrscheinlich musst du die Kante mehrmals wieder aufwärmen.

  13. kZkgHmgG3fDLVxDG
    kZkgHmgG3fDLVxDG
    Y5MVYASTjXCyhpLo
    44YUG2cQmMkRwCVg
    • Setze ein Plektrum in die obere linke Ecke ein.

    • Entferne den Hellebardenspudger.

  14. CBQc6gvFqMKQKZVJ
    CBQc6gvFqMKQKZVJ
    ZO4RhLxdHN6rXS1o
    RqMo3CDQ26O3VaLD
    • Erwärme erneut den iOpener und lege ihn auf die Oberkante des Geräts. Warte ein paar Minuten, damit der Kleber aufweichen kann.

    • Wenn das Frontpanel heiß genug ist, dann setze die Klinge eines Hellebardenspudgers neben dem Plektrum aus dem vorigen Schritt ein.

    • Schiebe die Klinge entlang der Oberkante des iPad, halte vor der Frontkamera an.

  15. mNh1GTQlrTR3pkLy
    mNh1GTQlrTR3pkLy
    dLAPVZJI5vGYMCMV
    • Setze ein Plektrum direkt neben der Frontkamera ein.

  16. PFlUwPfGpXky1muC
    PFlUwPfGpXky1muC
    hreYhudKgHTMRZTy
    o4mmn3fusrS4VQTA
    • Erwärme, falls nötig, erneut den iOpener und lege ihn über die Oberkante des Geräts. Warte einige Minuten, damit sich der Kleber aufweichen kann, bevor du den Hellebardenspudger erneut einführst.

    • Setze die Klinge des Spudgers unmittelbar nach der Frontkamera ein, gegenüber vom Plektrum.

    • Schiebe die Klinge des Hellebardenspudgers weiter bis zur oberen rechten Ecke des iPad.

  17. FyNhGWiLgp1Pmagx
    FyNhGWiLgp1Pmagx
    4JFJnCqN4OVLLwGk
    • Schiebe den Hellebardenspudger um die Ecke des iPad herum und setze ein Plektrum in die obere rechte Ecke ein, damit sich der Kleber nicht wieder verbinden kann.

  18. USkLgwFmKpt5RY2c
    USkLgwFmKpt5RY2c
    RW44JXTuOmbWLnJP
    • Erwärme die rechte Kante des iPad mit einem iOpener, um den Kleber aufzuweichen.

    • Schneide weiter mit dem Hellebardenspudger den Kleber auf, welcher die Displayeinheit befestigt. Halte in der Mitte der rechten Kante an.

  19. d5PM2TdvkpsdMeiO
    d5PM2TdvkpsdMeiO
    VXYYKOqID4Wm62nW
    LCHXD21VWWiKhfXb
    • Entferne das Plektrum von der Mitte der Oberkante des iPad, nahe der Frontkamera.

    • Wenn du genügend Plektren zur Verfügung hast, dann kannst du es an Ort und Stelle lassen.

    • Setze ein Plektrum in der Mitte der rechten Kante des iPad ein.

  20. MEGUjxSSbEjjIUxL
    MEGUjxSSbEjjIUxL
    LSwDCvpKOde5xfGv
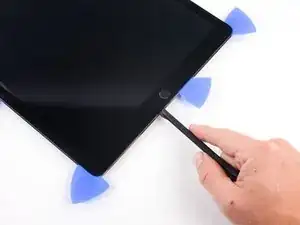
    • Setze einen Hellebardenspudger an der rechten Kante des Geräts zwischen Display und rückseitigem Gehäuse ein.

    • Schiebe den Hellebardenspudger an der Seite des iPad nach unten, um den Kleber aufzutrennen.

  21. Ihhg6aHVBPCvjHAS
    Ihhg6aHVBPCvjHAS
    MjBC5C4AvGWSep26
    • Schiebe die Klinge des Öffnungswerkzeugs um die untere rechte Ecke des Geräts herum.

    • Setze ein Plektrum in die untere rechte Ecke ein, dort wo du eben mit der Klinge durchgefahren bist.

    • Entferne den Hellebardenspudger.

  22. XXXsMME11P13sGjx
    XXXsMME11P13sGjx
    LTKyX3ifZoYJXidx
    vnw6JmqparjiZ5Sp
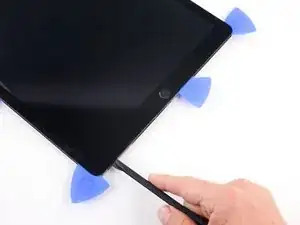
    • Erwärme die Unterkante des iPad mit dem iOpener.

    • Setze die Klinge des Hellebardenspudgers links vom Plektrum in der unteren rechten Ecke des iPad ein.

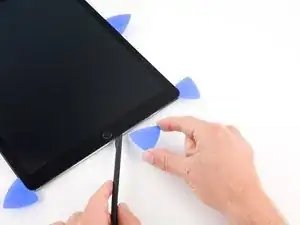
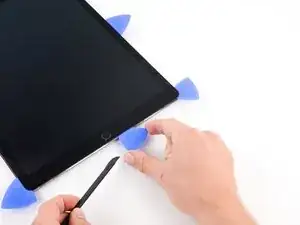
    • Fahre mit dem Hellebardenspudgers an der Unterkante entlang. Halte etwa 1 cm vor dem Home Button an.

  23. cZsgVusTdpCSodNI
    cZsgVusTdpCSodNI
    qsJfS2WgyWcqrB1p
    ZgAZWS3hVBjIrwew
    • Entferne das Plektrum von der Mitte der linken Seite des iPad.

    • Wenn du genügend Plektren oder Ähnliches zur Verfügung hast, dann kannst du es an Ort und Stelle lassen.

    • Setze ein Plektrum rechts vom Home Button ein.

  24. 3IoRJkBZXK6PHawA
    3IoRJkBZXK6PHawA
    PTHEUWLlZ51hqPXK
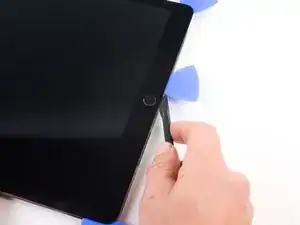
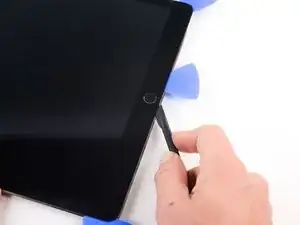
    • Schwenke den Hellebardenspudger so, dass du mit dem kürzesten Teil der Klinge schneidest.

    • Schiebe den Hellebardenspudger weiter, um den Kleber unter dem Home Button aufzutrennen.

  25. GdlHDjpjDOFqdWmP
    GdlHDjpjDOFqdWmP
    PLfhuKagUdSB4bPL
    • Schiebe wieder die Klinge des Hellebardenspudgers so tief wie möglich ein.

    • Fahre mit dem Auftrennen an der Kante entlang fort, bis du das erste Plektrum, welches du eingesetzt hast, erreichst.

  26. AakLhWjiDWpC4Grh
    AakLhWjiDWpC4Grh
    dJ3HaHgomNdwre2r
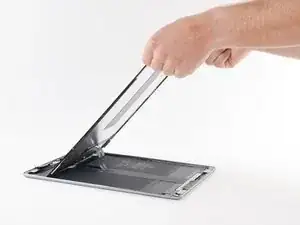
    • Gehe zu Schritt 5 zurück und stelle sicher, dass die Stellen mit besonders viel Klebstoff wirklich gut von der Displayeinheit getrennt sind. Wenn dem so ist, kannst du hier weitermachen. Anderenfalls schneide nochmals durch den Kleber, bis die Displayeinheit frei ist.

    • Die Displaykabel an diesem iPad sind kürzer und es ist vielen Nutzern unbequem, daran zu arbeiten. Lies die folgenden Warnhinweise, bevor du fortfährst:

    • Schwenke nicht das Display über die untere Kante. Die Displaykabel haben dafür nicht genug Spiel und reißen, wenn du das Display nicht in Richtung der Frontkamera schiebst, während du es anhebst.

    • Die Displaykabel reißen, wenn du das Display um mehr als 80° anhebst.

    • Hebe die Oberkante des Displays hoch und schiebe es in Richtung der Frontkamera, um so an die internen Bauteile des iPads zu gelangen.

  27. nDvHSQu2ehxaFfMw
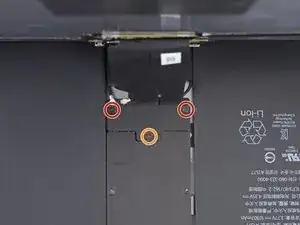
    • Bevor du weitermachst ist es wichtig, dass du den Akku abtrennst. Das Ablösen oder Anschließen der Displaykabel bei angeschlossenem Akku kann einen Kurzschluss verursachen und die Funktionalität des Touchscreens beeinträchtigen.

    • So wird der Akku abgetrennt:

    • Stütze zuerst das Display sicher ab, so dass es nicht fallen kann und die Displaykabel zu stark angespannt werden, während du arbeitest.

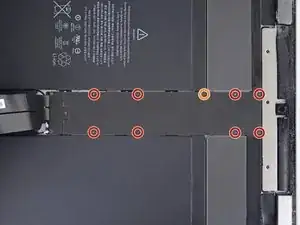
    • Entferne dann die neun Kreuzschlitzschrauben, welche die EMI-Abschirmung des Logic Boards befestigen:

    • Acht 1,2 mm Schrauben.

    • Eine 2,4 mm Schraube.

    Middle left, look at the 2 connecting ribbon wires as what I’m looking at in my hand is that ones L shaped with the 2 ports male and the cracked screen has different pins and in not seating properly?

    Matthew Newton -

    So my brother and I were connecting the ribbon cables and we totally forgot to put the plastic tool back in which separates the battery. There was a spark and when we got everything back together the touch screen wasn’t fuctioning. So we definitely messed that up. Is there a component that we can replace to fix that? Or did we totally destroy this iPad?

    derickgoebel -

    You have to have it microsoldered to fix it. You can take it somewhere locally or send it off to get it done.

    ericandjenallen -

    I forgot to disconnect the battery. I have not put my new screen back. Is it too late ( is my touchscreen function for sure damaged now)? If so, what can I do? I have disconnected and insulated the battery now…but is it too late?

    thomas yanowsky -

    Yes is the answer. Keep an insulator under the battery connector. Don’t skip step 26-29 before removing or installing display connectors.

    thomas yanowsky -

  28. 1j4TW2xNcxeZorBN
    1j4TW2xNcxeZorBN
    VoLpXIeyr3gyjiZH
    ST5OpJBg63Hi6adh
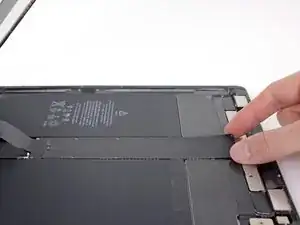
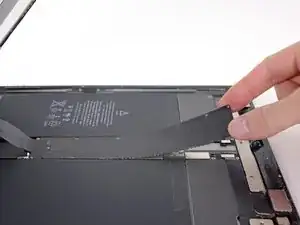
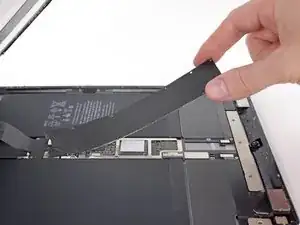
    • Hebe die EMI-Abschirmung des Logic Boards an der Seite nahe der Oberkante des iPad an.

    • Löse die EMI-Abschirmung vom Logic Board ab.

    • Dazu brauchst du wegen der vielen kleinen Rasten, welche die Abschirmung befestigen, recht viel Kraft. Möglicherweise verformt sich die Abschirmung ein wenig. Das ist in Ordnung, so lange die Verformung nicht zu stark ist und die Abschirmung sich beim Zusammenbau flach legen kann, wenn sie dann wieder festgeschraubt wird.

    • Entferne die EMI-Abschirmung des Logic Boards.

  29. TBGQfaGoBuJQIvCC
    • Entferne die 1,8 mm Kreuzschlitzschraube am Akkustecker.

  30. 3yNdI63KF3PkUETA
    3yNdI63KF3PkUETA
    RHuWxOZjJH4pYE1j
    36vdrtPlHGQgZiwJ
    • Diese Bilder zeigen, wie der Akkustecker unter dem Logic Board aussieht. Mit diesen Referenzfotos kannst du den Akkustecker sicher ablösen.

    • Beachte, dass der Akkustecker durch Federn auf dem Logic Board gegen die Kontaktflächen gedrückt wird. Da ja sowohl das Logic Board als auch der Akku festgeklebt sind, musst du ein dünnes und flexibles Werkzeug zwischen die Kontakte schieben, um den Akku abzutrennen.

  31. SNdpN4asOYltXt4Y
    SNdpN4asOYltXt4Y
    cyQxDFJ5QRdAgLph
    hHuFAgepLQG6ZAPM
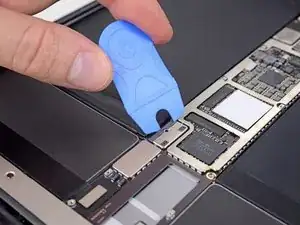
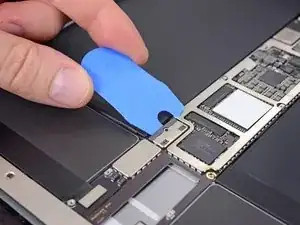
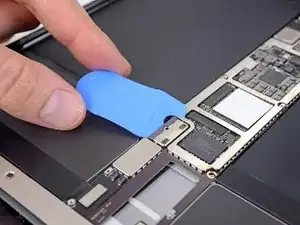
    • Setze ein spezielles Akkutrennstück (Akkublocker) oder einem anderes Isolierwerkzeug unter das Logic Board ein, damit es keinen Kontakt zu den Akkuanschlüssen mehr hat.

    • Sei sehr vorsichtig, wenn du den Akku mit einem Akkublocker abtrennst. Die Akkukontakte sind sehr empfindlich und können leicht dauerhaft beschädigt werden.

    • Schiebe den Akkublocker nicht mit Gewalt unter den Stecker. Wenn sich der Akkublocker nicht leicht unter das Logic Board schieben lässt, kannst du es stattdessen mit einer Spielkarte probieren.

    • Lasse das Werkzeug dort stecken, damit die Akkuanschlüsse keinen Kontakt bekommen, solange du arbeitest.

    • Bei den restlichen Bildern dieser Anleitung ist die EMI-Abschirmung eingebaut zu sehen. Das ist falsch. Folge den Schritten weiter, halte den Akku abgetrennt und baue die EMI-Abschirmung nicht wieder ein, bevor die Reparatur zu Ende ist.

    What is a safe alternative to using a battery blocker?

    Jeremy Spencer -

    Hi Jeremy, I use a guitar plectrum.

    Go for the thinnest possible. These are easier to wedge in between battery and motherboard (+ less risk on damaging something).

    Dreetn -

  32. YxAaLPnTnXJqcvhB
    YxAaLPnTnXJqcvhB
    jVXQJCb6cXhHhGuo
    yDQUkQwwIDXA2En3
    • Fixiere die Displayeinheit und entferne die folgenden drei Kreuzschlitzschrauben über der Halterung des Displaykabels:

    • 2,4 mm Schraube

    • 1,2 mm Schraube

    • Entferne die Halterung des Displaykabels.

  33. A5OwAsl2EpYFfNbu
    A5OwAsl2EpYFfNbu
    mqOmPlufXEAcCJsk
    ER5XIKlKNSoecasB
    • Löse mit dem flachen Ende eines Spudgers die zwei Displaydaten- und Touchscreen-Kabel aus ihren jeweiligen Anschlüssen auf dem Motherboard.

    which of the two connectors is the digitizer cable?

    elsa -

  34. pOB5XBlMFeV4uX6f

    Would be really nice if the adhesive strip kit for the screen included the adhesive bits needed to secure the existing home button to the new screen (or a new home button to an existing screen).

    Marc Nelson -

    Great, I followed the tutorial and succeeded to repair my iPad Pro 1st gen.

    I bought the pieces from https://www.unionrepair.com a little bit less expensive, making the rewear worth the spending.

    http://hebus.ovh/cimages/iPadOpened.jpeg

    http://hebus.ovh/cimages/displayRemoved....

    http://hebus.ovh/cimages/repeared.jpeg

    I took a black one with my original white home button … make it unique now ;)

    Cheers

    Serpieri -

    Great guide! I will add that on my iPad Pro 1st gen, I had to peel back the EMI cover material to Expose the last few screws. This is not listed as a separate step and I almost damaged my EMI board. Just a heads up to improve the guide!

    Brian Crea -

  35. gCYGhlecNbD3kxG5
    gCYGhlecNbD3kxG5
    MihRHoAOWDX1JlcM
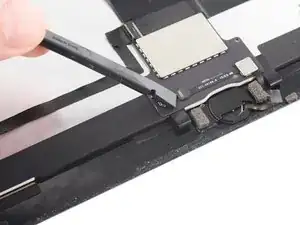
    • Ziehe das Klebeband vom ZIF Verbinder über dem Home Button ab.

  36. epmLCRdsuOUDLFhK
    epmLCRdsuOUDLFhK
    SpuKFEyoxwpikZUj
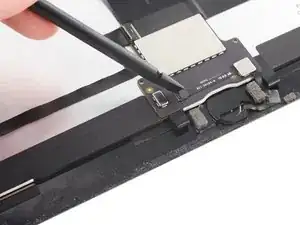
    • Hebe den Sicherungsbügel, der das Kabel im Verbinder festhält, mit dem flachen Ende des Spudgers hoch.

  37. ZkkFZ1RNliKlFhVD
    ZkkFZ1RNliKlFhVD
    STCKJU2aASeEQjpM
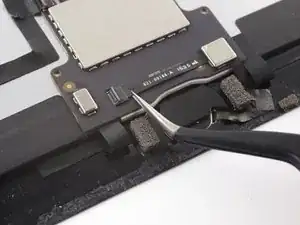
    • Ziehe das Kabel aus dem ZIF Verbinder heraus.

  38. RBkYMXMkPsJmkHWi
    RBkYMXMkPsJmkHWi
    TXbYyAHHmxEOvyX6
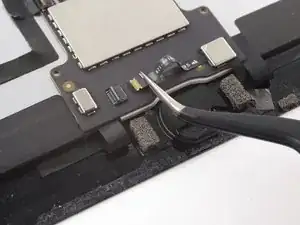
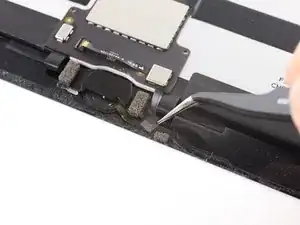
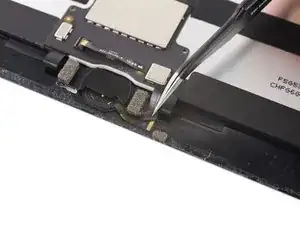
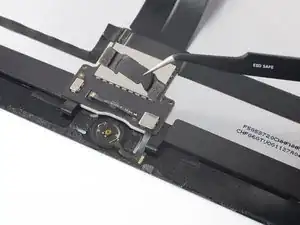
    • Das Kabel zum Home Button ist mit einem Klebeband bedeckt. Ziehe es mit einer Pinzette ab.

  39. GtWbmyFHBPgX1ykt
    GtWbmyFHBPgX1ykt
    qVTQAu2GsYdJTJqu
    ZMoDrMolAvOVwJjp
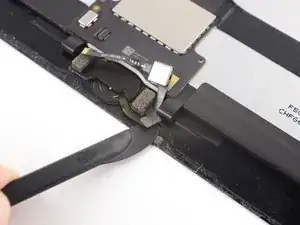
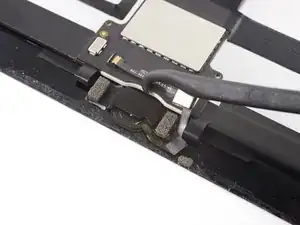
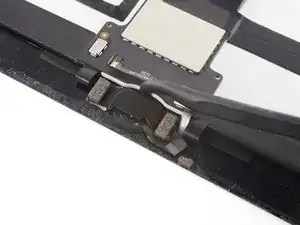
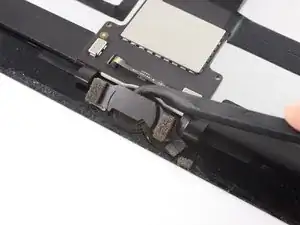
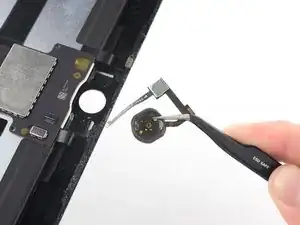
    • Das Kabel zum Home Button ist sehr empfindlich. Wenn es beschädigt wird, oder wenn der Home Button ersetzt werden muss, wird TouchID nicht mehr funktionieren.

    • Weiche den Kleber unter dem Kabel mit einem iOpener, einem Heißluftgebläse oder einen Haartrockner auf, bevor du es nach oben hebelst.

    • Beginne am ZIF-Verbinder mit dem Auftrennen des Klebers, mit dem das Kabel zum Home Button befestigt ist. Benutze dazu die Klinge eines Halberd Spudgers oder die Schneide eines Plektrums. Halte an, wenn du am Home Button angelangt bist.

  40. EicEfiQPEJMwgxPJ
    EicEfiQPEJMwgxPJ
    DVCTDQncIrGLrBwH
    WVAiQrKNVkkheTkp
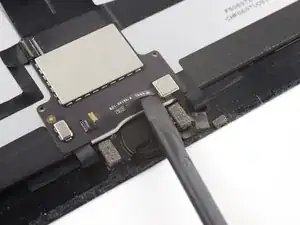
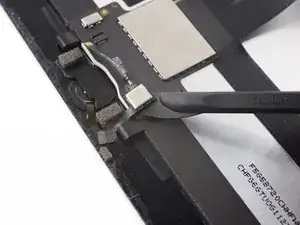
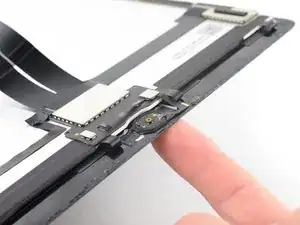
    • Setze den Haken eines Hellebardenspudgers oder das flache Ende eines normalen Spudgers zwischen Abdeckung und LCD. Heble dann vorsichtig die Abdeckung des Home Buttons in Richtung Unterkante des iPads ab.

    • Der Heißkleber, mit dem diese Halterung befestigt ist, kann störrisch sein. Erwärme sie, so dass sie sich leichter abtrennen lässt und/oder trenne sie sehr behutsam mit einer Rasierklinge ab.

  41. jcZjMMNi3clXqoEx
    • Entferne die Halterung des Home Buttons.

    • Wenn du beim Zusammenbau den Home Button wieder eingebaut hast, musst du diese Halterung wieder festkleben.

    • Schabe so viel wie möglich von den alten Klebstoffresten ab. Reinige den Bereich dann mit Azeton oder hochkonzentriertem Isopropylalkohol (90%ig oder mehr).

    • Befestige die Halterung mit Heißleim, Superkleber oder sehr starkem doppelseitigem Klebeband. Achte darauf, dass die Halterung vor dem Festkleben korrekt ausgerichtet ist, sonst klickt der Home Button beim Draufdrücken nicht richtig.

    Would be really nice if the adhesive strip kit for the screen included the adhesive bits needed to secure the existing home button to the new screen (or a new home button to an existing screen).

    Marc Nelson -

    One more thing about the bracket: you really need a strong adhesive when you put it back, so that pushing the button doesn’t dislodge it. If it doesn’t hold the button firmly, you can push the button out of its socket during normal use. Getting the bracket in and aligning it without accidentally sticking it in the wrong place or (much worse) sticking it to the fragile ribbon cable takes some very careful work.

    This is an excellent guide, but I’d like to see maybe the first two steps of reassembly, showing how to do this correctly.

    John Lasseter -

  42. iEBi5FWTDjOyFVFF
    iEBi5FWTDjOyFVFF
    5HSX1AaQHeDxBEhx
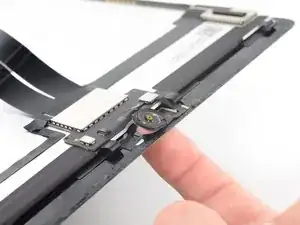
    • Drücke den Home Button von der Vorderseite des Displays aus mit der Fingerkuppe nach innen.

    The gasket tears easily, so go slower than I did. I should have heated the button up so to help the gasket release.

    jpmist -

  43. 5vVmER1qsnkPXvfJ
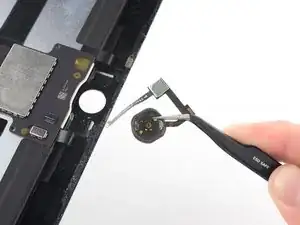
    • Entferne den Home Button.

Abschluss

Vergleiche dein Ersatzteil mit dem Originalteil. Du musst vielleicht fehlende Teile vom alten auf das neue Teil übertragen oder Schutzfolien vom Neuteil abziehen, bevor du es einbauen kannst.

Um dein Gerät wieder zusammenzusetzen, folge den Schritten in umgekehrter Reihenfolge.

Entsorge deinen Elektromüll fachgerecht.

Die Reparatur hat nicht den gewünschten Erfolg gebracht? Unser Antworten-Forum kann dir weiterhelfen.

Evan Noronha

Mitglied seit: 06/02/15

213827 Reputation

7 Kommentare

Do you need to reapply any adhesive to seal this back up after it is complete?

Dan Guy -

Yes. If you take the iPad apart most of the adhesive on the screen won’t be usable again. You can use either the specific kit for your ipad Pro that iFixIt sells, or get a roll of “red” tape (probably between 2-5mm size) and cut out pieces for all four side of the screen. You will probably also need tape or glue (such hot glue or something like B-7000) for the home button, and the metal bracket that holds the home button, since the old adhesive tends to not work a 2nd time.

Jennifer M -

Some LCD Assemblies come with Adhesive pre-applied, simply peel and seal. :)

Otherwise, plan on running some double-sided 3M tape before commencing new LCD Assembly Installation.

TIP: B7000 Adhesive in the bottom left and right corners will help keep it in place moving forward.

Kevin McCartney -

Replaced LCD and reattached home button, everything works, but the home button is lose and trying to fall inside, like it's missing something that is suppose to be between the home button and the cover that sets over it under the glass. The cover is stuck to the glass, but there's enough of a gap that the home button wants to fall inside?

Chip Teters -

I have the same issue, haven’t solved it yet but here is what I’ve found so far:

The home button appears to have several pieces not just one, including: 1. black gasket, 2. white or space-grey ring (paper or plastic?) around the metal part, 3. The actual glass circle button with fingerprint feature, and 4. electronics layer behind it.

When I took the button off, and re-adhered the button, the glue or tape between No. 2 and 3. above started to separate. Not sure how to put these back together since so small.

Jennifer M -

The guide plus a few videos made this a painless experience. my only problems are the home button no longer recognizes finger prints and iPad no longer auto shuts off when lid is closed. Not a great result for the price.

mvzagarola -

Successfully completed this one but I must have damaged the home button cable during removal, I was very careful but it does say the cable is very sensitive, as it will not enable touch ID. Oh well, my iPad Pro works again, yay!

Brian Crea -