Einleitung

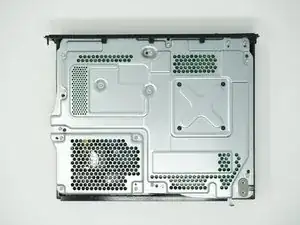
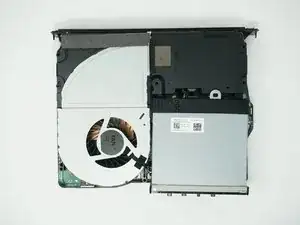
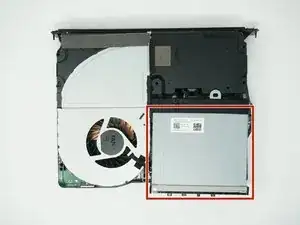
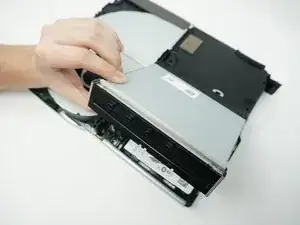
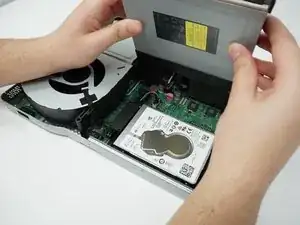
Diese Anleitung zeigt dir, wie du die Festplatte in der Xbox One X austauschen kannst, sie gilt auch für die Xbox One X Project Scorpio Edition.

  1. Xc1GGFUnMtkwDtOC
    Xc1GGFUnMtkwDtOC
    uoOQwgdJPnArO2lI
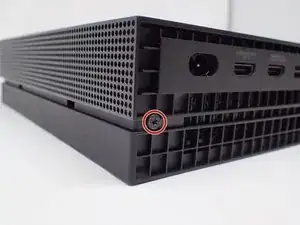
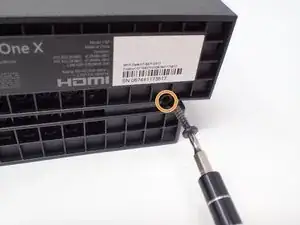
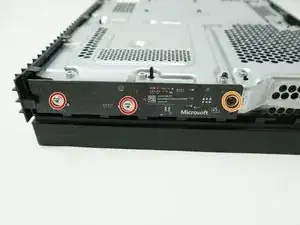
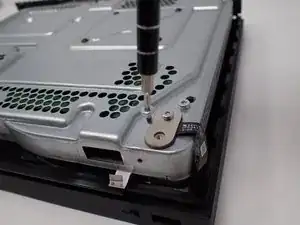
    • Entferne die 13 mm Torx T9 Schraube links unterhalb der Netzbuchse.

  2. oRhRdeYZuICAMXRZ
    oRhRdeYZuICAMXRZ
    EnuTwqlvNNeaJoaT
    KdSteUGMUD6SEhli
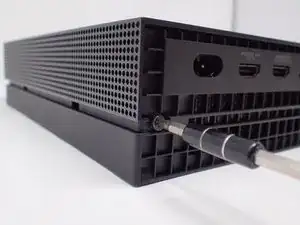
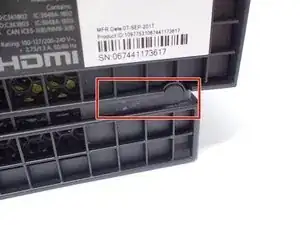
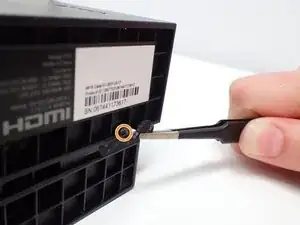
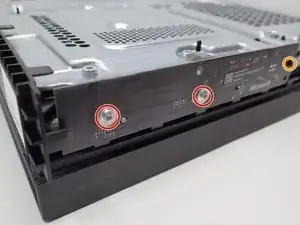
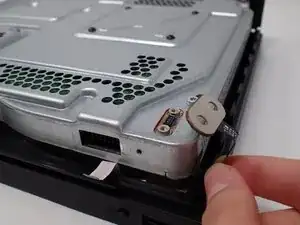
    • Entferne mit einer Pinzette die Schraubenabdeckung an der gegenüberliegenden Seite des Gehäuses.

    • Entferne die darunterliegende 13 mm Torx T9 Schraube.

  3. gWAsVT3cQI1vU6Wx
    gWAsVT3cQI1vU6Wx
    oUYNv3HtDL1fYPbJ
    YoomRoYAYCvUbGGA
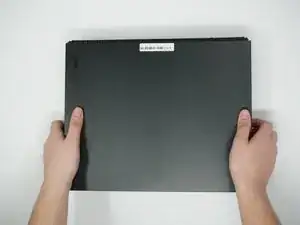
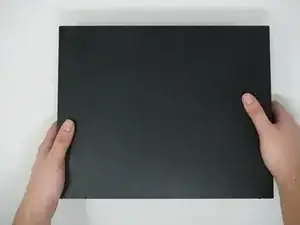
    • Drehe das Gehäuse so, dass die Vorderseite (mit der Einschalttaste) zu dir zeigt.

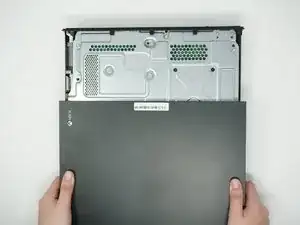
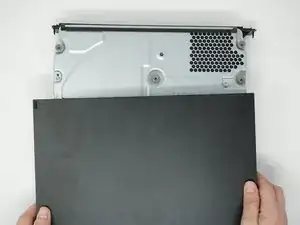
    • Schiebe den Deckel zu dir hin und hebe ihn vom Gehäuse ab.

    Bitte auch diesen Schritt überarbeiten. Es wird lediglich das Gehäuse für ca 2-4 Zentimeter nach hinten verschoben, dann sollte bereits das erste Hinterniss kommen, welches man ohne Gewalt nicht bewältigen kann. Hier muss das Gehäuse auf der Rechten Seite angehoben werden, dann lässt sich das Gehäuse ohne Probleme entfernen. Auch beim Zusammenbauen. Erst auf der Linkenseite bis zum ersten Plastik Haken (ca 2-4 Zentimeter vom Ende entfern) anlegen, danach auf der Rechten seite einklicken. Das Gehäuse kann auf der Rechten Seite auch etwas gedehnt werden, dabei geht nichts kaputt.

    Marcel -
    Please also revise this step. It is only the case for about 2-4 centimeters moved backwards, then should already come the first butt that you can not cope without violence. Here, the housing must be raised on the right side, then the housing can be removed without problems. Also when assembling. First put on the left side until the first plastic hook (about 2-4 centimeters from the end), then click on the right side. The case can also be slightly stretched on the right side, nothing breaks.

    Marcel -
  4. 2wJAtMfUuROdflWU
    2wJAtMfUuROdflWU
    DDedOIyfSuLkut2k
    Nv2sHu2rYATKCdWi
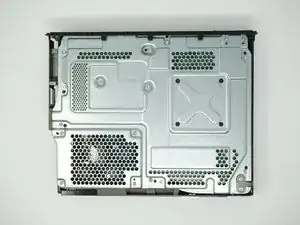
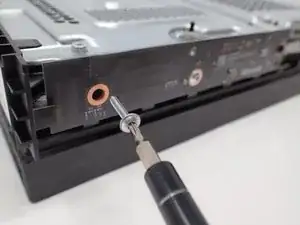
    • Entferne die beiden silberfarbenen 15 mm Torx T9 Schrauben, mit denen die Platine an der Seite des Metallgehäuses befestigt ist.

    • Entferne die schwarze 9 mm Torx T9 Schraube weiter rechts an der Platine.

    I feel like someone wanted to use a T9 for everything, but these were T8.

    Christopher McKay -

    You can use a T8 or T9 for this step. I was able to get all three screws with a T9 but there’s so little difference that both will work.

    Bryan Remely -

  5. sYlDUMiBUAp4iODb
    sYlDUMiBUAp4iODb
    Iha1jCGbuqE5cOcP
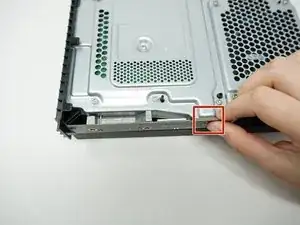
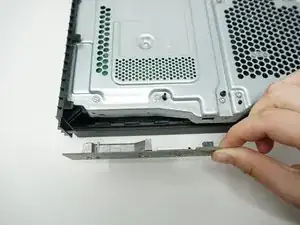
    • Ziehe das abgeschraubte Seitenpanel zu dir hin und entferne es.

    • Achte auf den empfindlichen Stecker.

  6. 314dZBPkdZKqRXHy
    314dZBPkdZKqRXHy
    fM4dRiqBSs1WasWo
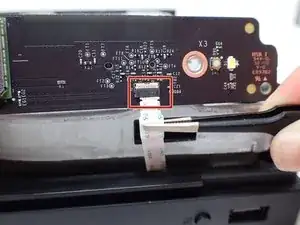
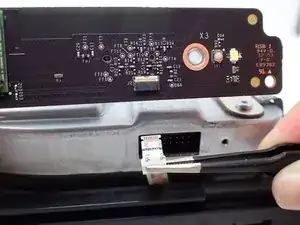
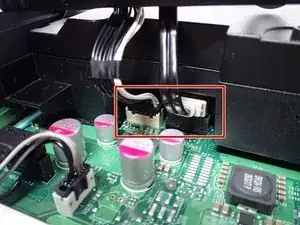
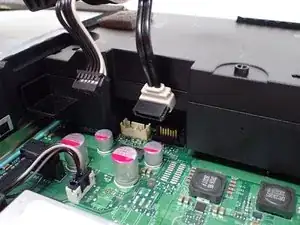
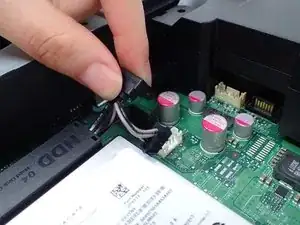
    • Ziehe die Oberkante des weißen Clips nach unten und entferne den weißen Stecker mit einer Pinzette.

    • Ziehe nicht zu stark am Stecker, vielleicht hilft ein bisschen Wackeln.

    Unfortunately the manual is not correct here. Above the black slot is a white switch / pen, fold it over with your fingernail, so fold it over to the front. Then the cable can be easily removed without any problems and tweezers. GERMAN: Hier ist die Anleitung leider nicht korrekt. Oberhalb des schwarzen Steckplatzes befindet sich ein weißer Schalter/Stift, diesen mit dem Fingernagel umklappen, also praktisch zu der Vorderseite umklappen. Danach lässt sich das Kabel ohne Probleme und Pinzette einfach abziehen.

    Marcel -

    Thank you. Had no idea what the !&&* this guy was talking about with the “pull down" part. You flip it downward gently like a flap.

    Get To The Point Already -

    there seems to be a missing step here. Nowhere are we told to remove the screws on this board.

    adcurtin -

    It is not necessary to remove the white flat cable. After removing the three gold screws from the board, go to the next steps and in step 9 remove the cover while hold the board against the cover to prevent stress on the white cable.

    Whole Witt -

    @Whole Witt, I second this. When you get to step 9 to remove the cover, just carefully remove the board, then remove the cover along with the board. You can leave the board in the cover.

    jonathan acosta -

    this is the worst step microsoft did bout this whole machine. most fragile thing is this right here. !!!!!!!!!!!!!!!!!!

    matt C -

    ok so the white thing see, just take finger nail. and on the far edge flip it up.. very delicate. putting back together flip down. its the the white plastic thing that moves

    matt C -

    To reinstall put it back down and push the ribbon into it. it will click into place

    matt C -

  7. FL11akYTnY3ldWAP
    FL11akYTnY3ldWAP
    xHbIf4Pxa2OScgAh
    14NweQKLxTF2d1Ea
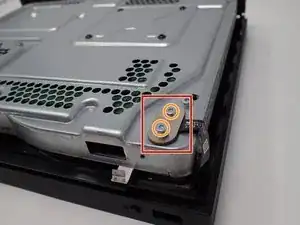
    • In der oberen Ecke, direkt über dem weißen Stecker, befindet sich eine von zwei Schrauben befestigte ovale Platte.

    • Entferne die beiden 7 mm Torx T9 Schrauben.

    • Ziehe die ovale Platte zur Seite.

    • Die Platte ist immer noch am Gerät angeschlossen.

    These are actually T8. Be careful trying to use a T9.

    Christopher McKay -

    these have the blue goo on them if you like me got a pile of screws

    matt C -

  8. aTHbtY5BWcJNO5vT
    aTHbtY5BWcJNO5vT
    MlUVqUASTiSEYj6l
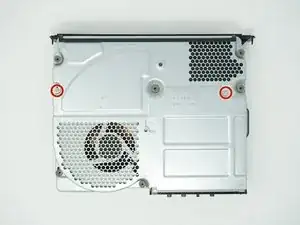
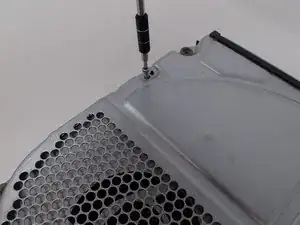
    • Entferne die sechs 47 mm Torx T9 Schrauben, mit denen der Boden am äußeren Gehäuse befestigt ist.

    These are all T10 on my Scorpio.

    Christopher McKay -

    These are T10 on the Xbox One X MFR Date 22-OCT-2017. You could get away with T9 and would be careful.

    Richard Lloyd (Tekeek) -

    My manufacture date is 15-JUN-18 and is not a Scorpio and is still T10. I would not recommend using a T9.

    Bryan Remely -

    They are t-10 and t-8

    Kellie Ramos -

  9. EsTFcVTDN3BvATSi
    EsTFcVTDN3BvATSi
    D3HELWsqHcPOdgn6
    6DG2R5KKw2YcVelt
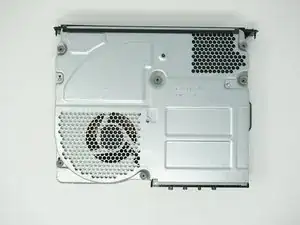
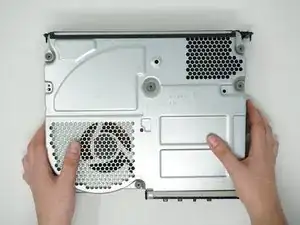
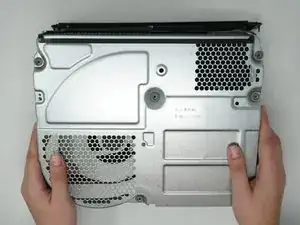
    • Lege die Xbox mit der Unterseite nach oben.

    • Ziehe den Boden des Gehäuses hoch zu dir hin und hebe ihn ab.

    I had to slide it forward off of the disc drive a little bit before I could lift up.

    Bryan Remely -

    When putting this cover back on, lay it flat and slide the case into it, slightly angling the front down so the plastic lugs on the BD-ROM fascia board slide into the slots in the cover You’ll have to push to the left slightly (with the cover flat side down and the front facing you) so as to depress the clip on the left-front side of the cover. You can check that the cover is on correctly by looking at the back of the cover and case and ensuring the screw holes on the cover line up with the case bezel.

    Chris Knight -

  10. IL2SOLHlJsLLeNLQ
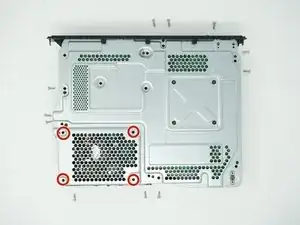
    • Drehe das Gerät wieder um, so dass die Oberseite oben liegt.

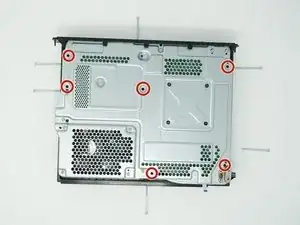
    • Entferne die restlichen vier kleineren 11 mm Torx T9 Schrauben in der unteren linken Ecke des Metallgehäuses.

    ugh, this is the worst step. you only should remove the 4 screws in the lower left for the hard drive. the rest of the screws in this step should stay

    adcurtin -

    All T10 for me. The 4 red circle screws are for the hard drive and should be removed later.

    Christopher McKay -

    This step appears it should be before Step 9

    Richard Lloyd (Tekeek) -

    These are also T10 like in Step 8

    Bryan Remely -

    This is unnecessary to remove the cover, this is ONLY necessary for the HD.

    Euripedes Claudino Leal Jr -

    Note the 5th screw to remove, top middle, otherwise the casing will not come off in step 12.

    Richard Russell -

  11. tsI3hcNdfuwPpORu
    tsI3hcNdfuwPpORu
    WNPZvCZ2CQeSeUSE
    • Drehe das Gehäuse wieder um, so dass die Unterseite oben liegt.

    • Entferne die beiden Torx T9 Schrauben an den gegenüberliegenden Seiten des Metallgehäuses.

    • Die linke Schraube ist 11 mm lang, die rechte 7,5 mm.

    T10 bit works better.

    Christopher McKay -

  12. KXcZ2eMQvm1uMLaR
    KXcZ2eMQvm1uMLaR
    DfvRRitk45eSFZCQ
    kiSpAtGdZbNFSGaw
    • Ziehe das Metallgehäuse nach oben und entferne es, so dass die inneren Bauteile frei liegen.

  13. pmoZxicNjxHinMf4
    pmoZxicNjxHinMf4
    FIePpp5SawhamOVe
    bAMNOtwQtEjJyvj5
    • Hebe das BD Laufwerk hoch und kippe es, so dass du an die Verbindungskabel zur Hauptplatine herankommst.

  14. DbsMExgNGsXBOJFJ
    DbsMExgNGsXBOJFJ
    dCOCGkEqtSiJxAQV
    XIetaqWU1dJld1DB
    • Löse mit den Fingern behutsam die beiden Kabelstränge zwischen Hauptplatine und Laufwerk ab.

    • Du kannst diese Kabel auch an den seitlichen Anschlüssen am Laufwerk ablösen. Das geht viel leichter, wenn das Netzteil nicht ausgebaut ist.

    • Nun sollte das BD Laufwerk ganz vom Gerät abgetrennt sein und du kannst es zur Seite legen.

    This step is much easier if you remove the black power supply module. Both wires are removed straight up (not towards the front of the Xbox, and forcing them forward could damage the wire, connector or board.

    Michael Alford -

    Alternatively remove the cables from the BD drive not the motherboard.

    Mark Kidd -

    You don’t have to remove the drive. just leave it connected after you remove the drive.

    jonathan acosta -

    If you’re just trying to get to the hard drive, I would recommend leaving the BD-ROM connected and just turn and rest it on the fan.

    Bryan Remely -

  15. VqZBhVvZOEjrfQ6U
    VqZBhVvZOEjrfQ6U
    HP5CWXt6aGQs51sZ
    rJmUMt22xVQDc2Kh
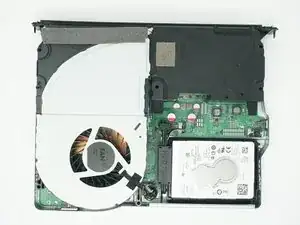
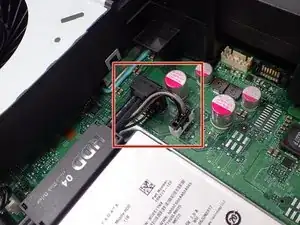
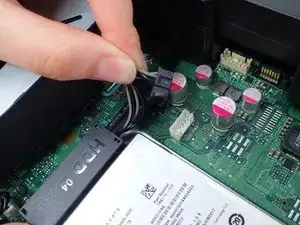
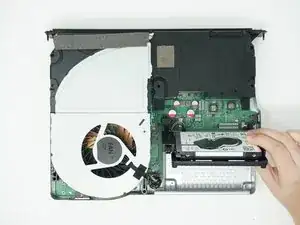
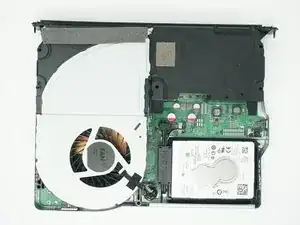
    • Löse die beiden Stecker rechts von der Festplatte ab.

    • Ziehe nicht zu stark an den Steckern. Eventuell kannst du sie mit wackelnden Bewegungen herausholen.

  16. QtZYXMbvNm4yLBkv
    QtZYXMbvNm4yLBkv
    myRuheDxq4JXggFK
    NThlrPssvRek65VP
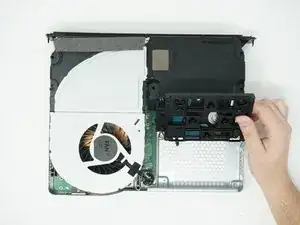
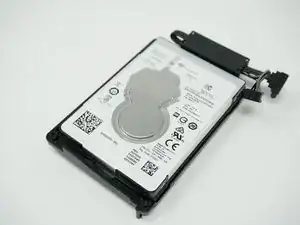
    • Hebe die Seagate-Festplatte aus dem Gehäuse heraus.

    Screw the drive caddy back in from the underside before replacing the BD drive and casing

    Mark Kidd -

    The screws to get the drive caddy off are T10. Take out the screws set in a little bit, not the wide ones.

    Bryan Remely -

Abschluss

Um dein Gerät wieder zusammenbauen, folge den Schritten in umgekehrter Reihenfolge.

Kyle Smith

Mitglied seit: 01/02/21

30367 Reputation

11 Kommentare

If I buy a new hard drive off of amazon, how do I install the Xbox OS back on? The offline usb?

SilentWorkForce -

The only way I found was to clone the disc sector-by-sector. I read online that you can expand it by making the “user content” partition larger.

Bryan Remely -

Do an offline update for xbox one x. I posted a link in another comment.

mike forrest -

I read a post somewhere saying that if Microsoft detect non-standard hardware in your system you could be banned. Has anyone had any experience with this?

David Marques -

I didn’t remove the fragile connectors, that ribbon cable I just opened the lock and slowly slid out the ribbon cable, I finally just put it all back together it took me a day, I done it very slowly, I have a SSD in there, it’s blazing fast. After doing all that download OSU1, extract it and format your USB to NTFS, copy $systemupdate to the root of your NTFS formatted USB, the update will auto partition and script the hard drive, download OSU1 from Microsoft, specifically search for offline Xbox update, then good luck putting your Xbox back together. No need to run third part scripts anymore.

King Difius -

I have had no luck finding the xbox one x os im not sure if its general for all xbox ones or if there’s a specific one for each? Also I’ve had not luck finding a source for a link to the code to reformat the drive that I trust (except for the ifixit youtube video but that link is dead.) in summary I was wondering if there is a good source someone could lead me to?

erik manousaridis -

This is the link for One X and One S models: https://support.xbox.com/en-US/help/hard...

The article says something about a different file for regular Xbox One. Idk what or where it is. But it’s on their site somewhere.

Andrew Sauk -

A couple of questions posted on installing the OS:

https://support.xbox.com/en-CA/help/hard...

*The download file is there too and you can see the link but you must right-click and save as. Regular left-click will not work.

mike forrest -

This was exactly right. New Hard drive in, the trouble shooter auto-ran when the xbox was turned on. I installed the update from a formatted Flashdrive and it’s all up and running.

(Running a 2018 Xbox One X)

Stuart Morris -

Good guide, thanks. There’s no need to unplug the sata cables from the main board, though, as there is enough play to reach the four screws holding the hdd to the plastic bracket.

Reinstalling the last part of the case can be tricky, the key is to locate the plastic lugs down one side of the base in their respective slots on the case. Once they’re in it all falls into place.

Mark Midderigh -

I purchased a 1 TB Samsung 870 QVO for my Xbox One X, I did not perform any formatting to the HDD prior to the install, it went straight from the packaging it came in and was installed in the console. I didn’t use any scripts or OSU files. I simply plugged the ethernet cable in and booted it up using the manual recovery button method. The Xbox immediately recognized the new SSD and automatically formatted and installed the OS. No special tools or hacks. The console is just like it was before just loads games a bit faster, I can play online, it updates when it needs to without hassle. Not sure why everyone is having such a hard time with finding so called software for the new hdd.

Stephen Sherfield -