Einleitung
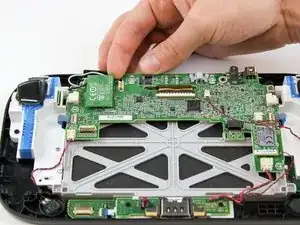
Diese Anleitung zeigt, wie die Bluetooth-Platine inm Wii U GamePad ausgetauscht werden kann.


Ersatzteile
-
-
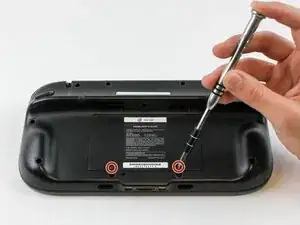
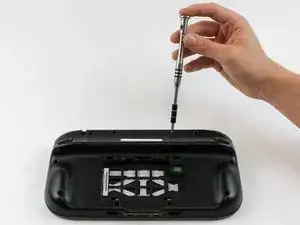
Drehe das GamePad um und entferne die beiden 4,7 mm Schrauben mit einem Kreuzschlitzschraubendreher #00.
-
-
-
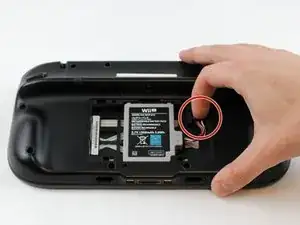
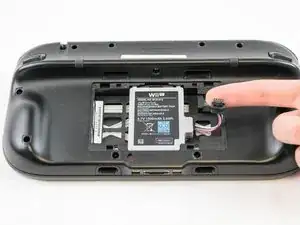
Drücke mit deinem Finger nach unten und ziehen sie Akkustecker heraus.
-
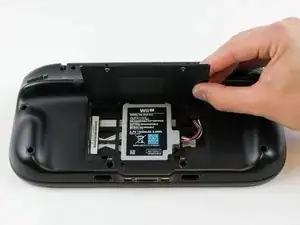
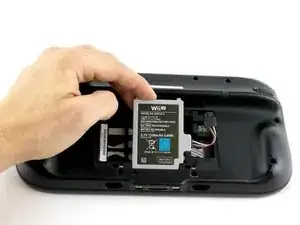
Entferne dann den Akku aus dem Akkufach.
-
-
-
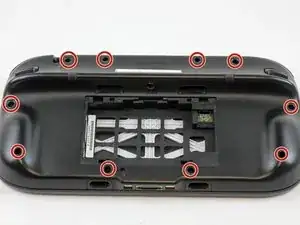
Entferne die zehn 9 mm Schrauben am äußeren Gehäuse mit einem Tri-Wing Y1 Schraubendreher.
-
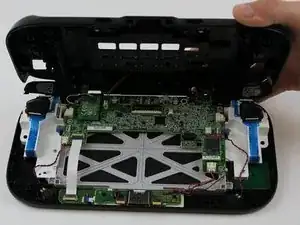
Hebe die Rückseite des Gehäuses an.
-
-
-
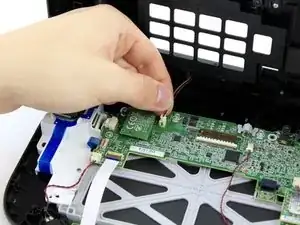
Ziehe mit den Fingern den Stecker des Rumble-Motors am äußeren Gehäuse von der Hauptplatine ab.
-
-
-
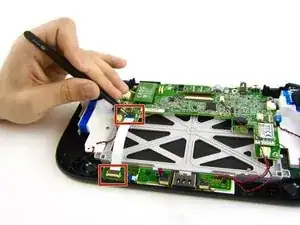
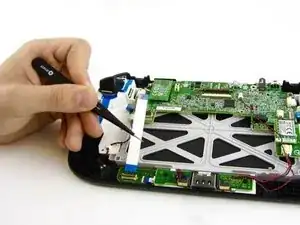
Löse die beiden Sicherungen am oberen und unteren Ende des weißen Flachbandkabels mit einer Pinzette.
-
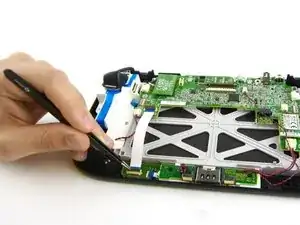
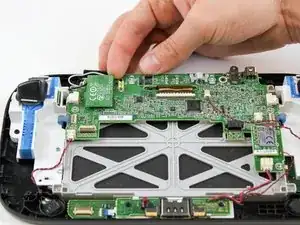
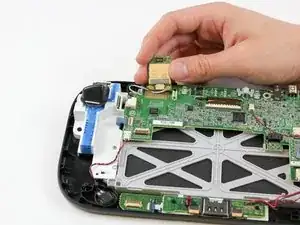
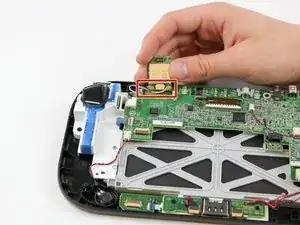
Entferne das weiße Flachbandkabel mit einer Pinzette.
-
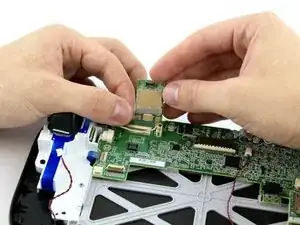
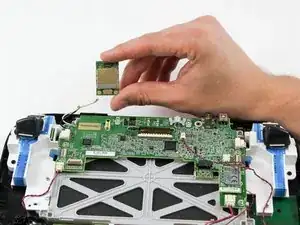
Um dein Gerät wieder zusammenbauen, folge den Schritten in umgekehrter Reihenfolge.

10 Kommentare
I just completed this repair on our Game Pad, and it worked perfectly!
There were two things that I noted that may be of use to anyone else completing this repair. First, the 9mm screws on the back may be located under small stickers used to conceal the screw holes. If you take them up carefully with a knife or other flat blade, you can reuse them if desired. Second, I didn’t see the need to remove the white ribbon cable in step #6. I successfully completed the repair without that step.
I just completed this repair on our Game Pad, and the guide worked perfectly!
There were two things that I noticed that may be of help to someone else completing this repair. First, note that the 9mm screws holding the back on may be located under small black stickers used to hide the screw holes. If you take them up carefully with a knife or other flat blade, you should be able to reuse them if you desire. Second, I didn’t see a need to remove the white ribbon cable in Step #6. I successfully completed the repair without that step.
Cheers!
This fix worked perfectly - our Wii U was virtually unusable because of the severely limited range of the gamepad. My kids are thrilled that they can comfortably play again!
tried to unscrew the 10 Tri-Wing size Y1 screw with my iFixIt toolkit
unfortunately the tool is too “fat” and short, it cannot reach 4 screws on the corners of the gamepad.
having the iFixIt toolkit and needing to purchase an additional slim screwdriver it’s a shame…
Antonello Iannone -