Einleitung

Diese Anleitung zeigt, wie das Gehäuse des Nintendo Wii U GamePads entfernt wird. Du benötigst dazu einen Tri-Wing Y1 Schraubendreher.

  1. dKTaxZjIUAsyAXlI
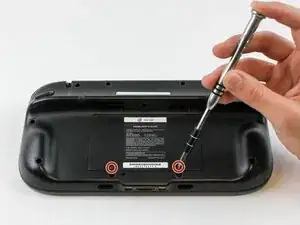
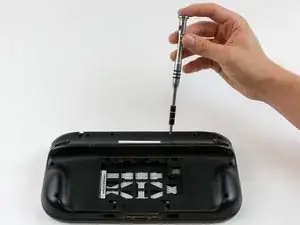
    • Drehe das GamePad um und entferne die beiden 4,7 mm Schrauben mit einem Kreuzschlitzschraubendreher #00.

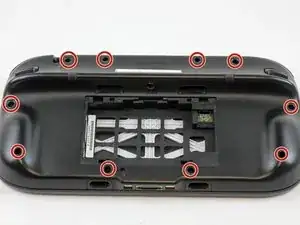
    tried to unscrew the 10 Tri-Wing size Y1 screw with my iFixIt toolkit

    unfortunately the tool is too “fat” and short, it cannot reach 4 screws on the corners of the gamepad.

    having the iFixIt toolkit and needing to purchase an additional slim screwdriver it’s a shame…

    Antonello Iannone -

  2. jQnDZvXRQvPOXfpG
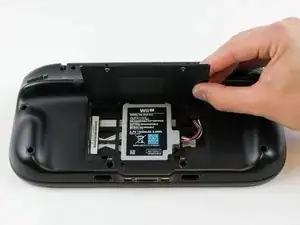
    • Hebe die Batterieklappe an und entfernen sie.

  3. qZN3PgyACtZ5Tw4i
    qZN3PgyACtZ5Tw4i
    nDakTZouVNlkKPKx
    o4RQ44lFuusIk4uU
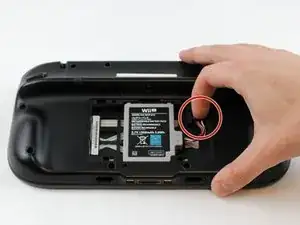
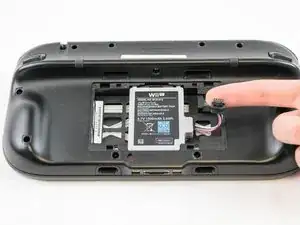
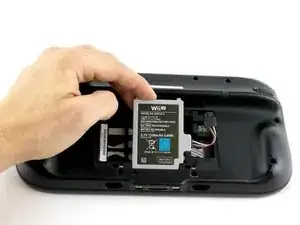
    • Drücke mit deinem Finger nach unten und ziehen sie Akkustecker heraus.

    • Entferne dann den Akku aus dem Akkufach.

    Battery lifts up from the bottom not the top like the photo shows.

    Tyler Schommer -

  4. IlOVIxDuCaqAuWCO
    IlOVIxDuCaqAuWCO
    iNj1oAZjk4bbQA1g
    CfComIPOOBMDkYhT
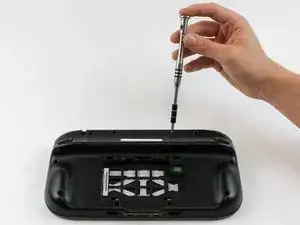
    • Entferne die zehn 9 mm Schrauben am äußeren Gehäuse mit einem Tri-Wing Y1 Schraubendreher.

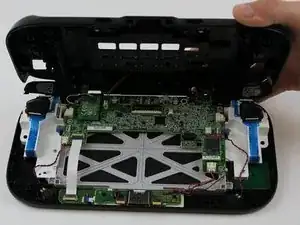
    • Hebe die Rückseite des Gehäuses an.

    • Hebe sie vorsichtig an, da der Rumble-Motor auf der Rückseite des Gehäuses immer noch über ein Kabel mit der Hauptplatine verbunden ist.

    I used a small blade tip to life up on the black squares that covered the screw holes. Replacing them after.. I skipped that as it seemed impossible they would even stick back down.

    Chris -

    I am having trouble getting the two screws on the hand grips as the screws are too deep. What should I use to get them?

    Essma -

    I ended up having to buy some cheap amazon screwdrivers and are very disappointed

    Essma -

  5. MBTkFeprlTH425NV
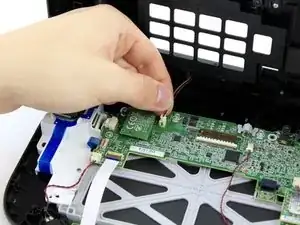
    • Ziehe mit den Fingern den Stecker des Rumble-Motors am äußeren Gehäuse von der Hauptplatine ab.

    Do not pull by the wires! If you do, you better be pretty good at soldering.

    Brandon -

    I agree. A circle over the plug would have been better as the picture looks like you just pull on the wires lol.

    Chris -

    Thanks for the comment. I did get a set of tweezers and the negative cable broke anyway. They really could have done a better job at using a different connector for that.

    Kristen Bartholomew -

    Great. Didn't pull on cord. Whole thing ripped off.

    August -

    Why in the world is this thing so tightly connected?

    Andrew Moore -

    Thanks for the comment. I did get a set of tweezers to try to pull it out but still ended up breaking the negative cable. They really could have used a better set of cables and connectors for this.

    Kristen Bartholomew -

Abschluss

Um dein Gerät wieder zusammenzubauen, folge den Anweisungen in umgekehrter Reihenfolge.

Valentina Cerruty

Mitglied seit: 10/02/16

2967 Reputation

Ein Kommentar

This doesn't show anything about taking the front of the housing off, is that relatively straightforward?

Will Prosser -