Einleitung
Diese Anleitung zeigt dir, wie man die Batterie in einem TI-30 XS MultiView ausbaut und ersetzt. Notiere dir bitte unbedingt, in welche Richtung diese eingelegt wird, wenn du die neue Batterie einsetzen willst.
Werkzeuge


Ersatzteile

-
-
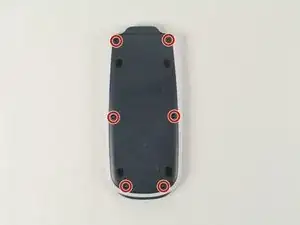
Drehe die sechs 6mm Kreuzschlitzschrauben #00 heraus.
-
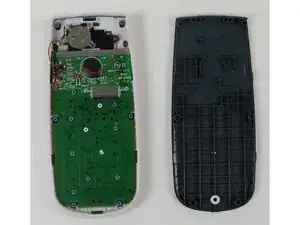
Setze den Spudger in den Spalt zwischen der blauen Rückseite und dem weißen Oberteil ein und heble die Rückseite ab.
-
-
-
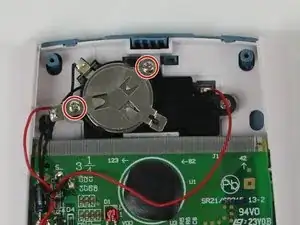
Benutze den Kreuzschlitzschraubendreher #00, um die beiden 3 mm Schrauben nahe an der Oberseite vom Taschenrechner zu lösen.
-
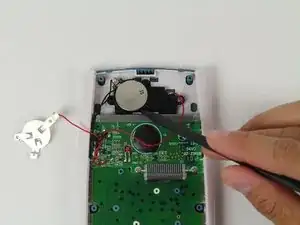
Hebe die Metallplatte von der Batterie ab und lege diese zur Seite.
-
-
-
Setze eine neue CR2032 Batterie ein. Benutze niemals einen anderen Batterietyp!
-
Führe Schritt 2 und 1 umgekehrt aus.
-
Um dein Gerät wieder zusammenzusetzen, arbeite die Schritte in umgekehrter Reihenfolge ab.

7 Kommentare
Hi, I followed your steps but my battery cover is not in the location that your photo indicates and the cover screws are not visible. There seems to be something covering them?
Why would my battery be situated next to the round black thing and yours is located above it at the top? If the calculator is a TI-XS 30 Multiview why on earth would they vary the orientation of internal components?
(I have had this calculator since 2006 - 12 years - it died this morning and I am disconsolate. Please help me figure out how to take the battery cover off or convince me to dispose of it.) ….I hate throwing away a good machine, even if I need to buy a more up to date graphing machine.
Eric of Ann Arbor
eric@engeltutors.com
Please note - My battery screws (the ones that were inside the calculator next to battery) were actually glued over. I had to push the old battery out with my screw driver and push it out manually. It worked though. Glad I didn’t have to toss it, one less thing going into the land-field.
Wait a minute. Why does this calculator need a battery if it has a solar cell. It must be a fake solar cell to deceive.
It charges the CR2032.
You can shine a light on the panel and remove the battery and the calculator will still work.
I didn’t have a spudger but a flat 3/32” jeweler’s screwdriver worked just as well. Also, the battery slides out the side, nothing to undo. I slid it out using a jeweler’s screwdriver. (Don’t touch any electrical components or traces with the metal tip.) If you’re not sure the battery is good, turn the unit over and see if there is anything displaying, or run a test operation like 2 x 2 etc. to check before putting the back into place.
Therese S -