Einleitung

Wenn dein Kopfhörer auch nach Durcharbeiten unserer Troubleshooting-Seite noch nicht funktioniert, muss möglicherweise die Kopfhörerbuchse ausgetauscht werden.

  1. GZ2Pki1FpHlvCO3S
    GZ2Pki1FpHlvCO3S
    5VJRorbfRR23MCuC
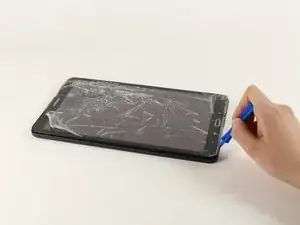
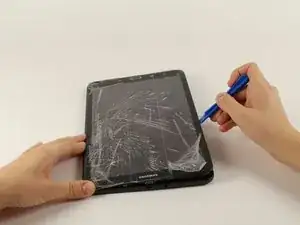
    • Lege das Gerät mit der Vorderseite zu dir.

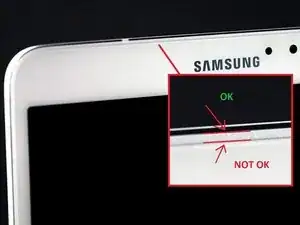
    • Fange an einer der abgerundeten Ecken an. (Vergleiche mit Bild 2).

    • Setze ein Plastiköffnungswerkzeug zwischen Vorderteil und Rückteil.

    • Wenn ein Plastiköffnungswerkzeug nicht funktionieren sollte kannst du es mit einem Metallspatel probieren, dies könnte allerdings den Kunststoff beschädigen.

    • Denke dran, dass du als erstes eine eventuell vorhandene micro-SD-Karte entfernen musst.

    AWESOME!! I was trying to open it from the “NOT OK” place and you saved me to broken the screen… thanks!!

    David Leiva -

    No problem, enjoy.

    Roger L. Ortiz -

    Felt it was easier for me to do it from the middles out.

    Tanin Garcia -

    Well then you are messing up the digitizer part, which sucks to replace on your own because it will never be stable again, ghost touches with fake digitizer with fake 3m double sided tape that doesn’t stick..

    Roger L. Ortiz -

    Important: the display is sourrounded with a plastic frame. You need to get beween this frame an the backcover (not directly at glass edge as I tried it first and almost broke the glass). Get a closeup picture of it to clarify.

    Oliver Dawid -

    wer lesen kann, ist klar im Vorteil - ich hab die SD-Karte drin gelassen. Hat aber funktioniert…

    Thomas Wolter -

    Don’t use a very small flathead screwdriver as a spudger. Just shattered the screen :(

    nikvoss -

  2. FEt6AIIjfR5mPXQH
    FEt6AIIjfR5mPXQH
    SOQODCRyQZlwVvj1
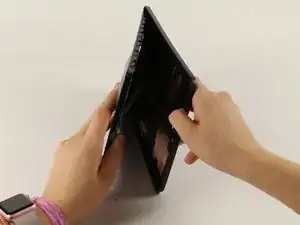
    • Wenn du das Werkzeug einsetzen konntest, dann schiebe es rings um das Gerät, um die Teile zu trennen.

    • Hebe den Rückdeckel vom Gerät weg.

    • Beim Öffnen wirst du klickende Geräusche hören.

  3. fPglWd16CqrfTnPk
    fPglWd16CqrfTnPk
    Ixaqq2Rd5qpRFqsy
    xE4TWX2YDWswXU6Z
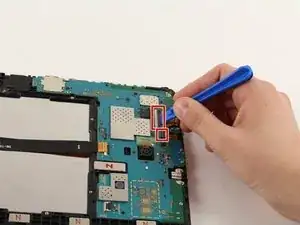
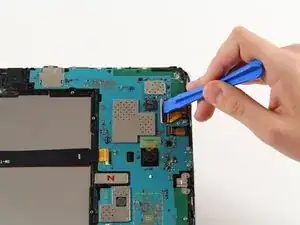
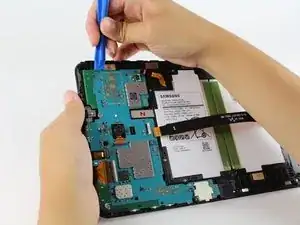
    • Klappe die Sicherungsbügel an den beiden ZIF Verbindern auf der Hauptplatine mit einem Plastiköffnungswerkzeug hoch.

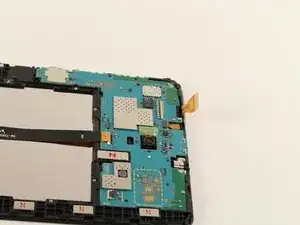
    • Schiebe die beiden orangenen Flachbandkabel aus den Verbindern heraus.

    • Entferne die Frontkamera.

    This step omits the disconnection of the battery from the motherboard , which is shown disconnected in this picture but was connected in the previous step

    Christopher Ford -

    Thanks for bringing this to our attention. We added the relevant battery disconnection steps—hope this helps!

    Kristen Gismondi -

    If the model you are working on is the T585 you will need to carefully pry up the blue antennae cable and disconnect the sim card slot from the motherboard.

    Brendon Gould -

  4. ZeXlPco1GFY2fcas
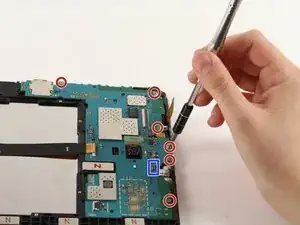
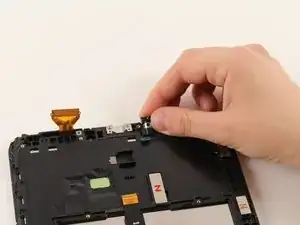
    • Trenne die Kopfhörerbuchse von der Hauptplatine ab.

    • Entferne sechs 4 mm Kreuzschlitzschrauben #000.

    die ganze Platine musste ich gar nicht ausbauen. Ich konnte die Kopfhörerbuchse vorsichtig mit einem kleinen flachen Schrubendreher lösen.

    Thomas Wolter -

  5. sR1EQqLISYUKoWBI
    sR1EQqLISYUKoWBI
    ZWuKRRPlJL6FGDYS
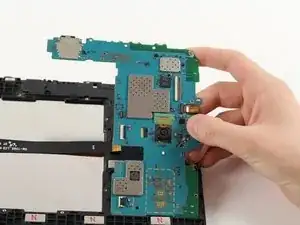
    • Setze das Plastiköffnungswerkzeug unter die Hauptplatine und hebe sie aus dem Tablet.

    • Achte darauf, dass sich keine Stecker verfangen.

    • Entferne die Metallhalterung unter der Ladebuchse und lege sie zur Seite.

    Replacing the broken screen, I stupidly unhooked the LCD with a metal screwdriver. It makes the sound of coming on but no picture. Is that the motherboard?

    MARGARET -

    I replaced screen once before and had no problem except using a screwdriver this time.

    MARGARET -

    I have tab a charging and show on screen but not starting at all motherboard water damage I clean all there any way make it start by motherboard with out power button

    waleed nawzad -

  6. 2cEKxxfiXCHx2cRn
    2cEKxxfiXCHx2cRn
    d6aITIhLNBUfq6Up
    HvYKdh2yOHZvXDQv
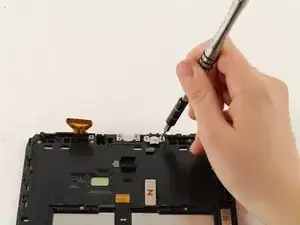
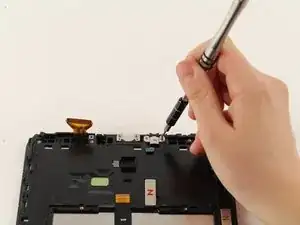
    • Entferne zwei 4 mm Kreuzschlitzschrauben #000 an der Kopfhörerbuchse.

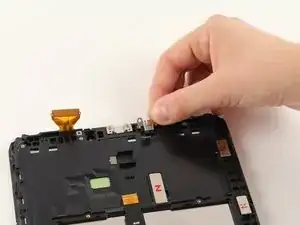
    • Hebe das Metallstück, welches die Kopfhörerbuchse bedeckt, ein wenig vonder Seite her an.

    • Hebe die Kopfhörerbuchse heraus.

Abschluss

Um dein Gerät wieder zusammenbauen, folge den Schritten in umgekehrter Reihenfolge.
Isabella Li

Mitglied seit: 02/10/17

2181 Reputation

5 Kommentare

where can i buy a new piece of headphone jack for my tab A?

Sven Leysen -

I just used this guide to change the headphone jack on a Galaxy Tab A 10.1 SM-T580.

After taking the back off (Step 2) the headphone jack is fully accessible (Step 10).

I didn’t need to remove anything else, so Steps 3-9 inclusive were not required for me.

Matt Griffiths -

Very helpful instructions.

I likewise found the headphone jack to be fully accessible (SM-P585Y). The metal cover sticks a bit, but it’s only held down by the two screws. The headphone jack itself rests on top of a slightly adhesive pad.

Benny Lawrence -

Galaxy Tab A6 2016 - SM-T580

Die Kopfhörerbuchse habe ich bei Ebay (lt. Angebot neu) für unter 5€ gekauft. Anstelle des Plastikwerzeugs habe ich ein normales dünnnes Schmiermesser genommen. Mein Tablet is ja auch schon was älter. Von daher war es mir egal, was passiert, wenn ich nicht das Plastikwerkzeug benutze.

Gehäuse geöffnet, die beiden Schrauben an der Buchse rausgeschraubt und dann vorsichtig mit einem flachen Schraubendreher gelöst. War offensichtlich mit einer Art doppelseitigem Klebeband fixiert.

Buchse getauscht, zusammengebaut, getestet - funktioniert!!!!

Vielen Dank für die tolle Anleitung, die einem Mut macht, es selbst zu probieren.

Thomas Wolter -