Einleitung
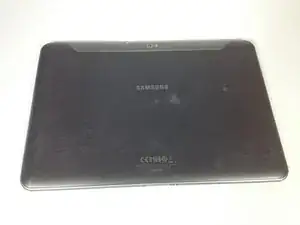
Hier wird gezeigt wie man die Rückabdeckung abnimmt, entweder zum Austausch oder um ans Innere zu gelangen.


Ersatzteile
-
-
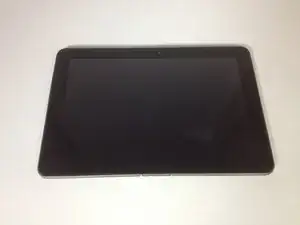
Drehe die Unterseite nach oben.
-
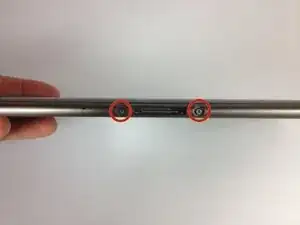
Drehe die zwei 4,1 mm Schrauben bei der Ladebuchse mit einem Tri-Wing Schrauber heraus.
-
-
-
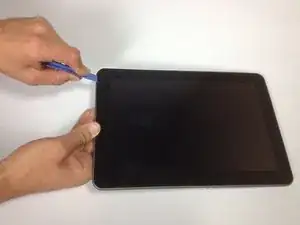
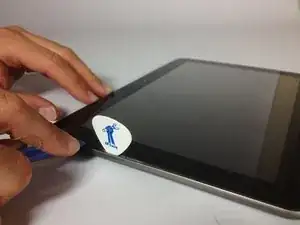
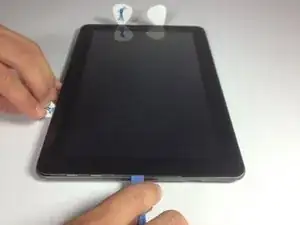
Beginne in der Mitte der linken Seite und führe ein Plastiköffnungswerkzeug zwischen die Rückwand und die Front Panel Einheit ein.
-
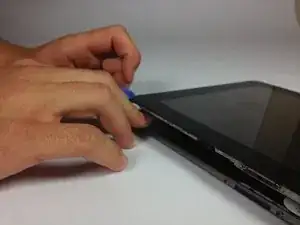
Fahre das Plastiköffnungswerkzeug vorsichtig entlang der linken und oberen Kante, um die Rückwand vom Rest des Gerätes zu trennen .
-
-
-
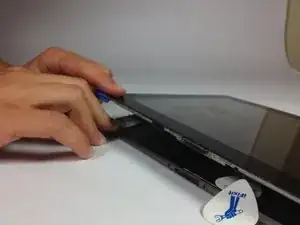
Fahre fort mit dem Plastiköffner sorgfältig an der rechten und unteren Kante entlang zu fahren. Hebe dann dann die Scheibe von der Rückseite ab.
-
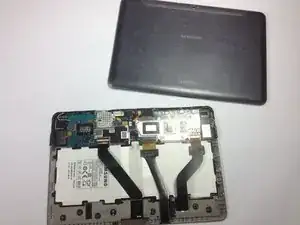
Um dein Gerät wieder zusammen zu setzen folge den Schritten in umgekehrter Reihenfolge.

3 Kommentare
Very interesting, but my note 10.1 does not have these two screws adjacent to the charge point as you describe. So mine is a bit different. There are no screws anywhere on the tablet. So how do I take the back off mine ??
It currently won’t start and I have read about a fix that requires the back to be removed.
What - How - Ware ? Yes I looked online for the parts, no I was not successful in finding the parts online. Can you tell me ware you found the parts for this project?
Access denied! The screws near the port are covered by buttons. I wedged a pointed screw and hammered "gently" until they popped out. Problem solved!
Daniella -
My model doesn't have any screws!
Barry -
What can I do if my model DOESN'T HAVE ANY SCREWS? It has a loose LCD cable so SOME of my colours are all mixed up. This is really frustrating so please help
Janine Coetzee -
I have SG Tab Pro 10.1
There are no screws..... now what?
iloveto travel -
Great instructions! Easy to follow.
skritzberger -
My model has no screws.
Faith Odutola -
My model has no screws and doesn't look like the one pictured here. It's a model SM-T580.
Elsa Kramer -
Be careful removing the two screw plugs by the 30 pin connector. They are easy to scratch. I couldn’t get the plugs out with my tool kit and finally removed them with the point of an exacto knife.
Behind the two plugs are sticky pads that will need to be handled carefully and saved for reassembly.
If you order a tool kit online, be sure it has a Y1 tri-wing screwdriver. The one in my kit was not Y1 and would not remove the screws.
I had to order a new screwdriver.
George Tomlinson -
I don't see any screws I have a galaxy tab 4
Tammylynn Gmarter -
if your model doesn’t have these screws, it’s probably ok to just skip this step. at least that’s what i did on model gt-p7500, and that repair was successful (battery replacement). Janine, a friend asked me to fix his Tab where that had happened when he tried to replace the battery himself… i just took out the 3 big cables over the battery, and re-inserted them, and that fixed the problem. you should try that if you haven’t already..
divinity76 -
Mine doesn't have screws so what do I do now?
katrinawisner -