Einleitung

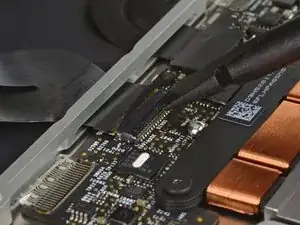
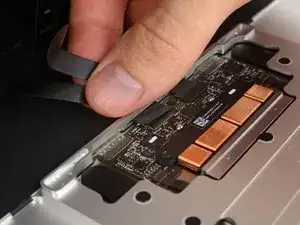
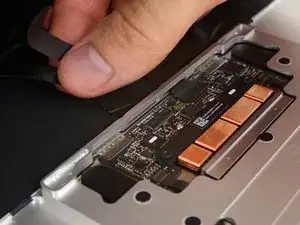
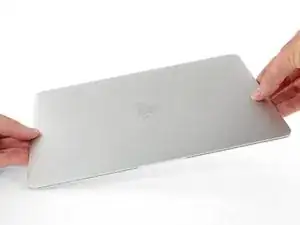
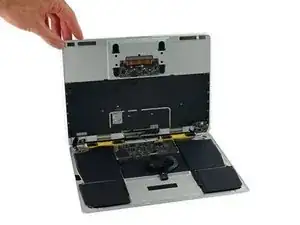
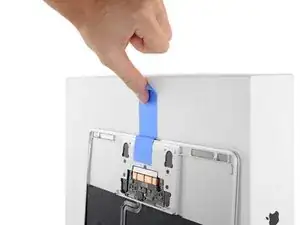
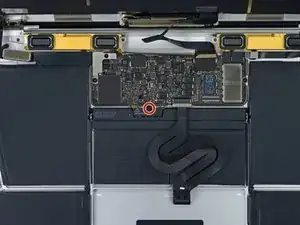
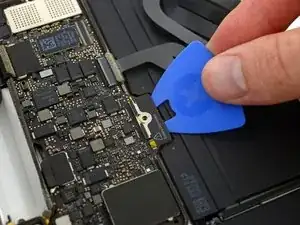
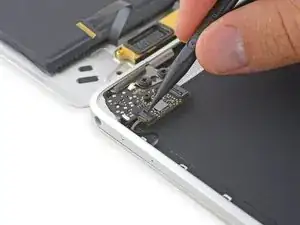
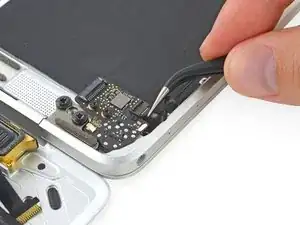
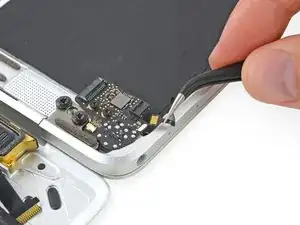
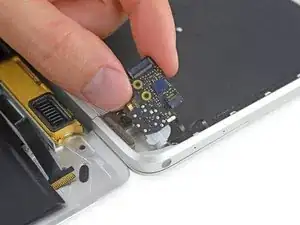
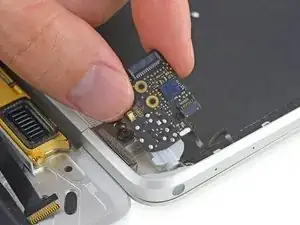
Ist deine Kopfhörerbuchse abgenutzt? Diese Anleitung zeigt dir, wie du die 3,5 mm Kopfhörerbuchse und die daran angebrachte Audioplatine als eine Einheit austauschen kannst.

  1. WTpjAPhBML2eX4Z1
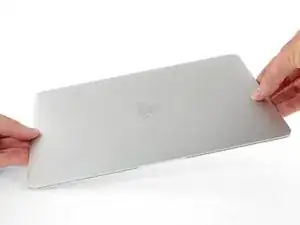
    • Bevor du weiterarbeitest, ziehe das Netzkabel und schalte das MacBook aus. Klappe das Display zu und lege den Laptop mit der Unterseite nach oben auf eine saubere weiche Arbeitsfläche.

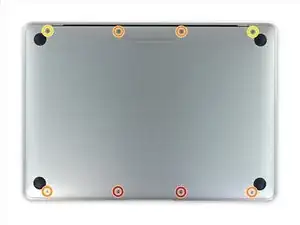
    • Entferne folgende acht Schrauben, mit denen das untere Gehäuse befestigt ist:

    • Zwei 1,8 mm Pentalobe P5 Schrauben

    • Vier 2,9 mm Pentalobe P5 Schrauben

    • Zwei 6,1 mm Pentalobe P5 Schrauben

    • Schaue dir beim Ausbau die Lage der Schrauben genau an - sie müssen beim Eindrehen leicht schräg stehen.

    • Halte bei der ganzen Reparatur die Schrauben gut geordnet und passe auf, dass jede Schraube genau auf ihren alten Platz zurück kommt, damit keine Schäden am Gerät entstehen.

    IMPORTANT. You’re not removing the bottom, yet. This step is solely to separate the panel from its clips, permitting inside access.

    Chris Leeds -

    The screws go in tangent to the curve of the case. If you aren’t used to handling small hardware try turning the screw counterclockwise while you feel for the hole until you feel it drop, that means the threads have aligned. It takes only light finger torque when they are threaded correctly

    abscate -

  2. oFRbloAsCqR4kMZO
    oFRbloAsCqR4kMZO
    o5lecdLOaMSsveUP
    OjOkolyUJbLFruoW
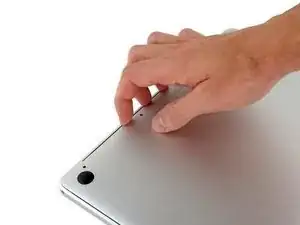
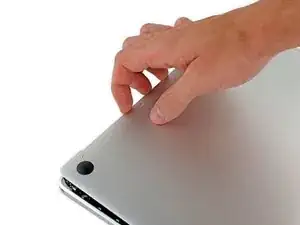
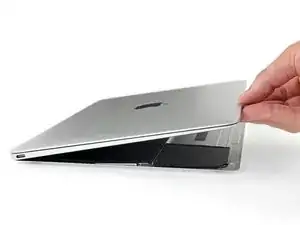
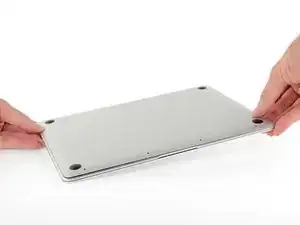
    • Zwänge deine Finger in den Spalt zwischen dem oberen und dem unteren Gehäuse. Beginne an der Rückseite des MacBooks zwischen den Scharnieren.

    • Hebe das untere Gehäuse nur ein wenig an, damit Schäden an den Kabeln, die das obere und untere Gehäuse verbinden, vermieden werden.

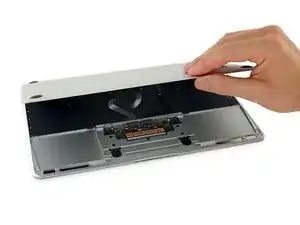
    • Fasse das untere Gehäuse fest an und hebe es gleichmäßig hoch, bis es sich vom oberen Gehäuse löst.

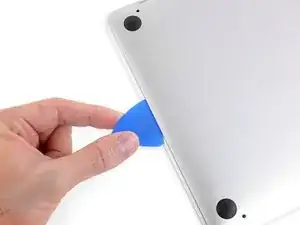
    • Möglicherweise geht das Hochheben des unteren Gehäuses schwer. Schiebe ein Plektrum oder ein anderes ESD sicheres Werkzeug an den Seitenkanten des unteren Gehäuses entlang , um die beiden versteckten Klammern zu öffnen.

    • Damit diese Klammern beim Zusammenbau wieder einrasten, musst du fest auf die beiden Seitenkanten des unteren Gehäuses drücken (in der Nähe des Plektrums im dritten Bild), bis du es einrasten hörst.

  3. v2ajYWLVaPyfdKBp
    • Halte das untere Gehäuse gut fest und drehe das MacBook vorsichtig um, sodass das Apple Logo nach oben zeigt.

  4. pYEJCQSeMGAEyFJM
    pYEJCQSeMGAEyFJM
    VjPKdFrhi2OEvgks
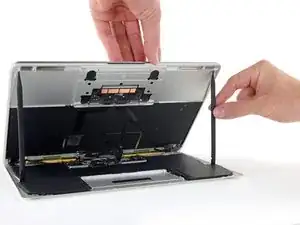
    • Hebe das obere Gehäuse und das Display zusammen von der Vorderkante her nach oben an, bis es mit einem Winkel von etwa 45° steht.

    • Es ist hilfreich, wenn du es in dieser Stellung für den nächsten Schritt abstützt.

  5. EXWTgtXS2vPBhGKP
    EXWTgtXS2vPBhGKP
    1JKIDRDVVFDBjMCr
    rUDUCKRgWBKStQAM
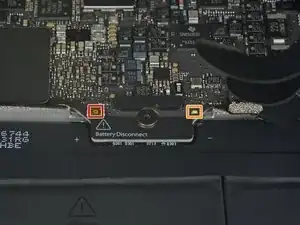
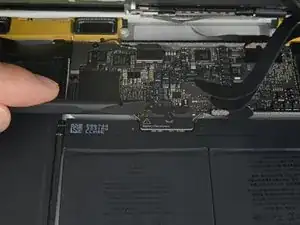
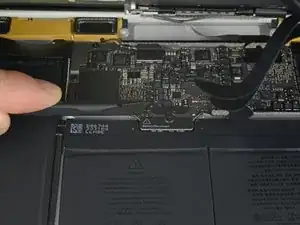
    • Drücke mit dem flachen Ende des Spudgers die goldfarbene "battery disconnect" Taste und halte sie fest.

    • Wenn die Einschalt-LED aufleuchtet, dann halte die Taste weiterhin gedrückt, bis die LED erlöscht. Das kann bis zu 10 Sekunden lang dauern.

    • Wenn die LED nicht aufleuchtet, dann lasse die Taste nach 5-10 Sekunden los. Drücke und halte sie für weitere 5-10 Sekunden und lasse los. Drücke und halte sie zum Abschluss erneut für 5-10 Sekunden und lasse los.

    • Durch dieses Verfahren wird sichergestellt, dass das MacBook ganz heruntergefahren ist und sicher daran gearbeitet werden kann.

    cannot turn on the led after replacing the new screen, even after following the turn on instructions upper…

    Laurent Pierre -

    on reassembly, I had to plug my laptop in to reactivate the LED light

    aaron_vandyke2003 -

    Does anyone know how to turn it back on..? I plugged the laptop in and saw the LED Light, but it won’t turn on

    mmcsorley -

    After reassembly I could not restart my MacBook using the power button or after SMC reset (shift-ctrl-option-pwr). I had to connect my MacBook to its charging cable to get the battery LED to re-illuminate. After that it was all normal.

    Richard Lovatt -

    It took a few minutes on the power adapter for my computer to turn on after it was reassembled.

    Luk Chl -

    mine doesnt turn on w anything, i forgot to click the buton to disconnect :_/

    cristian.campuzano -

    Same issue as above peeps. Followed ifixit directions verbatim and wasn't getting anything after screwing everything back in. Plugged in original 45W power block and waited, after few minutes battery LED came on and a min. or two after that, was able to get screen to turn on. Hope this helps somebody else.

    Brandon Elliott -

    May I ask how to get screen to turn on. I cannot get it work..

    Xiubo Zhang -

    There needs to be mention of procedure for getting the repaired MacBook to power up again after the repair is completed.

    I also am running into the issue described by others. MB will not come on again, even after being plugged into power and performing an SMC reset.

    Kinda stuck….

    Carlos Perez -

    Hi, I tried everything and my MacBook will not start up after replacing the bottom case with a battery installed. I decided to put back on the old case with the battery that needs servicing and it still will not power on. I am fairly experienced taking apart laptops I was an Apple service tech for 15 years. this has me baffalled. Any hints BTY the logic board does not show any power coming from the AC charger the power LED is not lit up

    eestern -

    I had trouble with this as well. What worked for me is to plug in power using the stock 29W USB C power brick that originally came with this Macbook. Trying other, lower powered, power adapters did not work. Use this advice with caution as there are multiple (i.e substantiated) comments that indicate that first power up should only be with a 5W adapter! So perhaps try this strict sequence: try with a 5W adapter, then and only then try with the 29W adapter. Or even slightly better, if everything else has completely failed, only then try full power 29W adapter.

    LexxOne -

    How long did you wait to get it power back on? I replaced my logic board and tried to connect the power charger but it doesnt still turn on.

    Herb -

  6. 1xlLw6pjiuElshkZ
    • Schließe das MacBook und lege es mit der Unterseite nach oben hin.

  7. 2GYsPBbAwkEqs2xq
    • Hebe die Vorderkante hoch, bis das untere Gehäuse mit einem Winkel von etwa 45° geöffnet ist.

    • Achte darauf, dass die Flachbandkabel, mit denen das untere Gehäuse immer noch am MacBook angeschlossen ist, nicht beschädigt werden.

  8. lGBQcICtFaslxUHu
    lGBQcICtFaslxUHu
    uhunJJRpxlkLAvhl
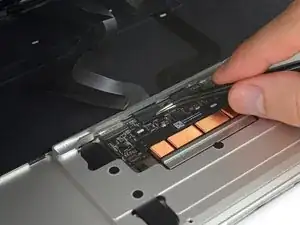
    • Löse mit einer Pinzette das Klebeband ab, mit dem der ZIF Verbinder des Trackpadkabels bedeckt ist.

    Where can I find a replacement cable?

    John Comix -

  9. iImRKXAcEWwgyePw
    iImRKXAcEWwgyePw
    b3YwfdgUUlOCsXSy
    LMjS3bqlbWDB4ieE
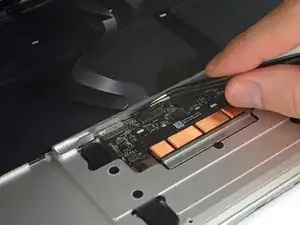
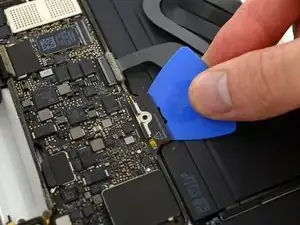
    • Klappe vorsichtig den Sicherungsbügel am ZIF Verbinder des Trackpadkabels mit einem Spudger hoch.

    The small retainer flips up about 90 degrees from locked position

    abscate -

  10. WeOX4JZDcQrqklNd
    WeOX4JZDcQrqklNd
    qtXyAcpgiAVCBmVC
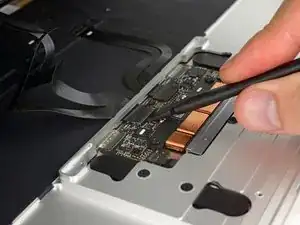
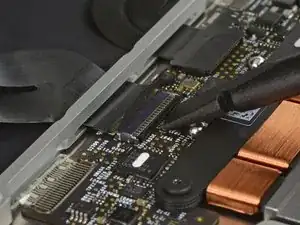
    • Ziehe das Flachbandkabel des Trackpads vorsichtig durch den Schlitz im Rahmen vom Trackpad ab.

  11. CDaHMX5h1aFsjtL2
    CDaHMX5h1aFsjtL2
    iLYAVQ2N3yLQFkvC
    XbPR6F5Pfwam2NkO
    • Schließe das MacBook sorgfältig und drehe es wieder um, so dass das Apple Logo nach oben zeigt.

    • Klappe das obere Gehäuse/Display Einheit etwa rechtwinklig auf und stütze es an einem stabilen Gegenstand, so dass du es nicht festhalten brauchst.

    • Klebe das obere Gehäuse mit einem Klebeband in der Nähe des Trackpads fest, so dass es sich nicht versehentlich bewegen kann.

    • Man könnte zwar das MacBook die ganze Zeit flach aufgeklappt lassen, dies ist aber nicht zu empfehlen, da die Flachbandkabel beschädigt werden können.

  12. KhNCZTtfaGxFvwMu
    • Entferne die einzelne 2,9 mm Torx T5 Schraube, mit der der Akkuanschluss am Logic Board befestigt ist.

    From my experience it’s important to carefully press and hold the small button above left of the Battery Discharge label. Use a plastic spudger or finger tip. The illuminated yellow LED to the right will go off. I believe this discharges remaining electricity from logic board protecting it during repair.

    * I cannot find any documentation to support this, but I have damaged boards by not including this step.

    Chris Leeds -

    What is with the all plastic end of this cable that appears to just be glued right on top of its connector?

    Does the new one just stick back right on top?

    (In this photo it is the bottom side of the cable below the white water indicator sticker)

    Elizabeth Erkelens -

  13. pTJmavEfBv2DXgVU
    pTJmavEfBv2DXgVU
    VUebfHZqvKTpapBB
    • Als zusätzliche Sicherheitsmaßnahme kannst du den Akku physisch trennen, indem du ein Akkuisolierstück zwischen Logic Board und Akkuanschluss einsetzt.

    What happen if you don’t disconnect the battery? I didn’t and I saw smoke coming out when I connected the pad flex cable and the computer still started up

    DSANTIAGOSOY -

    If you don’t disconnect the battery you might accidentally short something on the logic board since power is still running through everything while you’re working on it. You can complete the repair without disconnecting the battery, but you risk accidentally breaking your logic board. It’s much safer to keep the battery disconnected while you’re working.

    Adam O'Camb -

  14. NxUtySGy3uWmfBTN
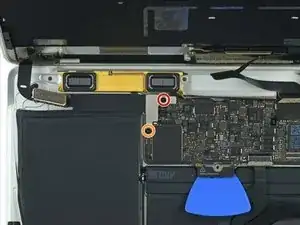
    • Entferne die beiden Schrauben, mit denen die Halterung des USB-C Anschlusses befestigt ist:

    • Eine 1,1 mm Kreuzschlitzschraube #00

    • Eine 3,5 mm Torx T5 Schraube

    I’m at this point and the 1.1 mm Phillips #00 screw won’t budge and now I fear it could be stripped? Now what???

    Y'vonne Feeney -

    You could try to cover the tip of your screwdriver with a thin rubber glove to improve the grip on the screw while applying a little more downward force for the initial jolt. That might loosen the screw.

    Tobias Isakeit -

    The USB-C ribbon cable breaks very easily when being attached. Any particular tricks for ensuring that it won’t snap somewhere while being installed?

    bfg737 -

    With my iFixit screwdriver kit, these were Philips #000, not #00.

    Paul Nishikawa -

    This was #000 for me as well

    Adam Hupp -

  15. aPJDUSEVa24G5wDu
    aPJDUSEVa24G5wDu
    fQXrJmJDGER4qs1d
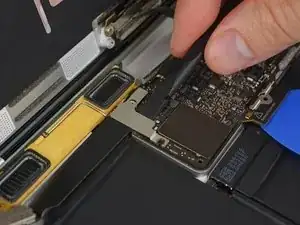
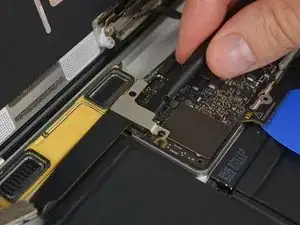
    • Heble die Halterung des USB-C Anschlusses mit dem flachen Ende des Spudgers gerade hoch und löse sie vom Logic Board ab.

    • Um dieses Kabel wieder anzuschließen, musst du erst die Metallhalterung passend über die Schraubenlöcher legen und dann in der Mitte der Halterung nach unten drücken. Achte darauf, dass sie korrekt sitzt, sonst könnte der Stecker beschädigt werden.

    At re-assembling, when you reconnect this cable, pressing centre of metal plat is extremely important. You should feel tiny click when it connected properly. I encountered unrecognised external HDD and external monitor through USB-C even though charging in/out was OK, i.e failure of data transmission. I needed to re-open the back cover and pressed the metal plate again, then USB-C connection worked properly.

    Aki Mochi -

  16. cnkkpqnImOJBKvGP
    cnkkpqnImOJBKvGP
    XcXlAMnXJVFGLOZA
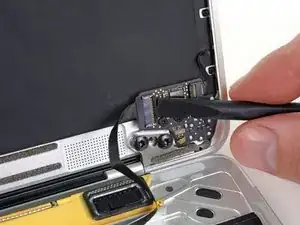
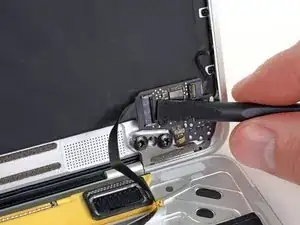
    • Klappe den Sicherungsbügel am ZIF Verbinder des Kabels zur Audioplatine mit dem Spudger hoch.

  17. gWObarmSQqX4gWjO
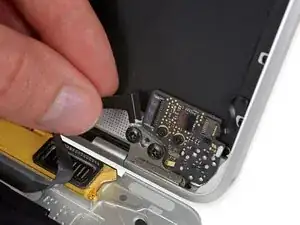
    • Ziehe das Flachbandkabel zur Audioplatine gerade aus seinem ZIF Anschluss heraus und löse es ab.

    • Achte beim Zusammenbau darauf, dass das Flachbandkabel so liegt, dass die Seite mit dem weißen Streifen, wie zu sehen, zu dir zeigt.

    • An dieser Stelle ist es möglich, das MacBook ganz zu öffnen und flach auf den Tisch zu legen, ohne dass die Flachbandkabel beschädigt werden.

    Make sure at reassembly that you insert the ribbon cable in to the jack board fully. It seems to take an extra push. The white line should disappear when it is seated properly. I didn’t get it in all the way by a fraction of a mm and had no sound (internal speakers weren’t even recognized). Went back and seated the cable fully and sound was back.

    Timothy Dinkelman -

  18. aRBTvLonTFkvcOtO
    aRBTvLonTFkvcOtO
    VW6sCYsVtk1CCDQO
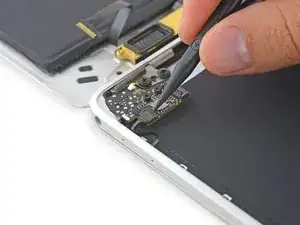
    • Klappe den Sicherungsbügel am ZIF Verbinder des Flachbandkabel zur Doppelmikrofoneinheit mit einem Spudger hoch.

  19. bmYAgwQZJmlECncS
    bmYAgwQZJmlECncS
    MBKBs3hxDuAKOFUa
    • Ziehe das Flachbandkabel zur Mikrofoneinheit gerade aus seinem Anschluss heraus und löse es ab.

    Does anyone know were I can buy the “microphone assembly ribbon cable“? It is the most delicate cable and cant seem to find spare part.

    Vernon Roth -

  20. V4R3guxfwuCWyjQI
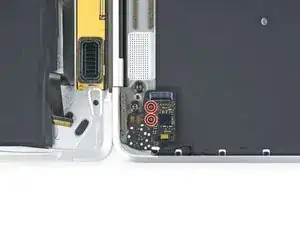
    • Entferne die beiden 3,2 mm Torx T5 Schrauben, mit denen die Platine der Kopfhörerbuchse am Gehäuse befestigt ist.

  21. KMZLqx45JmFco3PR
    • Entferne die Platine der Kopfhörerbuchse.

    After jack replacement my internal speakers stop working. Any solution?

    piotr2503 -

    There must be a bad contact in the jack socket or the card has been damaged, the sound therefore remains blocked on it

    Ludovic -

Abschluss

Um dein Gerät wieder zusammenzusetzen, folge den Schritten in umgekehrter Reihenfolge.

Adam O'Camb

Mitglied seit: 11/04/15

159624 Reputation

0 Kommentare