Einleitung

In diese Anleitung wird gezeigt, wie man den Akku der Playstation Vita austauscht.

  1. bXHPdJvmOqwnRZ5W
    bXHPdJvmOqwnRZ5W
    Kxh4sK2xMaaiHQtJ
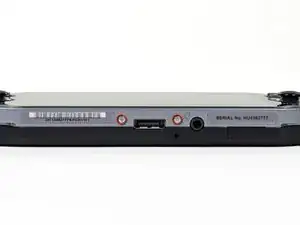
    • Ausschalten und Speicherkarte entfernen.

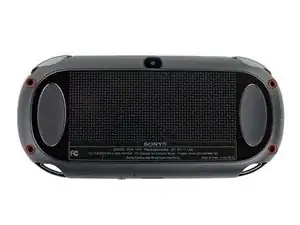
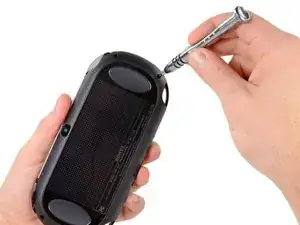
    • Die vier 6,4 mm Schrauben auf der Rückseite mit einem Phillips #00 Schraubendreher entfernen.

  2. WwpKNcKBHnx3iwJP
    WwpKNcKBHnx3iwJP
    36FYDevnAqBvbNY3
    mjh2iFATaa2BKMEs
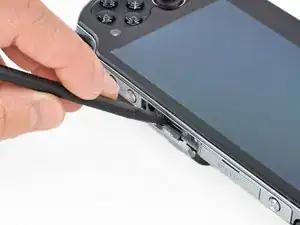
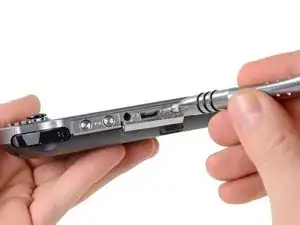
    • Öffne den Zubehörslot mit einem Fingernagel oder Spudger.

    • Entferne die zwei 5,4 mm Schrauben mit einem Phillips #00 Schraubendreher.

  3. AH6yWSkBJ4VWv3RB
    AH6yWSkBJ4VWv3RB
    aXih4BBWrQN2fmOK
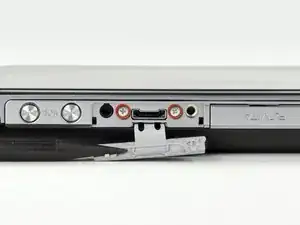
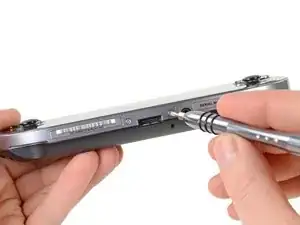
    • Entferne die zwei 5,4 mm Phillips #00 Schrauben an der Ladebuchse.

  4. bEJVmiEky4mHiDcb
    bEJVmiEky4mHiDcb
    aQOOn4pkOrVFR3hw
    vEQhcA4OEHFKVYLS
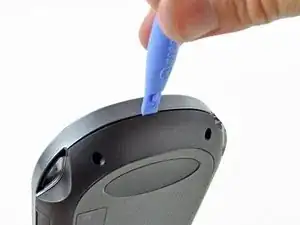
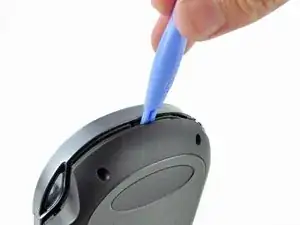
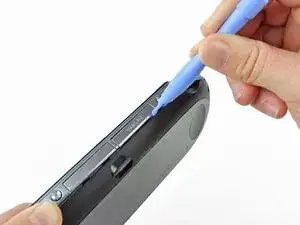
    • Trenne die Front- und Rückseite, indem du ein Plastic Opening Tool an der Seite des Gerätes einführst.

    • Vorsichtig um das Gerät herum gehen und aufhebeln.

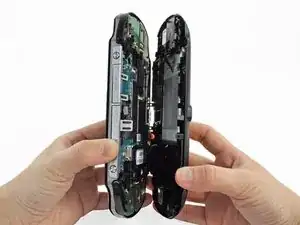
    • Es sind immer noch Kabel vorhanden, die Front- und Rückseite zusammenhalten. Wenn du die Hälften auseinander reisst, wird dies das Gerät beschädigen.

  5. 3BBZJmwmjKVUDiJa
    3BBZJmwmjKVUDiJa
    EpjUlyY4L4GWcaLS
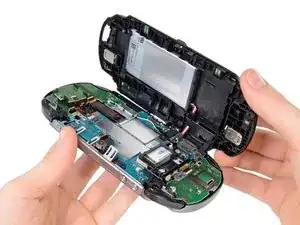
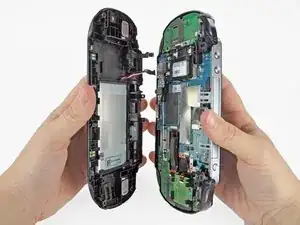
    • Vorsichtig die beiden Seiten trennen und auf die Batterie- und Touchscreen-Controller-Verbindungen, welche die Seiten zusammenhalten, achten.

    One of the shoulder buttons fell out when I was doing this step, along with the piece holding it in place. They go back in just fine when reassembling but make sure that they are oriented properly, of course.

    klung -

  6. NeowybD4slFqYmiM
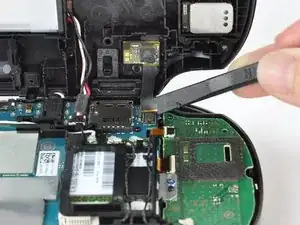
    • Mit einem Spudger das Touchscreen-Controller Flexkabel vorsichtig lösen.

  7. DtebpV1FIAkm4AUj
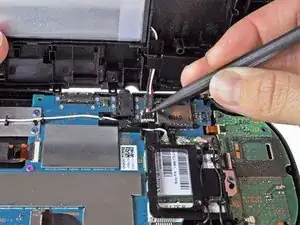
    • Das Akkukabel vorsichtig mit einem Spudger lösen.

    Any idea what type of pcb header is on the board for the battery? I have a motherboard with a broken header but I cant source a replacement

    Jimbo Jones -

    This is where I screwed up so I recommend extra caution for other newbies. Only the black part is supposed to come off. Don't be an idiot like me and pry off too much...

    ylimakiminna -

    Yea I messed up there too. Is there a way to fix it?

    Alethia Henry -

    This component was far more stubborn than the screen connector when it came to removal. I opted for a smaller tool than the spudger (small flat-head) and managed to disconnect it after determining the best bit size for the job. Screwdriver is metal, obviously, so being gentle helps to avoid damaging anything.

    klung -

  8. fkyIaVUrPDRIlhZV
    • Trenne Front- und Rückseite.

  9. VX2TaXVbYtwNHIKP
    VX2TaXVbYtwNHIKP
    EWlJuiUsM1DIWfPZ
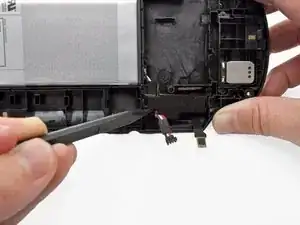
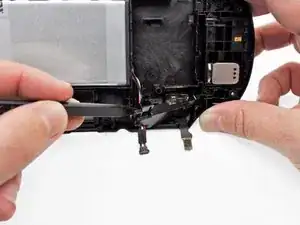
    • Heble mit einem Spudger vorsichtig den Akkukabelhalter auf der Rückseiteneinheit ab.

    • Der Akkukabelhalter lässt sich am einfachsten an der Stelle erreichen, wo das Akkukabel herauskommt.

    • Du kannst auch die beiden kleinen Laschen an der Seite des Kabelhalters benutzen. Finde die Laschen und löse sie beide gleichzeitig. Sei vorsichtig, drücke nicht auf die Abdeckung, so dass sie gleich wieder einrastet.

    Using the tabs (I could really only see one) on the side of the retainer proved essential for me to remove it and release the cable. Unless that happened that cable retainer was not moving for me at all. It did come out once the tabs were pressed though they did prove somewhat uncooperative with clicking back into place once I had installed the new battery. Also, watch that the battery’s cable isn’t pinched when you’re putting everything back in place.

    klung -

  10. jWQeSRp1IvWd1Uk5
    jWQeSRp1IvWd1Uk5
    DreEZarQjH5flyTe
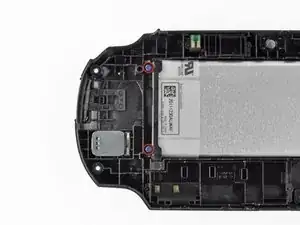
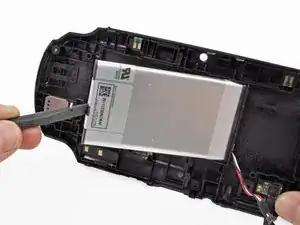
    • Entferne die beiden blauen 5 mm Kreuzschlitzschrauben #00 vom Akkugehäuse.

    • Entferne Kunststoff-Halteleiste des Akkus.

    When reinstalling the battery retaining bar, be sure to insert the bottom end (as shown in the photo) into the slot before driving in the screws. If you just lay it on top, you will crack the bar.

    Lee Johnson -

  11. xwePUQIY3U6KNvWS
    xwePUQIY3U6KNvWS
    NdNRLZVKwGAMGxKI
    nPB3YCMyWJOKYWrP
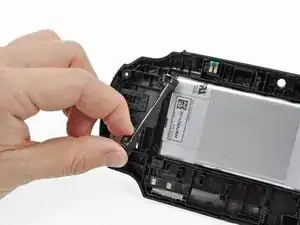
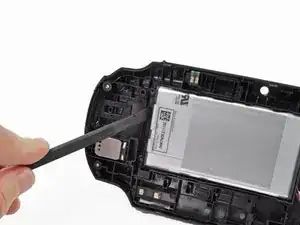
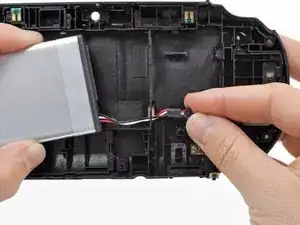
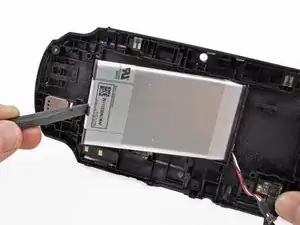
    • Hebe den Akku mit dem Finger oder einem Spudger hoch und entferne ihn.

    • Führe die Akkukabel beim Ausbau des Akkus durch die Öffnung im hinteren Gehäuse.

Abschluss

Um dein Gerät wieder zusammenzubauen, folge dieser Anleitung in umgekehrter Reihenfolge.

Brittany McCrigler

Mitglied seit: 05/03/12

87095 Reputation

21 Kommentare

Great guide. Only problem is this takes very steady hands (something i do not have)

chavis0704 -

This is a great guide. It allowed me to execute the repair and do so without and damage. Just be careful with the triggers they can move and get caught while closing everything up.

Amon Bouchereau -

how do i know what persent my battery is at

jewon -

Jewon today we have a hack for psvita 3.60 version ONLY !! this allow u download a VPK file that says how much persent your battery is at

brunosapo -

With your Vita connected to your PC and the Content manager application running, on windows right click on the vita and then properties and the battery percentage will show up.

Matthew Michand -

Great guide. Thanks for writing it!

Reiaze -

weeelll I think I have a broken Vita now. Make sure you're not an idiot like me who doesn't know which parts to pull in which direction when trying to free the battery cable.

ylimakiminna -

Well. Didn't take out the memory card after removing battery Aaannndddd now the vita says its not in there.

Emmanuel Brown -

I had the same issue do you think you just need a new memory card? I'm hoping that's all it is even though they aren't cheap it's cheaper than a whole mother vita...

klarson79 -

Yeah, I’d seen warnings about that online. Apparently, when you install a new battery there is a surge of power as everything is reconnected. Removing any cards in any of the slots is advised to prevent damage to them.

klung -

I had the same issue Emmanuel I just need a new card then right?

klarson79 -

Thank you! My son's PS Vita alive again :)

Юрий Иванов -

My PS vita phat is only displaying PlayStation. Logo then shutdown I can't even go through the recovery mode.. Tried most charging method... I tried removing my battery and putting it to a different PS vita unit and it worked fine... Is my battery faulty?

demetrio dario -

So I replaced the battery on my PS Vita 1000. When I try turning it on, an orange light shows up on the PS logo but the device does not turn on. Should I let the new battery charge for a bit before trying again?

ajsanaje -

The iFixit info on the Vita battery product page stated to calibrate the battery before use. Not sure if that has to do with the complications you’re facing but worth considering.

klung -

Are there alternatives to the Spudger and/or Opening Tools that one might already have available from home?

Matthew Conklin -

Worked perfect. Great guide. Thanks!

Jochen Jakob -

My version is different i can’t for the life of me get back panel touch foil into the connector it is really short

limbovampier -

Try to hold the back panela at a closer angle with the console and use a spudger to or tweezers to reach the cable if necessary.

Daniele Carminati -

The socket on the motherboard is different and smaller than on the replacement seems to big and I can't get it to fit

Jesinia Reyna -

My nine-year-old Vita still worked, but its original battery was not in the best condition. I obtained a replacement battery from iFixit and used this guide to install it. It may look daunting at first, but if you study the guide, take your time, and follow the steps carefully, it’s actually pretty straightforward. Having a spudger definitely helps.

Lee Johnson -