Einleitung

Diese Anleitung zeigt dir, wie du die Bodenplatte aus Kunststoff an der Playstation 4 Slim austauschen kannst.

  1. HVTGYelJeUQRNBTL
    HVTGYelJeUQRNBTL
    6Z3td3NoCXXHhZQI
    4ybs2g5RHLPUHZ6a
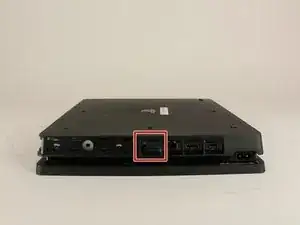
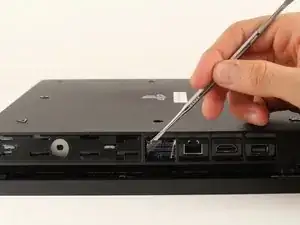
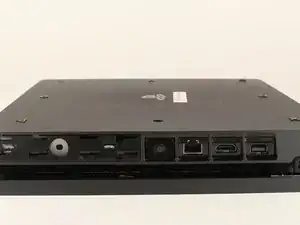
    • Finde den Garantieaufkleber aus Plastik in der Nähe der drei Anschlüsse auf der Seite der Konsole.

    • Löse den Aufkleber mit einem geeigneten Werkzeug ab.

    • Die Garantie wird durch das Entfernen des Aufklebers NICHT beeinträchtigt.

    Remove the screw directly to the left of that one in the picture as well. Should be silver.

    Elizabeth Johnson -

    ihr seid so ein scheiß haufen das stimmt über haubt nix

    Toaster 95 -

    einfach alles stimmt nicht

    Toaster 95 -

  2. iuwUc5FNjBXlxWDZ
    iuwUc5FNjBXlxWDZ
    NddVVDLyNaEUIPME
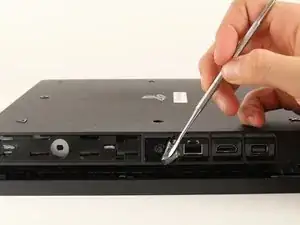
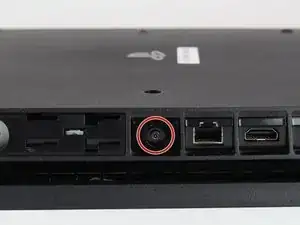
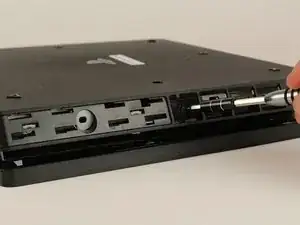
    • Unter dem Aufkleber ist eine 5,0 mm Torx T8 Sicherheits-Schraube verborgen. Drehe sie gegen den Uhrzeigersinn heraus.

    Are you SURE that it’s counter-clockwise?

    The Stuff -

    Try T9. Fits better.

    Otter -

    T8 fits like a glove for me

    Daniel Henderson -

    Is there anything else you can use

    randomweeb -

    A small flathead screwdriver will work

    shawng6363 -

    There is a small metal rod in the middle of the screw that isn’t allowing my t8 inside. Any insight on this?

    gavinstoutconner@icloud.com -

    Some T8 bits have a hole in the middle that will allow that rod to go through; some do not. If you have a set of multiple bits, check if there are any others labeled T8 or TR8 with that hole in the middle.

    Nicholas -

    There is a metal thing inside of the screw slot any insite on this?

    Tristan York -

  3. SlFEBbB2b3bIl6BX
    SlFEBbB2b3bIl6BX
    oRDOW1Bq6YK4gBJW
    Qs6ybIWcbq4tnNZZ
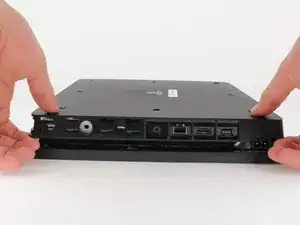
    • Lege die Playstation 4 Slim mit der Unterseite nach oben, so dass die Seite mit der eben entfernten Schraube zu dir zeigt.

    • Ziehe an den beiden Ecken, die zu dir zeigen, mit den Fingern hoch.

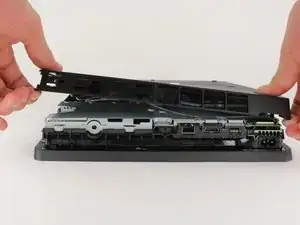
    • Das erfordert schon einiges an Kraft und du wirst ein lautes Knacken hören, wenn sich die Bodenplatte löst.

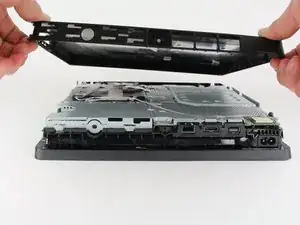
    • Schiebe die Bodenplatte in Richtung der Rückseite, hebe sie hoch und entferne sie.

    It says to place it upside down, but didn't you do so in the previous step? I've been trying to unscrew the screw with my screwdriver that I got from here and if I had to had the system right side up, I'm afraid I might've stripped the screw from all the force I tried to use to get the screw out that will NOT budge. It didn't even move the slightest after removing the warranty sticker.

    Vidal Santos -

    There is a single clip on the left side about 5cms in, and another clip on the right side equidistant to the one on the other side. Jamming a spudger in there first, and lifting those clips helped, and then I had to slide down to lift a total of 4 clips on each side (each about 4cms apart). Then push the cover away from you, if that makes more sense than “sliding it towards the back corners”, since the back corners are technically facing you.

    Emil Fisk -

    It would be easier if you just lifted the top cover of the PS4.

    Poobler -

Abschluss

Um dein Gerät wieder zusammenzusetzen, folge den Schritten in umgekehrter Reihenfolge.
Hernan Rodriguez

Mitglied seit: 24/01/18

2750 Reputation

Ein Kommentar

Wo kann man die Bodenplatte kaufen?

Emre Kaman -