Einleitung
Ich wollte diese Anleitung erstellen, weil ich beim Versuch den PS4 Dualshock 4 Controller wieder zusammenzubauen ziemlich genervt war.
Werkzeuge

-
-
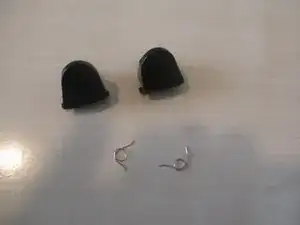
Nimm die beiden Schultertasten und die Federn vom der Rückplatte ab.
-
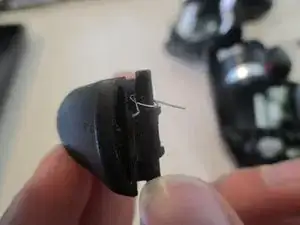
Kontrolliere, welche Taste auf welche Seite gehört, und setze die Federn so ein, dass sie in Richtung des Inneren des Controllers zeigen.
-
-
-
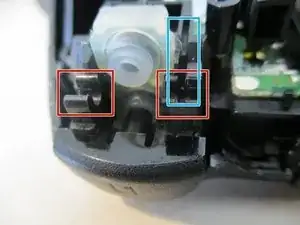
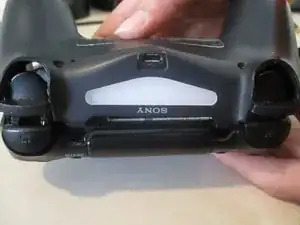
Setze in diese beiden Clips ..
-
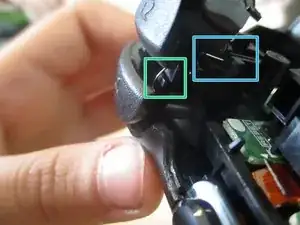
die Schultertaste ein und drücke, bis sie an beiden Seiten einrastet.
-
-
-
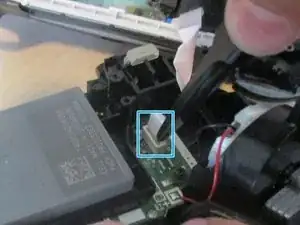
Stecke das Flachbandkabel der Controllerbeleuchtung mit den Fingern ein. Stelle sicher, dass es komplett eingesteckt ist und richtig herum sitzt.
-
-
-
Setze die Abdeckung wieder auf und drücke sie wieder zusammen. Beginne neben den Schultertasten. Hierfür ist etwas Kraft erforderlich, aber achte darauf die Abdeckung nicht zu brechen.
-
Drücke die Abdeckung an bis sie rundherum eingeklickt ist.
-
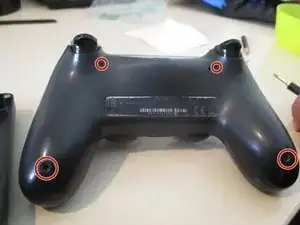
Schraube die vier Schrauben mit einem PH0-Kreuzschlitzschraubendreher wieder ein.
-
3 Kommentare
Thank you so much! I had a ps4 controller that had a broken r2 button and i had gotten a replacement (which is now having battery issues) Today I took the old controller apart… the spring had come out of the rail. That was it!
Dee -
This guide is wrong. The top part spring should be inside the trigger, if you look at the other trigger it’s not exposed.

Thanks for pointing it out. I do not have this controller anymore as it was from a repair job so unfortunately, I cannot correct it. If you or someone else happens to have one and is able to take high-quality pictures I’d be more than grateful to accept your correction.
Devnol -