Einleitung

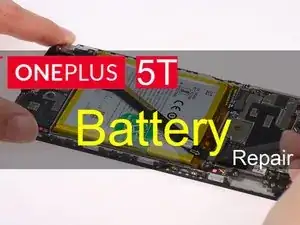
Falls der Akku Deines OnePlus 5T sich schnell entlädt oder beschädigt ist, schaue Dir dieses Video an, in dem der Austausch des Akkus Schritt für Schritt erklärt wird.

Abschluss

Folge den Anweisungen in der umgekehrten Reihenfolge, um das Gerät wieder zusammenzubauen.

Dominik Schnabelrauch

Mitglied seit: 23/11/16

125125 Reputation

16 Kommentare

my flex cable is stuck to the top of the metal protector wtf

Audrion Bird -

Any place to get the battery adhesive sticker in order to replace it?

Nothing Else -

I removed the adhesive sticker. Is it dangerous to use the phone without one?

E S -

Hi E S,

are you talking about the battery adhesive? If that is the case i can say - this sticker holds the battery in place and prevents it from moving around. If there is no sticker you might hear some noice when shaking the phone because the battery is moving. However it is unlikely that the battery disconnects because of that since the connector sits under a small metal shield. Depending on the phone movement theres a tiny chance that the battery or its cable deforms or gets damaged from moving around over time. It is not necessary to replace the adhesive with an original one, however i recommend using any double sided tape or similar rather than nothing.

Dominik Schnabelrauch -

Dominik, following up on that other comment, is there a particular suggested tape for the battery? The replacement battery kit on ifixit does have precut tesa tape but it’s not that large tape piece from your photo.

Toh Mah -

Hi Toh Mah,

the adhesive in the replacement battery kit is double sided pre cut tape which works fine when replacing the battery. There is no need to use adhesive tape as large as the original one, which is a pull tab. However thinking of the battery removal I advice not to overuse any adhesive tape when putting the battery back in place (as long it’s not the original one). The original tape makes future battery removals a bit easier. In case you replace it with any other adhesive tape (too much of it) a second battery replacement becomes more complicated because of the cables running underneath the battery. I recommend to use just enough of the tape to hold the battery in place and to apply it onto the mid frame where no cables are running. In this scenario every double sided tape will do the job. Sometimes the original tape is still sticky enough to reuse it.

Dominik Schnabelrauch -

Thanks for the answer. I’ll go with the simple solution then.

Toh Mah -

Hi Dominik,

Can I use a hair dryer on the screen to heat it up the adhesive if I don’t have access to the iOpener?

Lucas Cunha -

Hi Lucas,

a hair dryer will do the job. However take care not to overheat your phone. Heat to screen a little and check if you can remove the battery. If not, repeat the procedure.

Dominik Schnabelrauch -

Hi Dominik, i am in the process of replacing my battery but the backcover does not budge. I am using the same tools :-/

Do you have any tips?

thanks!

Karel Claes -

Good, helpful guide. After some frustration I managed to remove the case and old battery in preparation for fitting a new battery. All good.

Jim Norman -

Just went through the process and it was successful. Thanks for your guide, very helpful! The most stressful part was to open the screen without crashing the glass, but it was more resistant than I thought originally

Luis Enrique -

The #00 Phillips screw (2.8 mm long) in step 10 did not need to be removed.

Hosoe Shinji -

I can't get my cover back on. It seems the battery is slightly thicker than the original

Justin Gall -

I also had problems with this. I checked by eye and the two batteries had the same height. After taking it apart twice and try to put back the back cover many times I managed to click it in all the way. Keep trying!

Mód Márton -

Worked flawlessly! Thank YOU! <3

João Gouveia -