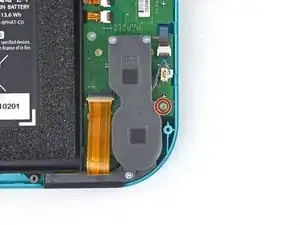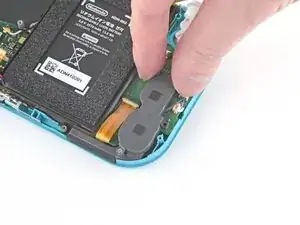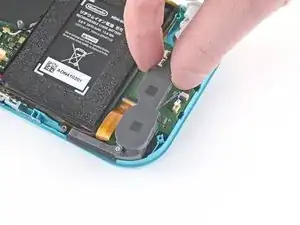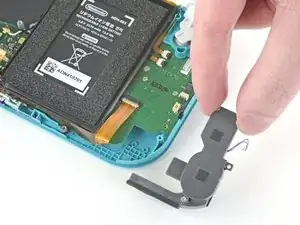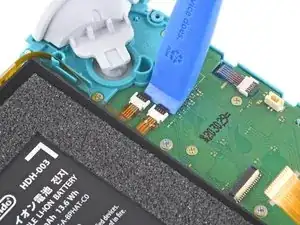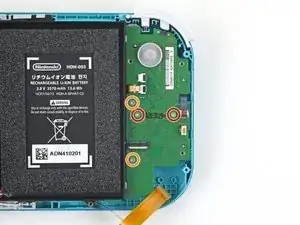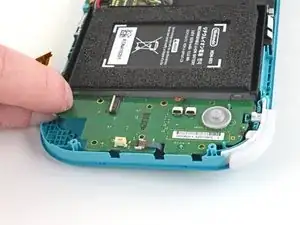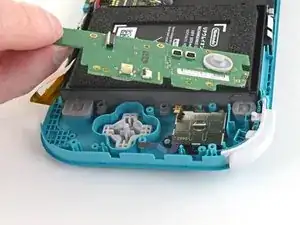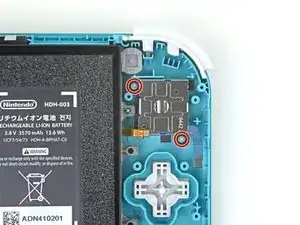
Einleitung

Diese Anleitung zeigt, wie der linke Joystick in der Nintendo Switch Lite ausgebaut und getauscht werden kann. Diese Reparatur beseitigt das häufige "Joy-Con Drift" Problem.

In der Switch Lite sind JIS-Schrauben verbaut, zur Not passen aber auch Bits für Kreuzschlitzschrauben. Sei aber sehr vorsichtig und beschädige die Schraubenköpfe nicht. Die Bits von iFixit können auch für JIS-Schrauben verwendet werden.

Hinweis: Die Reparatur erfordert aus Sicherheitsgründen das Abtrennen des Akkus. Das Abschirmblech muss dabei ausgebaut werden. Die alte Wärmeleitpaste muss entfernt und neue aufgetragen werden, bevor es wieder eingebaut werden kann.

  1. CtSXh5SNdBfY3d4X
    • Bevor du die Reparatur beginnst, musst du das Gerät komplett ausschalten.

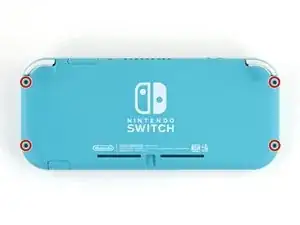
    • Entferne die vier 6,3 mm Y00 Schrauben, mit denen die Rückseite befestigt ist.

    • Halte während der ganzen Reparatur die Schrauben gut geordnet und achte darauf, dass jede Schraube wieder an ihren alten Platz kommt.

    All my screws got stripped any ideas on how to remove?

    Almost A Mammal -
  2. LoododBfWX565CM3
    LoododBfWX565CM3
    axePI5XqFET5KVdd
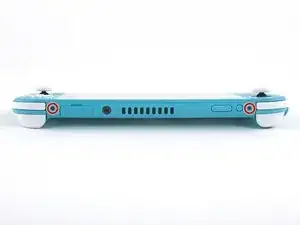
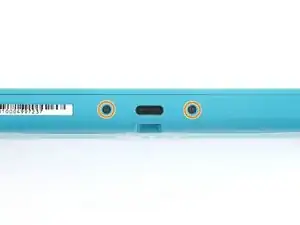
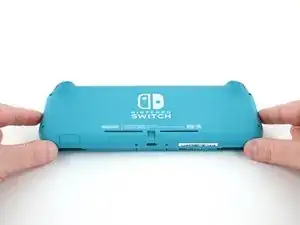
    • Nimm einen JIS 000 Schraubendreher/Bit oder ein Original PH000 Bit von iFixit und entferne folgende JIS-Schrauben, mit denen die Rückseite oben und unten befestigt ist:

    • Zwei 3,6 mm lange Kreuzschlitzschrauben an der Oberkante des Gerätes

    • Zwei 3,6 mm lange Kreuzschlitzschrauben an der Unterkante des Gerätes

    • Passe auf, dass die Schraubenköpfe nicht rundgedreht werden. Drücke das Werkzeug fest nach unten und arbeite langsam. Wenn die Schrauben nicht herauskommt, dann versuchen es mit einem anderen Bit.

  3. OdqFPXbVWUcLdDot
    OdqFPXbVWUcLdDot
    CIVhMktLorQQTIDM
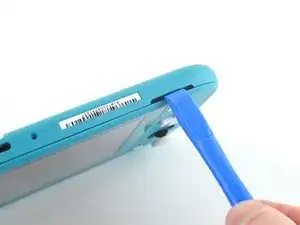
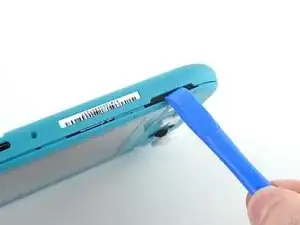
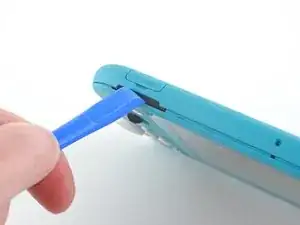
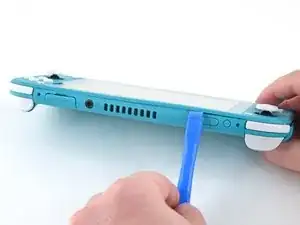
    • Setze ein Öffnungswerkzeug in die linke Öffnung für den Lautsprecher an der Unterseite des Geräts ein.

    • Verdrehe das Werkzeug, so dass sich die Rasten lösen, mit denen die Rückseite befestigt ist.

    • Setze das Öffnungswerkzeug nicht tiefer als nötig ein, du könntest sonst das Lautsprechermodul beschädigen.

  4. wrE1q1yNyF2ogBV4
    wrE1q1yNyF2ogBV4
    Pmw5QYCTejXbIUKw
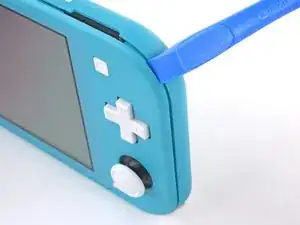
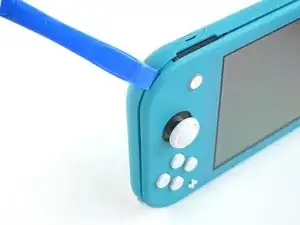
    • Schiebe das Öffnungswerkzeug um die untere linke Ecke herum, so dass sich die Rasten auf der linken Seite des Geräts lösen.

  5. RlPaVdXmyVJlvRdR
    RlPaVdXmyVJlvRdR
    xpNFcLWpxIZGYAZo
    • Setze ein Öffnungswerkzeug in die rechte Öffnung für den Lautsprecher an der Unterseite des Geräts ein.

    • Verdrehe das Werkzeug, so dass sich die Rasten lösen, mit denen die Rückseite befestigt ist.

    • Setze das Öffnungswerkzeug nicht tiefer als nötig ein, du könntest sonst das Lautsprechermodul beschädigen.

  6. nKd22DZNmOtktjJ6
    nKd22DZNmOtktjJ6
    ZFI5WyJ26AuYMJ34
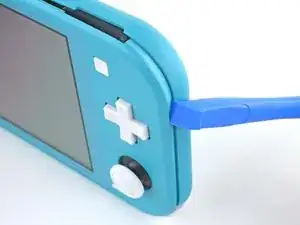
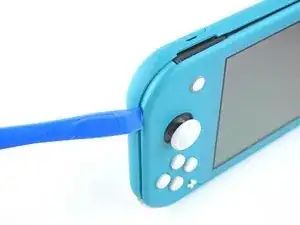
    • Schiebe das Öffnungswerkzeug um die untere rechte Ecke herum, so dass sich die Rasten auf der rechten Seite des Geräts lösen.

  7. UB4MQPADBNC3AKGp
    UB4MQPADBNC3AKGp
    FDjmileJQ6nKxeRT
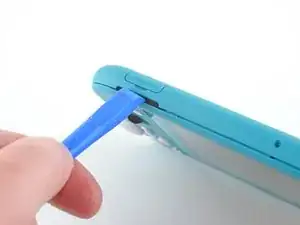
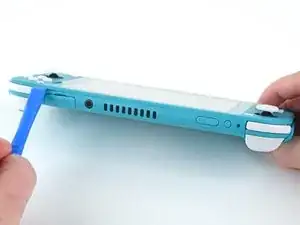
    • Schiebe das Werkzeug weiter am Spalt an der Oberseite des Geräts entlang und heble die Rasten auf.

  8. 3YVyXRJqMpDtXeYv
    3YVyXRJqMpDtXeYv
    N5JkogvdUb1o4kID
    ZH5AGwN3bXMGGKnl
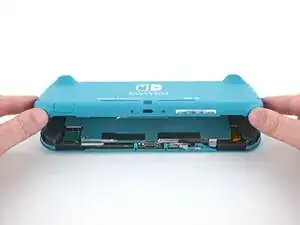
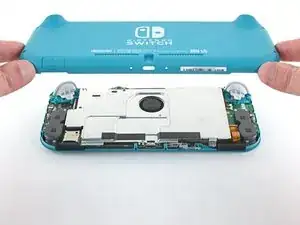
    • Hebe die Unterkante der Rückseite an und klappe sie wie ein Buch auf.

    • Entferne die Rückseite.

  9. vsR2tYTiCfHGSlh1
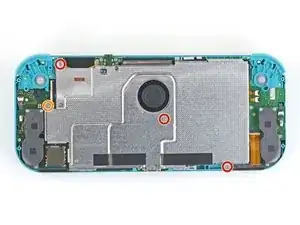
    • Nimm einen JIS 000 Schraubendreher/Bit oder ein Original PH000 Bit von iFixit und entferne folgende vier JIS-Schrauben:

    • drei 3,1 mm Schrauben

    • eine 4,5 mm Schraube

    There are four screws instead of three mentioned

    Khurram Chaudry -
  10. FIwGjkfOhVmFCyvp
    FIwGjkfOhVmFCyvp
    LUwt2Ov3TDBmbBMy
    CxSr6WAFIqTkPknC
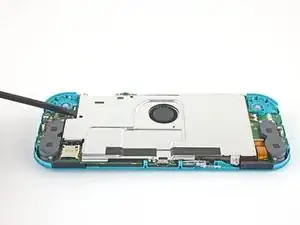
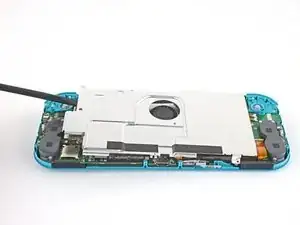
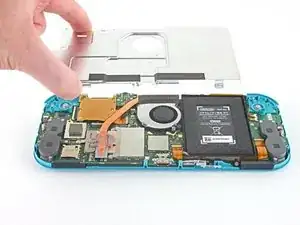
    • Hebe mit dem Finger oder einem Spudger das Abschirmblech hoch und entferne es aus dem Gerät.

    • Wahrscheinlich spürst du etwas Widerstand. Das ist normal, weil das Abschirmblech wegen der Wärmeleitpaste ein wenig am Kühlkörper hängen bleibt.

    • Entferne das Abschirmblech.

    • Reinige das Abschirmblech mit Isopropylalkohol und einem Mikrofasertuch von der Wärmeleitpaste. Bringe vor dem Zusammenbau neue Wärmeleitpaste am Kühlkörper an.

    You may need to replace the thermal paste on the heat sink.

    ahoz28 -

  11. NfJ4EyXkJrCSjyMP
    NfJ4EyXkJrCSjyMP
    SWRCDlfTfCNLuWJO
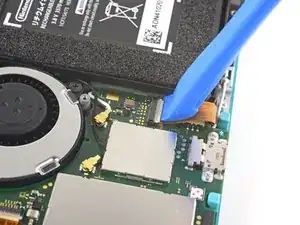
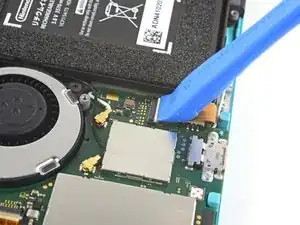
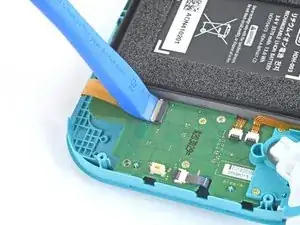
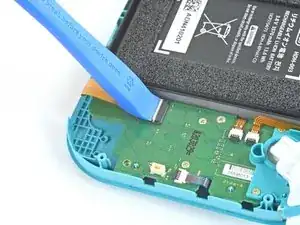
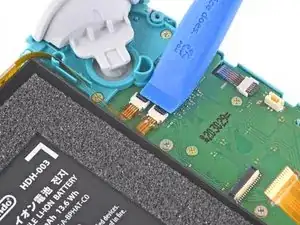
    • Klappe den kleinen, scharnierartigen Sicherungsbügel am ZIF-Verbinder des Verbindungskabels auf der Hauptplatine mit dem Fingernagel oder einem Öffnungswerkzeug hoch.

  12. EOLi3GutoqJNvstI
    EOLi3GutoqJNvstI
    hO2FmA16pHiJq2to
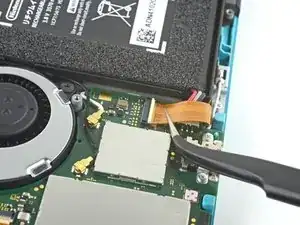
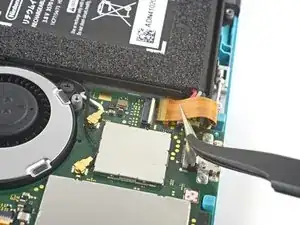
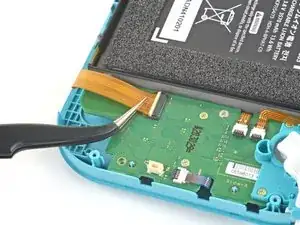
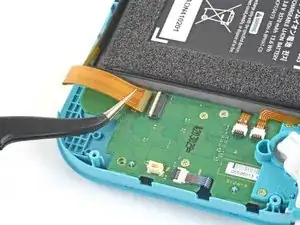
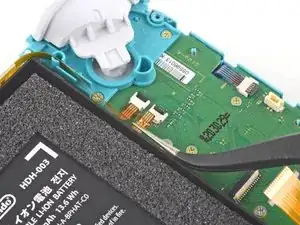
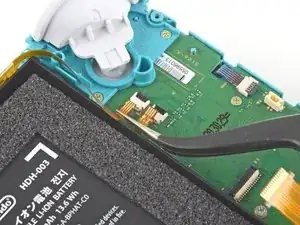
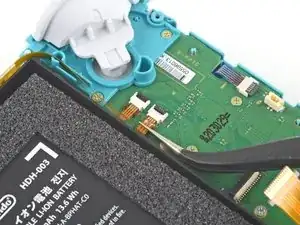
    • Schiebe das Verbindungskabel mit Hilfe einer Pinzette aus dem Anschluss auf der Hauptplatine heraus.

    I turned the unit off beforehand, I used tweezers just like the instructions said (ifixit branded) , my device sparked and now it won’t turn back on

    User Service -

    The flap came off is it important or is there a way t fix it?

    Jose Cruz R Rangel Cordero -

  13. yfTkAmQeCWGhAEl2
    yfTkAmQeCWGhAEl2
    SFobIivmPhWAmdMb
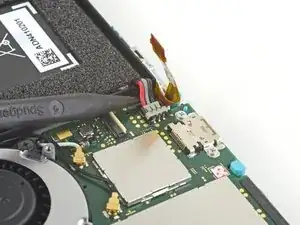
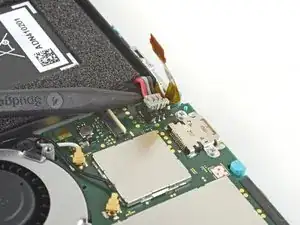
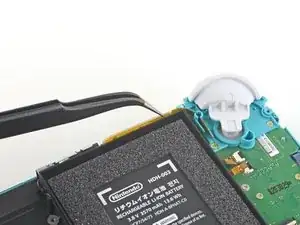
    • Heble den Akkuanschluss mit der Spudgerspitze gerade nach oben aus seinem Anschluss auf der Hauptplatine heraus.

    Caution the connector may not be properly soldered onto the motherboard. For me it snapped off the pins and now have to find a place to get that fixed if even possible. may have bricked it.

    Craig Osman -

    Yup, broke the connector right off the motherboard. Thanks, ifixit -_-

    Justin Kerr -

    I backed out when I reached this point. I couldn't risk damaging it. Do u just need to pull it up? Did you mean that it might have been soldered shut below?

    Jannalyzer -

    You should just need to pull straight up, but make sure you’re pulling on the wires or the gray plug—do not pull on the black socket or it can snap off of the motherboard.

    Adam O'Camb -

  14. nuVsDQNmqQoywpiB
    nuVsDQNmqQoywpiB
    Vm1uBmbYeq4KuLZI
    • Ziehe den Kabelstecker zum linken Lautsprecher mit einer Pinzette oder deinen Fingern gerade nach oben und löse ihn aus seinem Anschluss auf der Hauptplatine.

    • Ziehe nicht an den Kabeln selbst, du riskiert sonst, dass sie aus dem Stecker herausreißen.

    pulled from the connector, not the wires, and ended up ripping them off the connector anyways since it encountered tension from the other end (the gray chamber on the left)

    consider doing step 15 before pulling the wire, just in case.

    Phillipe Legenda -

    Why even disconnect this cable. Not worth the risk leave it connected to daughter board.

    Michael McNally -

    while doing this I ripped the pad on the circuit board off. Should i risk trying to repair it or should i just try to go without the speaker???

    sarah.carney203 -

    I also accidentally ripped off the connector, disabling the left speaker. However, that will not break any functionality of the switch. The right speaker works just fine on its own (just remember to turn the audio to mono in system settings) and I was successfully able to replace the joystick. Although the audio quality is a little bit depleted, you barely notice it if you turn up the volume a little, and I think being able to actually MOVE FORWARD in my games is a better plus than having louder, stereo, audio.

    Jonathan Maye -

  15. rfJx5DDGcYumZLDZ
    • Nimm einen JIS 000 Schraubendreher/Bit oder ein Original PH000 Bit von iFixit und entferne die 4,5 mm JIS-Schraube, die das linke Lautsprechermodul befestigt.

  16. i1fgqmy1vHD5EmGs
    i1fgqmy1vHD5EmGs
    6hloEhG1xAM2cIWL
    sIT3siejtjNVrL4W
    • Hebe das Lautsprechermodul mit der Hand aus seiner Vertiefung hoch und entferne es.

    • Ein Teil des Moduls sitzt unter einem empfindlichen Flachbandkabel. Achte darauf, dass sich beim Ausbau das Modul nicht am Kabel verfängt.

    Pulling the lower screw on the speaker assembly gave me a little more wiggle room to get it out without damaging the flat cable.

    Spacer -

  17. rUdjNcGiZVMqokyq
    rUdjNcGiZVMqokyq
    rPRud43Zc3ynVY4L
    • Klappe den kleinen, scharnierartigen Sicherungsbügel am ZIF-Verbinder des Verbindungskabels zur Hauptplatine mit einem Öffnungswerkzeug oder dem Fingernagel auf.

  18. QnRCVKS2hdlaYdZY
    QnRCVKS2hdlaYdZY
    DjPDMEBck3WLETTZ
    • Schiebe das Verbindungsabel der Hauptplatine mit einer Pinzette aus seinem Anschluss auf der Tochterplatine heraus.

  19. fk4CET6RdhAMLfyv
    fk4CET6RdhAMLfyv
    VLmY4Du2JeqXEHpJ
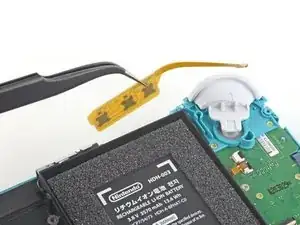
    • Klappe die kleinen, scharnierartigen Sicherungsbügel an den ZIF-Verbindern der beiden Kabel mit einem Öffnungswerkzeug oder dem Fingernagel auf.

  20. NJYbXYEobSDpb3fT
    NJYbXYEobSDpb3fT
    aAr6MeGWIOxGtMAc
    HeFIUbfQhWtqQQWO
    • Schiebe das Displaykabel der Tochterplatine mit einer Pinzette aus seinem Anschluss auf der Hauptplatine heraus.

    • Wiederhole das Ganze für das Flachbandkabel zu den Lautstärketasten.

  21. YU6kfk2AMvX131DF
    YU6kfk2AMvX131DF
    KkNUAgCK3xhOHNaD
    • Entferne die Lautstärketasten mit einer Pinzette oder den Fingern.

  22. sUkMCNGNN4LPVZZM
    sUkMCNGNN4LPVZZM
    1HRu2lfDPkcscVmU
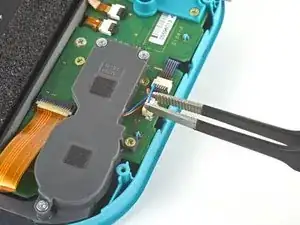
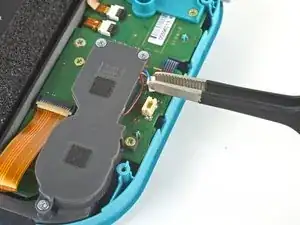
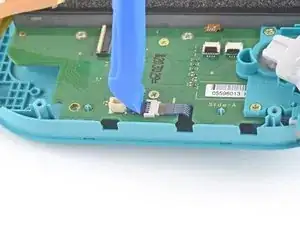
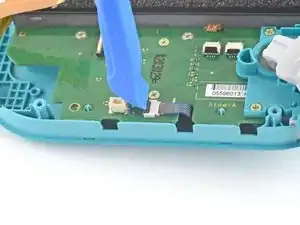
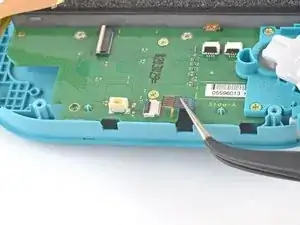
    • Klappe den kleinen, scharnierartigen Sicherungsbügel am ZIF-Verbinder des Kabels zum linken Joystick mit einem Öffnungswerkzeug oder dem Fingernagel auf.

  23. 3ewDGowSEYRsSoGe
    3ewDGowSEYRsSoGe
    ZSbVLJT5TyMEMdw1
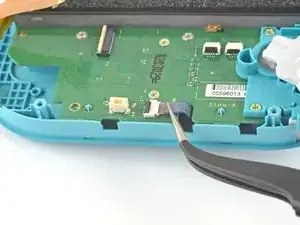
    • Schiebe das Kabel zum linken Joystick mit einer Pinzette aus seinem Anschluss auf der Tochterplatine heraus.

    The connector for my left joystick broke. Is there a way to fix it?

    Christopher Shackelford -

    How badly did it broke?

    Daniele Carminati -

  24. aMfx1XnPjD2XJZU1
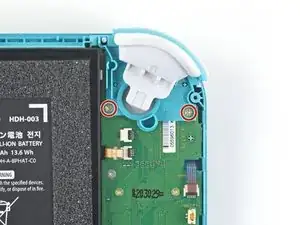
    • Nimm einen JIS 000 Schraubendreher/Bit oder ein Original PH000 Bit von iFixit und entferne die beiden 4,5 mm JIS-Schrauben, mit denen die Baugruppe der linken Trigger-Taste befestigt ist.

  25. U1DZ6ItpRRDM6bR6
    U1DZ6ItpRRDM6bR6
    XDWLwsSDmteyClP6
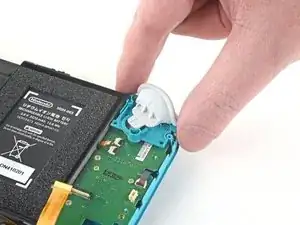
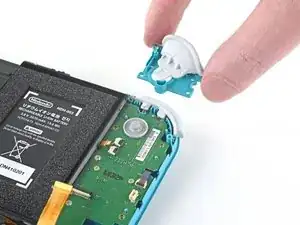
    • Entferne die Baugruppe der linken Trigger-Taste.

  26. nNWn4JQ3wWAM1bPO
    • Nimm einen JIS 000 Schraubendreher/Bit oder ein Original PH000 Bit von iFixit und entferne die folgenden vier JIS-Schrauben:

    • Zwei 4,5 mm JIS-Schrauben

    • Zwei 6 mm JIS-Schrauben

  27. LWqBVq43uhACZLOx
    LWqBVq43uhACZLOx
    BDc2sqDrthKMLEHE
    • Hebe die Tochterplatine mit den Fingern nach oben aus ihrer Vertiefung heraus.

    Stop here if repairing Switch Lite for joycon drift. After removing daughter card you can see the bottom of the joystick. This thin metal actually bends during use causing bad connection of joystick. If you cut out a business card the same size as the joycon and put it on the bottom of the joystick it gives the metal enough backing to fix the issue. I used two layers with just a small bit of glue stick to adhere it. Put it all back together and you will find your issue is fixed.

    Michael McNally -

  28. jdTAwLEurNQPQFuR
    • Nimm einen JIS 000 Schraubendreher/Bit oder ein Original PH000 Bit von iFixit und entferne die beiden 3,5 mm JIS-Schrauben, mit denen der linke Joystick befestigt ist.

  29. jRQVdAFSfv3GTGIf
    jRQVdAFSfv3GTGIf
    bRIXL3cebNsxNFfE
    GcVdmXworPOUWNUn
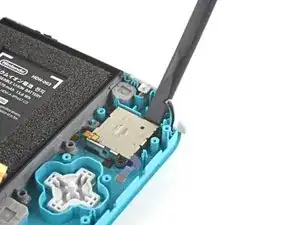
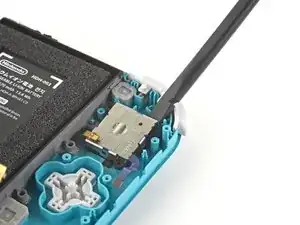
    • Hebe den Joystick mit dem flachen Ende des Spudgers nach oben aus seiner Vertiefung heraus.

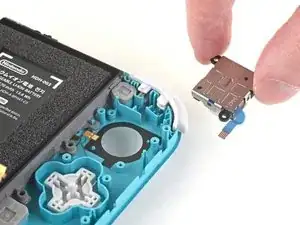
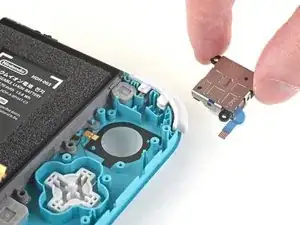
    • Entferne den Joystick mit der Hand.

    • Die Öffnung für den Joystick im Rahmen ist mit einer dünnen schwarzen Dichtung abgedichtet. Achte darauf, dass diese Dichtung beim Ausbau des Joysticks nicht verrutscht oder beschädigt wird.

Abschluss

Um dein Gerät wieder zusammenzubauen, folge den Schritten dieser Anleitung in umgekehrter Reihenfolge.

Entsorge deinen Elektromüll fachgerecht.

Lief die Reparatur nicht wie geplant? Probiere zunächst einige grundsätzliche Lösungen oder frage in unserem Nintendo Switch Lite Forum nach Hilfe bei der Fehlersuche.

Craig Lloyd

Mitglied seit: 10/02/16

24531 Reputation

13 Kommentare

Really appreciate the detailed pictures.

ALLEN COLLINS -

Great guide! Circling the screws really helped as went backwards for the reassembly. Not a bad repair just very delicate components. Best of all no adhesive removal required!

lee -

This was great, I love how every step was so simply broken down and had pictures. Thank you, my son is very happy to have his switch back in action.

Louise Perkins -

I followed this guide, bought the tools and replacement part, after successfully doing the replacement, my switch light now won’t power on at all, how can I fix this? any help please…

lczleal -

Hi Iczleal I had the same issue when I first did it and then I went back step by step. Turns out I didn’t plug the battery back in correctly, I recommend just repeating the steps and checking to see if everything is connected properly. Hope this helps :)

Moon Poppy -

Thank you to both. Had the same problem and you helped me solve it.

Paulette Taylor -

It is not called a daughter board it is called a mother board

Caden Anderson -

It’s called a daughter board because it is not the main device board and it can only work if it is connected to the main (mother) board, thus making it the daughter board. For the normal joy-cons, those boards are considered motherboards because those are separate from the Switches mother board and can operate with their own battery pack. Hope this makes sense :D

Simao Monteiro Ramos -

Appreciate the detail. Now it's fixed and my character doesn't wander off anymore.

Paulette Taylor -

That was easy to follow. The procedure went really smoothly! Thanks for the guide! <3

Simao Monteiro Ramos -

Is it mandatory to replace the thermal paste or can I just place the heat shield back without any consequence?

E. Serrano -

Thanks for this guide! The thumbstick on my son's Switch Lite stopped moving up and down. I already had the iFixit tools so I bought the part and followed the iFixit guide and repaired almost like new.

Glad I had some thermal paste on hand from a previous laptop repair.

Robert Blois -

Hi- I did this step for step and now my screen doesn’t work. It turns on and I can hear it clicks when I press buttons but the screen is black. Any ideas?

Carina -