Einleitung

Diese Anleitung zeigt Schritt für Schritt, wie du den Joystick eines Nintendo GameCube Controllers korrekt entfernst. Dieser Vorgang kann helfen, wenn der Joystick nicht mehr von selbst in die ursprüngliche Position zurückkehrt.

  1. dcSYZ1UnVsl6SqWL
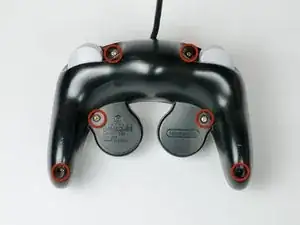
    • Lege den Controller mit den Knöpfen nach unten zeigend auf eine feste Oberfläche.

    • Entferne die sechs 9,2 mm Tri-Wing Y0-Schrauben, die die Rückseite fixieren.

  2. SubSoUIKRilFSPLf
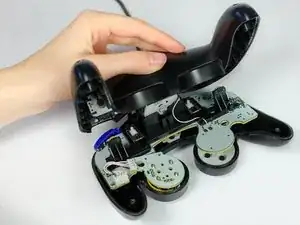
    • Hebe behutsam die Unterseite an und löse sie so von der Vorderseite.

    • Einige der Knöpfe können herausfallen, wenn sie Stößen ausgesetzt werden.

    For some reason, it was simpler to take the top half off, although it could be because it is most probably refurbished before

    Rukir Gaming -

  3. BQUirnGSsufXkwwG
    BQUirnGSsufXkwwG
    AdvobFhUkQhZLVSu
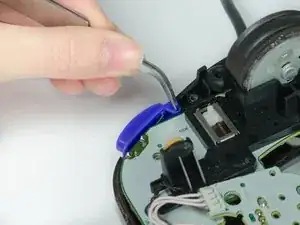
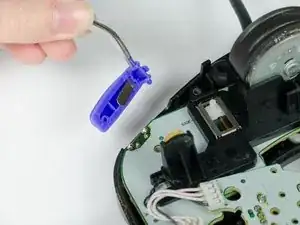
    • Hebe den Z-Knopf mithilfe einer Pinzette an seinem Stift aus dem Controller.

    • Wenn du den Controller wieder zusammensetzt, stelle sicher, dass der Kunststoffrand und die Feder in den dafür vorgesehenen Steckplatz passen, sonst wird sich die Ummantelung nicht schließen lassen.

    So how do you put it back in like the replacement because I have a controller I'm working a junker my Friend gave me and I'm trying to fix it the z button doesn't work here it's a pelican wireless controller it's actually not to bad bulky but not bad

    Justin Sebastian -

  4. oywDlnUm2aXc3Se4
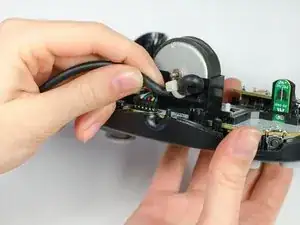
    • Löse vorsichtig das Kabel, das um den Zapfen gewickelt ist.

    Um can soneone explain the peg and cable part? I dont understand it...

    Tyler Goamez -

    I would say that the cable is somehow "hooked" to the case and you have to get the cable away from the case so that you can pull out the board

    My1 -

  5. NYSTuZVnjIra26fC
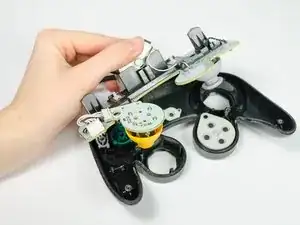
    • Hebe die Leiterplatte aus dem Controller.

    • Hebe die Leiterplatte nicht am Rumble-Motor aus dem Controller wie es hier im Bild gezeigt wird. In vielen Fällen wird so einfach nur der Rumble-Motor aus seinem Sockel gehoben. Hebe die Leiterplatte stattdessen an den Kanten an.

  6. Q4wDZ1xxYamVSsAk
    Q4wDZ1xxYamVSsAk
    SNaZ6s5YK4inx1Js
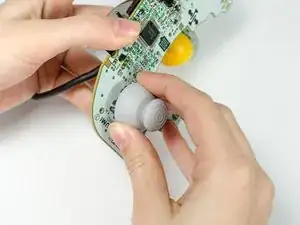
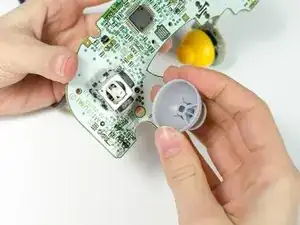
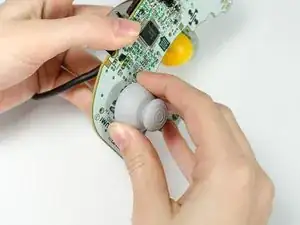
    • Fasse die graue Abdeckung unten an und ziehe sie ab.

    • Achte beim Zusammenbau darauf, dass die Schlitze im Innren des Joystick genau passend ausgerichtet sind, damit alles wieder zusammenpasst.

    Where can you get the square device under the the plastic joy stick

    Tyler Lovejoy -

    Love your site, I am actually trying to replace the analog underneath my joystick. This site is a great reference tool for different fixes though. I will definitely be visiting again in the future.

    Kestopher -

Abschluss

Um den Controller wieder zusammenzusetzen, folge den Anweisungen in umgekehrter Reihenfolge.

Sean Michel

Mitglied seit: 14/01/13

1923 Reputation

12 Kommentare

Great guide, but I'm looking to buy replacement joysticks and I can't find them anywhere. Where would I find those?

Joe Freedman -

When I removed the joystick it would come off. The plastic was stuck too hard to the joystick so I accidentally broke it in half. Is there anyway to glue it back together?

Mattias Wirsenius -

@Tyler Lovejoy - That's already part of the controller.

@Joe Freedman - Try Amazon.com

@Mattias Wirsenius - At this point it would be best to buy a new controller.

builderman1q2w3e4r -

This guide is quite unhelpful; it tells you how to remove the stick but not how to repair it. My controller's joystick has sunken into the controller and stays slightly tilted if i move it to the right. Yet when I go to the "rogue joystick" portion of the troubleshooting guide, it tells me to repair the joystick if it's not correctly attached to the motherboard. Seriously, there needs to be a more in-depth guide if such repairs are possible.

J DC -

without taking the controller completely apart, pull the joystick straight up with your hand

McRedstoneYT -

If it stay tilted, it because of a solid cluster of dust in the mechanism. After having remove the analog stick, look good solid black dust on it for each different rotation of the analog. After having clean it, to remove completely all the dust insistig with air compressed (shouldn't be any in risk in damaging something). The stick should come back as new.

The dust is conductive and give bad signal reading

noreason94 -

https://smashboards.com/threads/technica...

This forum post has some options to make your stick unwobbly.

lwbnjio -

my controller cannot receive inputs left or right, only up and down. i tried unplugging it and plugging it back in, but it did not help. i dont know what is wrong.

Liam Scollins -

did you ever find a fix?

Hendrik Helwig -

I have the same issue with my controller as well. If anyone has a solution to this problem I would also like to know.

Holden Gibson -

I had this problem. Removing the joystick you can observe that the analog plastic is snapped meaning that my input left and right wasn’t picked up unless I pushed down really hard. The solution seems to be to place a thin piece of metal, like a part of a paperclip, insert it into the hole in the plastic and then glue the joystick plastic together.

https://www.youtube.com/watch?v=b-5keRZa... - This seems to show a similar issue but with an Xbox controller. Hopefully this helps anybody with the same issue

Callum -

Amazing. I had a controller from when the cube first came out and my joystick was falling apart- SO i used this guide to take apart mine and one of the spares that had wire problems so i could swap out the joystick and it worked perfectly!

Megan Christina -