Einleitung

Bist du sauer, weil dein Nexus 7 keinen Ton mehr rausbringt? Diese Anleitung zeigt dir, wie du eine defekte Lautsprechereinheit austauschen kannst.

  1. X5Ts2NpboWv1CrVs
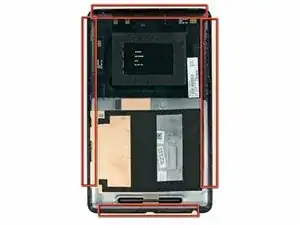
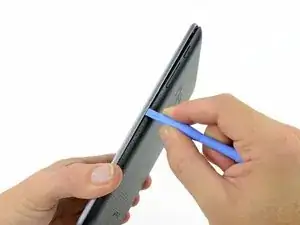
    • In den folgenden Schritten wirst du die Klammern (in rot hervorgehoben) lösen, die sich um den Rand der Rückabdeckung des Nexus 7 befinden.

    • Wende keinesfalls übermäßige Gewalt an, leider brechen die Klammern leicht.

    Mine doesn't look like this. There is no metal band around it. The only opening looks like its between the front glass and back which is on the front. I'm afraid to try it for fear of breaking it. Any suggestions?

    Kim McCauley -

    There is no front or rear panel. There’s no sign of any seam whatsoever. The front and back are one solid piece of plastic.

    Proud Liberal -

  2. GfNZgZXTDvoLusXy
    GfNZgZXTDvoLusXy
    anLmRNrUoNQWBKUY
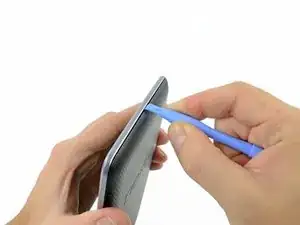
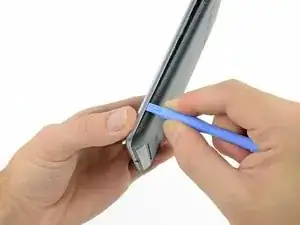
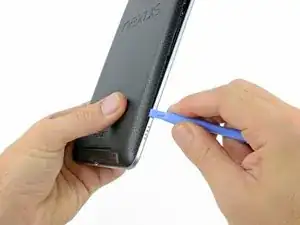
    • Führe vorsichtig ein Plastic Opening Tool am oberen Ende des Nexus 7 zwischen Vorder- und Rückseite ein.

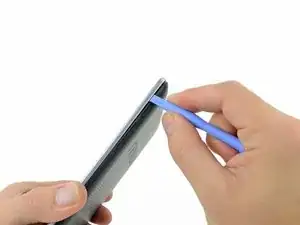
    • Führe das Opening Tool am oberen Ende entlang, um die beiden Hälften des Nexus 7 zu trennen.

    My Nexus 7 looks nothing like this. These instructions are horrible as they do not work.

    Andy Garcia -

    someone help? my nexus looks completely different

    Music Raider -

  3. WwtYTYZ2CAceGXng
    WwtYTYZ2CAceGXng
    53wRQHjFW23GmNT1
    jYpEiy4UnehyKoDM
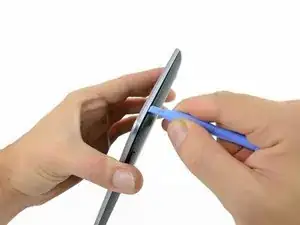
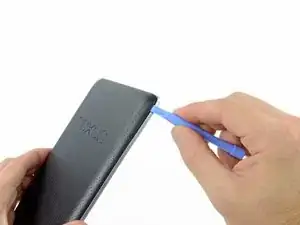
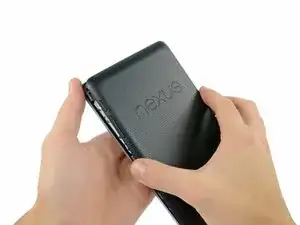
    • Führe an der Seite in der Nähe des Power Buttons vorsichtig ein Plastic Opening Tool zwischen Vorder- und Rückseite ein. Löse so einige Klammern entlang der rechten Seite.

  4. XyWkGPoQkp2N3sRo
    XyWkGPoQkp2N3sRo
    kywiZcRePllXllUk
    cFluDH2DnBlOygwN
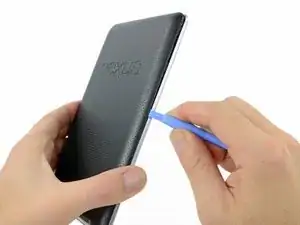
    • Führe vorsichtig ein Plastic Opening Tool an der linken Seite des Nexus 7 zwischen Vorder- und Rückseite entlang, so wie in früheren Schritten beschrieben.

  5. YMtnflWPHAXsTTiZ
    YMtnflWPHAXsTTiZ
    2YmqXWNHKoB6qB1x
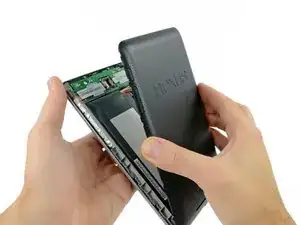
    • Nun kannst du – vorsichtig – Vorder- und Rückseite trennen.

  6. KPSU3Bq55IZSRIyl
    KPSU3Bq55IZSRIyl
    LvEv41KaObLIDhVE
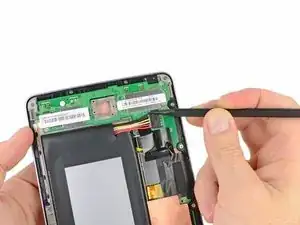
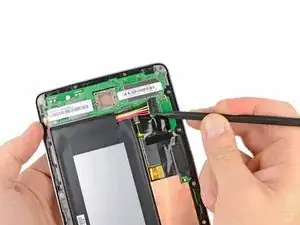
    • Benutze die Spitze eines Spudgers. Wackle abwechselnd erst an einer, dann an der anderen Seite des Akkukabels, um es senkrecht aus seinem Sockel zu ziehen.

    I have the newer version of Nexus and the battery connection inside is different from pictured here. I can't seem to get any part of the connector backed out. Any further details about how to accomplish this step?

    indianowen31 -

    After my post I tried it again, and realized the connector comes straight UP, not OUT. Once I went this direction, the process was simple.

    indianowen31 -

    I followed this, everything worked fine. Even though the battery is now charging, the OS doesn't recognise when the USB cable is connected to a wall socket or a PC. The battery icon when the tablet is shut down shows charging so it works, but the OS in itself doesn't seem to know about it...any ideas?

    /D

    Daniel Zakrisson -

    Thanks for your guide. It makes the process very straightforward. Easier than I was expecting.

    Les Gordon -

    Superb easy to follow guide. Thanks greatly, the nexus 7 lives on ! Just need to patiently wait for it charging now !

    stuart -

    Yes, this is a really helpful guide. I wouldn't have had a clue without it, but it all turned out to be very simple. Thanks a lot!

    Ian Gibson -

    I managed to break one of the two small golden pins to the right of the battery cable (obscured by the tool in the picture above).

    Is this terminal (sorry for the pun)?

    I tried re-assembling (without screwing the assembly back to the bezel) and the display doesn't work.

    gravelld -

    Step 6 could be much clearer. I thought it meant to pry the connector upward, away from the surface. When I did this, all the pins broke off. The correct procedure would appear to be to slide the connector along the surface toward the wire side and battery, leaving the pins at parallel to the surface.

    Unfortunately I don't think my Nexus 7 is salveagable now.

    Warren Harris -

    Watching a YouTube video helped. Dislodge the battery first, then pull the battery away from the connector and the connector will become dislodged quite easily.

    d_ratner_1999 -

  7. 3DVP6vtj2kVyyJtK
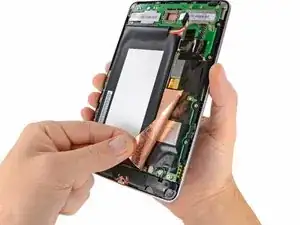
    • Ziehe die kupferne ESD Abschirmung von der Unterseite der Hauptplatine etwas ab.

    • Löse die Abschirmung nicht ganz ab, sie ist noch unter dem Akku befestigt.

    • Wenn du nur den Micro USB Buchse austauschst, brauchst du nicht das kupferne Kühlblech, so wie im Foto, abzuziehen. Wenn sie losgeschraubt ist, kann die Lautsprechereinheit einfach weg geschobenen werden. Wenn die Lautsprecher ersetzt werden, dann brauchst du nur die untere Ecke abzuziehen, um an den Stecker zu gelangen. Den Rest kannst du lassen.

    Peel back the copper heat spreader for the Nvidia Tegra 3 processor

    Jack J -

  8. GGvCAXX5WDAeFPUH
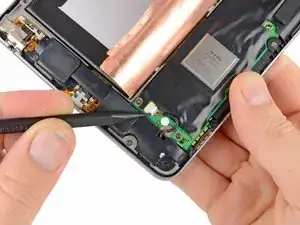
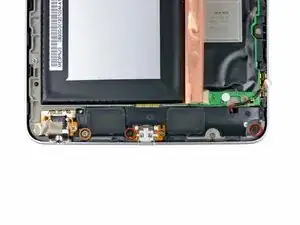
    • Drücke den Stecker am Lautsprecherkabel mit der Spudgerspitze aus seinem Sockel auf der Hauptplatine.

  9. CmVHcfCsF54XcC6G
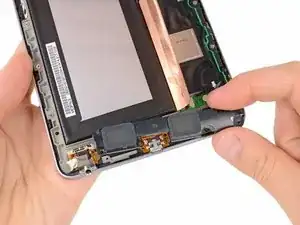
    • Entferne folgende Kreuzschlitzschrauben, welche die Lautsprechereinheit an der Displayeinheit befestigen:

    • Zwei schwarze 4,25 mm Schrauben

    • Eine silberfarbene 3,2 mm Schraube

  10. TaLMsqFiJZM2MAKo
    • Hebe die Lautsprechereinheit an und entferne sie aus dem Nexus 7.

Abschluss

Um dein Gerät wieder zusammenzusetzen, folge den Schritten in umgekehrter Reihenfolge.

Walter Galan

675112 Reputation

7 Kommentare

Hello. My Nexus 7 had issue with the speaker but I can't return it because i don't live in the USA. Can you tell me where can I buy speaker for the Nexus 7. Thanks.

bobski -

Bobski, if you're not covered under warranty then you'll have to buy the speaker assembly on your own, from eBay or a third party site. They're kind of rare.

EXCELLENT guide, had no issues replacing mine and works great! Thanks iFixit!

Justin Redd -

Would anyone happen to know the type of connector that is used to connect the nexus 7's speaker to its logic board?

Gray -

Guide was great! Worked perfectly. Thank you!

milleniumofthecomet88 -

easy took like 5minutes

David -

Thanks so much, my nexus speaker had blown and I had another dead nexus laying around in my basement so with the help of this guide replaced the blown device

Seal-Space -

Brilliant guide. Followed it without any problems and my Nexus now has excellent new sound quality.

Jack -