Einleitung

This guide outlines instructions for replacing a broken front screen . The touchscreen is the most buried component in the device, and lots of important cables need to be removed to access the screen. If the steps in this guide are followed, no damage is expected to come to the device. For more information, refer to our troubleshooting page.

  1. R3WrHkdaFuZjfZ3d
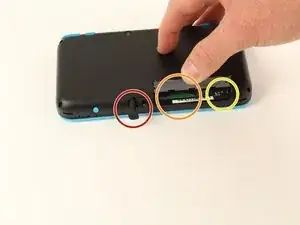
    • Before starting the disassembly, remove

    • The stylus

    • Any game cartridge

    • The SD card

    This is a great repair instructional, but I would advise also looking at the below video link. (I used both.) Sometimes watching 2 repair guides can help when you think you think you’re stuck. For example, I had a really hard time getting the hinge off!

    https://www.youtube.com/watch?v=Zuu_T2ls...

    (HINT: Works best if you rotate it 180 degrees, so that you are repairing it from the same perspective as the technician)

    skat1140 -
  2. qInyERKyTGMKUtxf
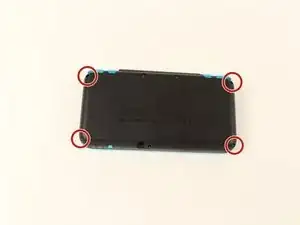
    • Unscrew the four 6mm tri-point screws located at the four corners of the bottom panel.

    The Y0 was too big; I ended up using a Y00 and that worked fine

    Christopher Gilmer-Hill -
    Would not recommend using a Y000 like I tried to do

    Daniela Magaña-Ochoa -

    gotta use Japanese Industry Standard YOO (blunt end)- I did not, and accidentally stripped two of the screws… still trying to figure out how to remove them -_-;

    Yanko Artidiello -

    Yeah I can confirm, the y0 does not work.

    Arc Turus -

  3. FUiabbAOYVaNjG4X
    FUiabbAOYVaNjG4X
    MiHqoVbAY3mST6Ls
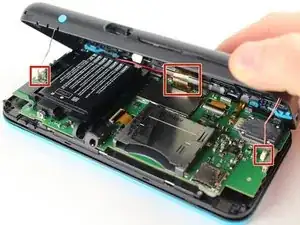
    • Be careful when separating the bottom panel from the front casing to avoid breaking the three cables connected to the motherboard (two on each side and one in the rear).

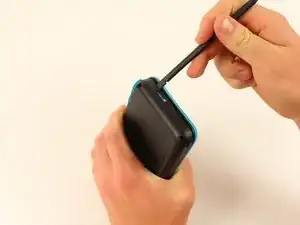
    • Using a spudger, separate the back panel from the front casing by gently prying around the panel.

    • There are many clips along the hinge of the case, so it is recommended to work your way along one short side and the two long sides before finishing the last short side.

    You need to be super careful separating the top from the bottom at the rear end. I got stuck there, applied a lil more force and ripped the right shoulder button straight off the pcb!

    Dominik Leicht -

  4. hN4JmkBHkaqtRlxN
    hN4JmkBHkaqtRlxN
    sLnMpviSoWENSJQk
    CxaLwKZ2IuAS5cAV
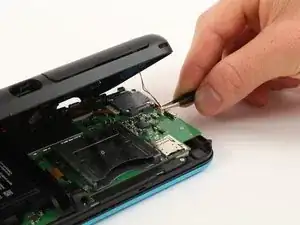
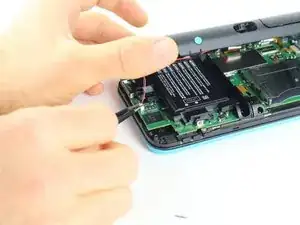
    • Using tweezers, disconnect the two cables that connect the rear buttons on either side to the motherboard by gently pulling them upwards.

    I unfortunately took off the base of one when trying to pull apart. Is there a fix or will it not be broken?

    Phoenix Typhoon -

    Did you manage to fix this at all?

    Owen McKay -

  5. 6AT5OJ1MuuBaICeA
    6AT5OJ1MuuBaICeA
    ua4Ruiu5ewlgVKlO
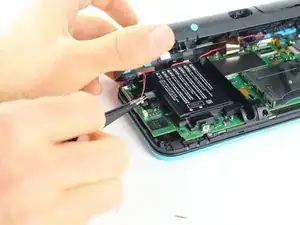
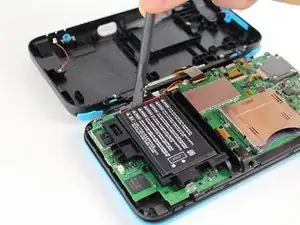
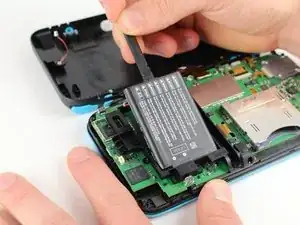
    • Using a spudger, lift out the battery.

    • Be aware that there is a sticky pad holding the battery into its tray. It may be necessary to use multiple tools to gently pry the battery away from the tray and motherboard.

    Some might see this as an optional step. But you probably do NOT want to skip this. I did, and now I have malfunctions on the Nintendo (touch screen functionality not working, possibly as a result of shorts from skipping this step.)

    skat1140 -

  6. jsjgOUIawZWESUXN
    jsjgOUIawZWESUXN
    VRgNRQ53qkPwcvlk
    dJeHGCVnBjiX1U1P
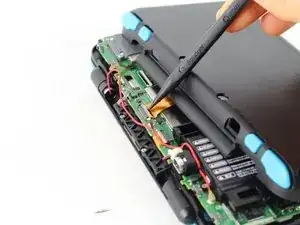
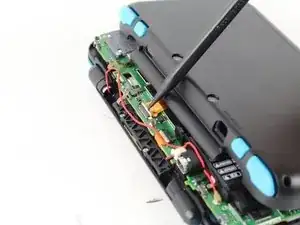
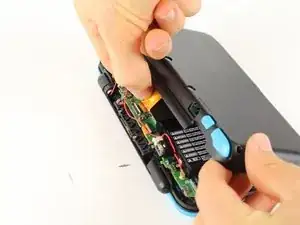
    • To more easily access this ribbon cable, flip the device so the back casing faces upwards. Gently slide the back casing forward, revealing the ribbon cable connecting to the motherboard.

    • Using a spudger, pry up the ZIF connector holding the ribbon cable.

    • Pull the ribbon towards the bottom casing and out of the connector.

  7. vs5SJGfPUygu5lmG
    vs5SJGfPUygu5lmG
    NXDcOe3GUOlemOPB
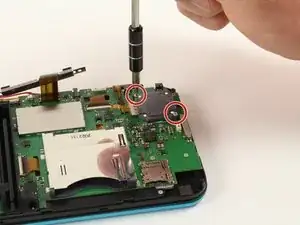
    • Remove the two 7.5mm phillips screws using a PH000 screwdriver.

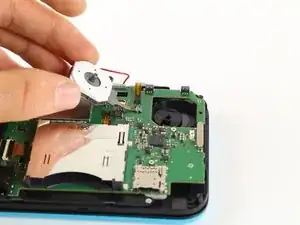
    • Gently flip over the circle pad. Be aware that the pad is pressed into the back of the circle pad on the front of the case. Gentle prying will be necessary to pry if from the back of the circle pad.

    • Be aware that there is a black plastic disc that sits between the circle pad module and the circle pad stick. During reassembly, stand the unit on end and hang the plastic disc on the circle pad module and hold the stick from the front to press them back together.

  8. 65KIJLy2EIKUVqZE
    65KIJLy2EIKUVqZE
    ok6OMmECgYSMsUPh
    KEdQ2GHGis4OTOln
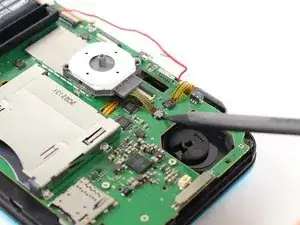
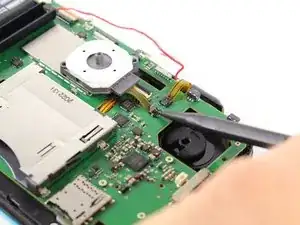
    • Using a spudger, lift up the ZIF connector (the hinge is located on the side closest to where the cable connects).

    • Remove the circle pad by pulling it away from the connector.

    You'll need to push the circle pad through groove out the front face plate.

    Adedamola Odutola -

  9. IXO5oq6cd2c5SYqe
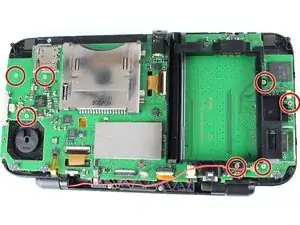
    • Remove the seven 3.5mm phillips screws holding down the motherboard using a PH000 screwdriver.

  10. pSIMnsjVbSgAJwIb
    pSIMnsjVbSgAJwIb
    PH1PYf4OEomUgFh1
    UiNJqfVsjSxsKgn6
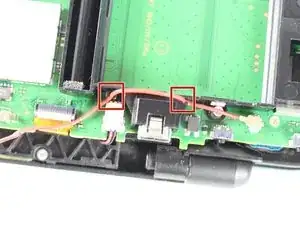
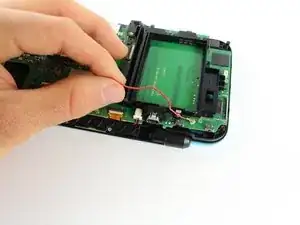
    • Remove the wire attached to the battery housing.

    • Remove the battery housing by lifting it away from the charging port.

  11. mgLq2k5GhbHHDdbF
    mgLq2k5GhbHHDdbF
    BiotcFTjCHcvFkYH
    qJ6tupbChxoZtdJT
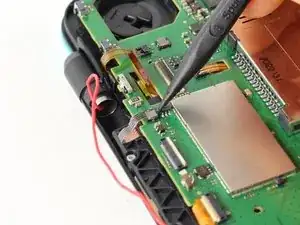
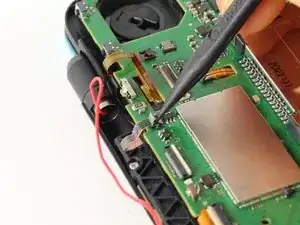
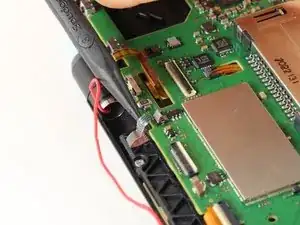
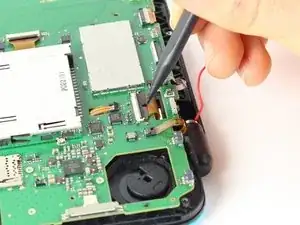
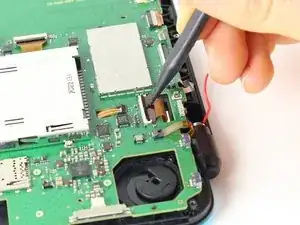
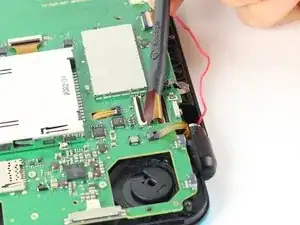
    • Using a spudger, lift up the small ZIF connector next to the circle pad's connector.

    • Gently pull the ribbon cable out from the connector.

    Holy s*** this guide is so embarrassing... This is NOT a ZIF (zero insertion force) connector, it DOES require some amount of force and under no circumstances should you lift up on the latch!!! Only pull out the cable (gently). If you lift up on the latch, it will be permanently bent and you will be forced to solder a new connector in place. (unless you're lucky bending the contacts back into shape)

    Leonhard Bokowski -

    hah, amateur, i couldnt be bothered so i just removed the top part of the socket and soldered the ribbon connector in. yeah, idiot me for not reading the one comment on this and breaking my board, but its back to working order. i will keep this in mind for future repairs

    zac ahlers -

    Another victim joining the party…….. I wish i read the comments beforehand, and for god sake……please update the guide iFixit…..following the instruction ‘lift up the small ZIF connector’ (which in fact not a ZIP connector as pointed out by Leonhard Bokowski , WILL break the connector and render your device’ ZL key malfunction (turns off immediately when you press the ZL key), or in worse case (my situation), the device refuse to boot (and i am now looking for someone to fix it).

    ingramli -

    I'm adding my new (used) 2ds xl to the list of dead consoles.

    Honestly this is the first time that I notice a fault on an ifixit tutorial, usually I just watch the video and replay the steps on my hardware.

    This time it costed me a device.

    Needless to add that I am very upset.

    Alessandro Toppi -

  12. VMF51PoNZZZPNIk1
    VMF51PoNZZZPNIk1
    NBYUA4PyTyTNWOVV
    1ZWPqObUT3HVpTFo
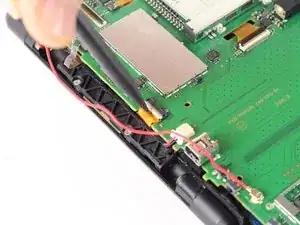
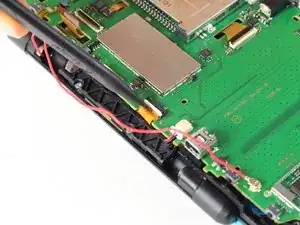
    • Pry up the grey ZIF connector holding the small silver ribbon cable.

    • Gently pull the ribbon cable out of the connector.

    Be VERY careful with this one!

    Dominik Kozaczko -

  13. UEl2hNRq5XPgvgYh
    UEl2hNRq5XPgvgYh
    JAwhbJTNAUdfWvbF
    ta26PlNpysKOAwsH
    • Lift up the ZIF connector holding down the wide bronze ribbon cable that goes through the motherboard near the hinge.

    • Gently pull the ribbon cable out from the connector.

  14. jBxAJjla2Qv1cYI5
    jBxAJjla2Qv1cYI5
    gdhRX1OrURZFYrv3
    oCSchG21Ypdo2gAw
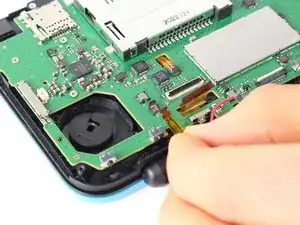
    • Lift up ZIF connector holding down the golden ribbon cable located next to the charging port.

    • Gently pull the ribbon cable out from the connector.

  15. QWnBARuEtXcDSNEn
    QWnBARuEtXcDSNEn
    CWHlBZTT4BDvEsJv
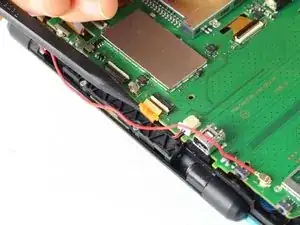
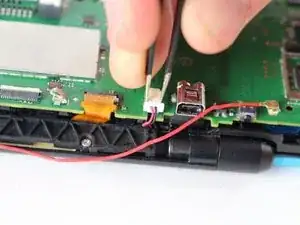
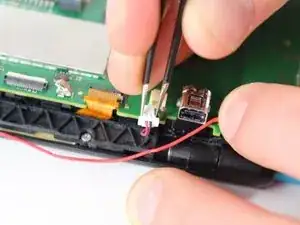
    • Using tweezers, gently pull out the plug located next to the charging port.

  16. cPyVFoXIObVOL1Vj
    cPyVFoXIObVOL1Vj
    1MrIGDBFiqfCa5dv
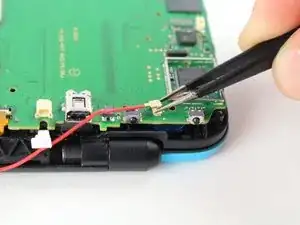
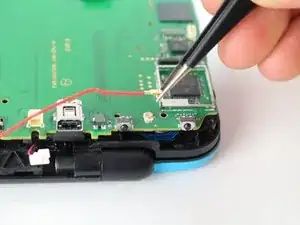
    • Using tweezers, remove the red wire connecting the top screen to the motherboard by gently pulling the connector straight up.

  17. qMue34DIoWnp6YFf
    qMue34DIoWnp6YFf
    VDwjIf4vAhqKcEPd
    hHHYStrEPyVccFmQ
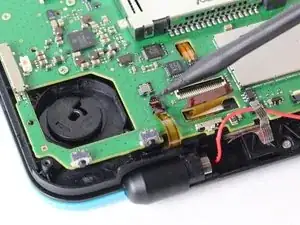
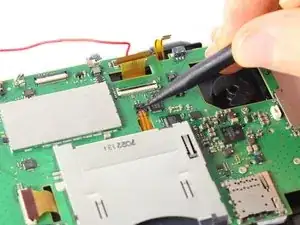
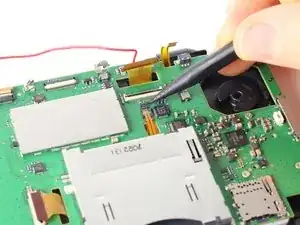
    • Lift up the ZIF connector holding down the wide golden ribbon cable coming through the motherboard next to the game cartridge shell.

    • Gently pull the ribbon cable out from the connector.

  18. jyEOBI5PZQtXbOxG
    jyEOBI5PZQtXbOxG
    D1i1iRWtb1OruCQa
    GDwgmjItXICHYNsW
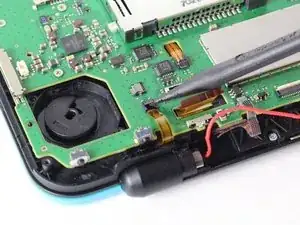
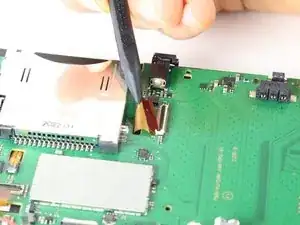
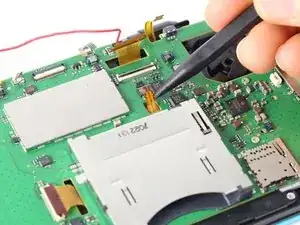
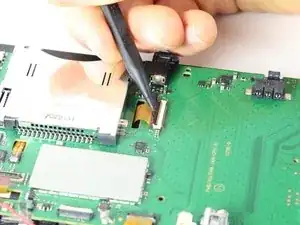
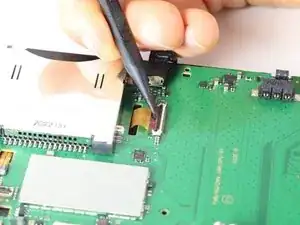
    • Pry up the ZIF connector behind the game cartridge shell holding a small bronze ribbon cable that comes through the motherboard.

    • Remove the ribbon cable by pulling it out from the connector.

    Be VERY careful with this one!

    Dominik Kozaczko -

    do not bend the connector up, it’s not a zif connector as they say, simply use tweezers to pull the cable out, don’t ever open this latch or it will never close again!

    SomeFishySnail -

    help! I broke this one. How bad is it? Can I replace only the zif or the whole part?

    Seth Hannigan -

  19. sFLhAiUBcpwRQWKy
    sFLhAiUBcpwRQWKy
    6yk3ZKUwbgNOcvG4
    RscGPnIlAHhaE2aq
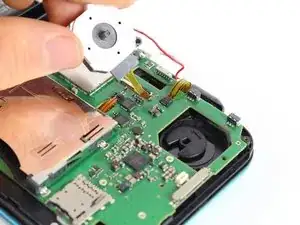
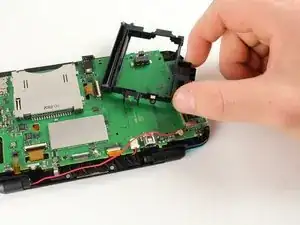
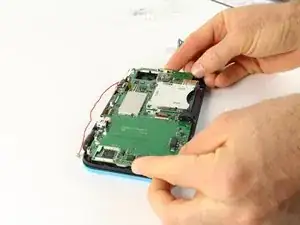
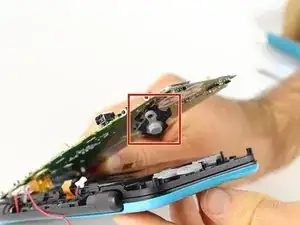
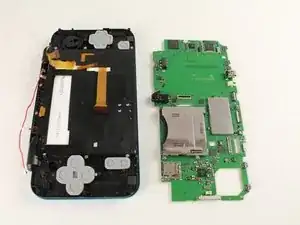
    • The C stick is still connected to the motherboard on the bottom side, and will pop out with the motherboard (Picture 2).

    • Separate the motherboard from the rest of the device by vertically lifting it out of the casing

  20. 1AWjFXVBiOKmFNhR
    1AWjFXVBiOKmFNhR
    xHuOoIpFuYUssHPT
    hqMbMBTZvBFWGu5s
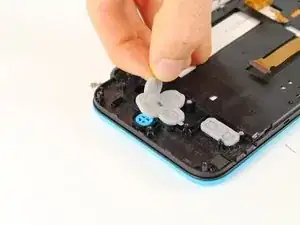
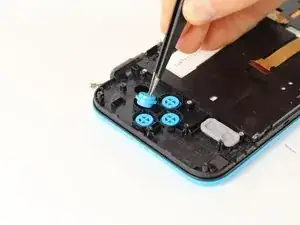
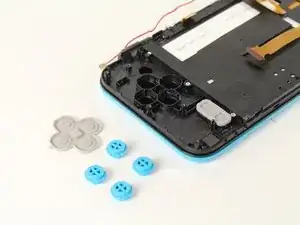
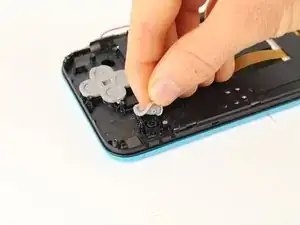
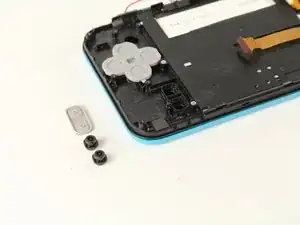
    • Lift off the rubber cover on the A, B, X, and Y buttons.

    • Using tweezers, life out the buttons.

  21. SUIT6nTdrgJSLmL6
    SUIT6nTdrgJSLmL6
    1LHNhvAVBHYTPGTE
    hMLaJ2UiYgM1RSek
    • Lift off the grey rubber cover on the start and select buttons.

    • Using tweezers, lift out the buttons.

  22. 1cwwoDgCSSJZT6Ea
    1cwwoDgCSSJZT6Ea
    JQitoP2fXQnPBHQD
    eYyA5dS1rSILCFa5
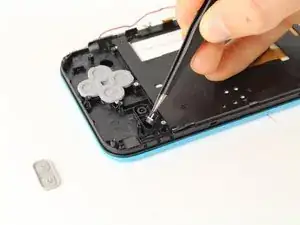
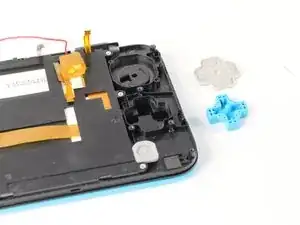
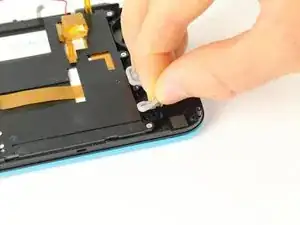
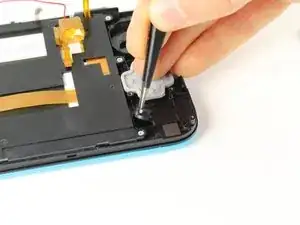
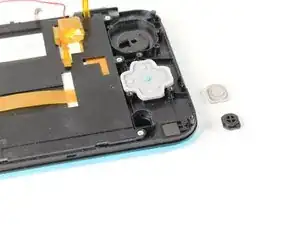
    • Lift off the grey rubber membrane on the D-pad.

    • Using tweezers, lift the D-pad out.

  23. 11ffSkdYLQKDnkUa
    11ffSkdYLQKDnkUa
    lyBftax4pLCY3FcF
    PLhgAthrMuOOuJl6
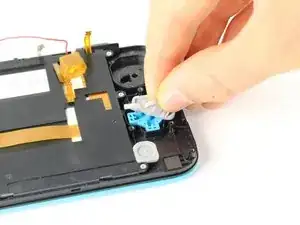
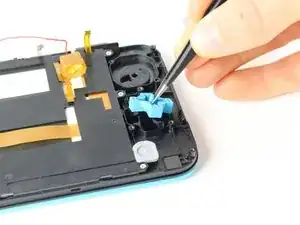
    • Lift off the grey rubber membrane covering the home button.

    • Using tweezers, lift out the button.

  24. ol4jyICbCZsn66yI
    ol4jyICbCZsn66yI
    yPAbCLGELWP6jNbv
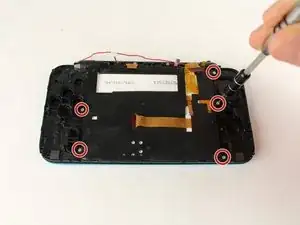
    • Remove the five 7.5mm phillips screws using a PH000 screwdriver.

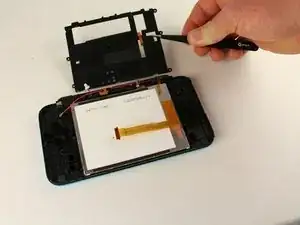
    • Using tweezers, pull up the plate covering the touchpad. The center ribbon cable will slide through this plate.

  25. DoPI4JsKlabhpWYI
    DoPI4JsKlabhpWYI
    f3GSso2O5ZbIJObD
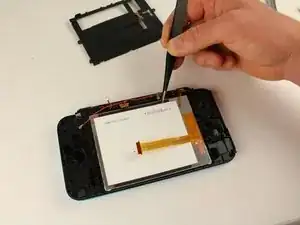
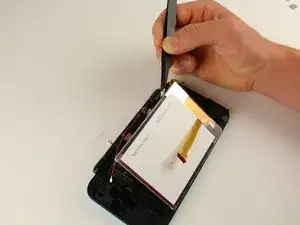
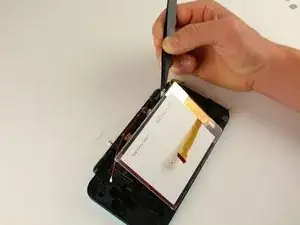
    • The bottom screen is stuck to the front with an adhesive border. Be careful to slowly separate the two. Quick separation can damage both components.

    • Using tweezers, pry up the touchscreen.

Abschluss

To reassemble your device, follow these instructions in reverse order.

Tim Newman

Mitglied seit: 25/09/17

1285 Reputation

7 Kommentare

Please do top screen next, that’s what I need, but still +30 points :)

Multimegamander -

Hi Bud

Great instructions, but where do you buy 2ds xl replacement screens. I’ve looked everywhere. I only see 2ds and 3dsxl replacements for sale

Thanks

John

John S -

Hi Bud

great guide! But where do you buy replacement screens? I’ve looked everywhere and only find 2ds and 3ds xl screens.

Thansk JB

John S -

Where can you find the screen replacements?

Caleb Riley -

Where can you find the screen replacements? This is a great guide but I can't find the screen replacements anywhere.

Caleb Riley -

I changed the digitizer of touch screen for one new, but still not working. which can be the problem? thank you for you answer.

Juan David Giraldo -

⚠WARNING⚠

This guide has a fatal error on step 11. The latch on the connector mentioned in step 11 should NOT be lifted, doing so will break the connector.

Same goes for step 18.

John256145 -