Einleitung
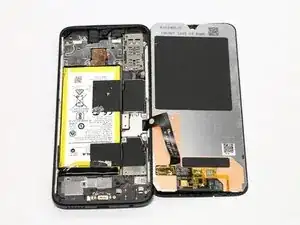
Um fortgeschrittenere Reparaturen am Moto G7 Plus (Modell XT1965) durchzuführen, ist es nötig zuerst das Display auszubauen. Diese Anleitung wird dir zeigen, wie ein solcher Ausbau schnell und einfach zu bewerkstelligen ist. Falls das Display zusätzlich noch ausgetauscht werden soll, können die Schritte in umgekehrter Reihenfolge unter der Verwendung eines neuen Displays und eventuell neuen Klebers durchgeführt werden.
Beim Ausbau eines zerbrochenen Displays sollte beachtet werden, dass unter Krafteinwirkung Glasstücke abspringen können. Sei also vorsichtig und trage falls nötig eine Schutzbrille.
Ein paar der benötigten Teile sind unten aufgelistet. Stelle sicher, dass das Handy vor dem Beginn der Reparatur ausgeschaltet ist.
Werkzeuge


-
-
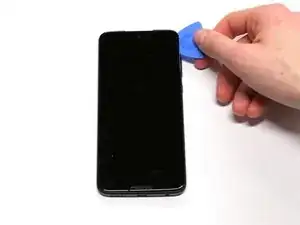
Führe oben am Gerät ein Plektrum zwischen Display und Rahmen ein.
-
Arbeite dich mit dem Plektrum an den Kanten des Gerätes entlang, um den Klebstoff an diesen Stellen des Displays zu entfernen.
-
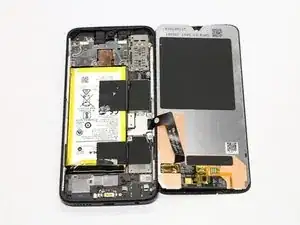
Sobald genug Kleber gelöst wurde, sollte es möglich sein, das Display vorsichtig von der linken Seite her anzuheben und vom Gerät zu trennen.
-
-
-
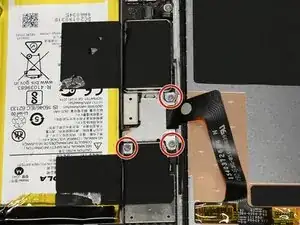
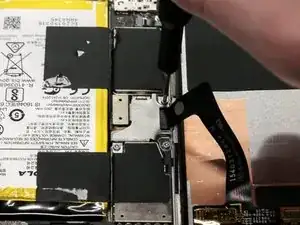
Entferne die drei 2,7 mm Schrauben, die den Sockel des Kabels umgeben, mit einem Torx T5 Schraubendreher.
-
nachdem die Schrauben gelöst wurden kannst du vorsichtig die Metallplatte, die den Sockel des Kabels bedeckt, entfernen.
-
-
-
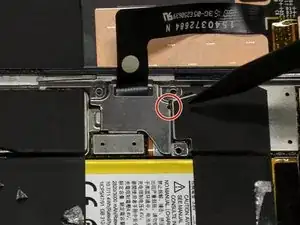
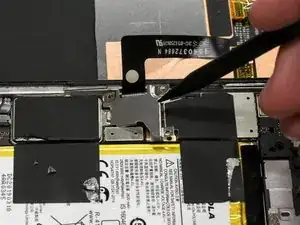
Benutze das spitze Ende des Spudgers, um die Metallabdeckung an der eingekreisten Stelle anzuheben.
-
-
-
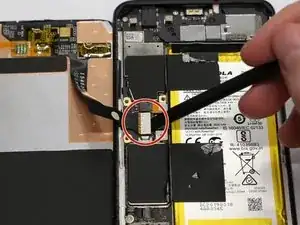
Unter dem Metallstück befindet sich die Verbindung von Logic Board und Kabel. Verwende ein Plektrum oder einen Spudger, um die Verbindung zu lösen.
-
Der Bildschirm wird vom Gerät getrennt.
-
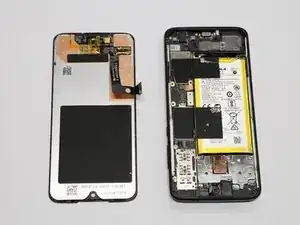
Führe die Schritte in umgekehrter Reihenfolge aus, um das Gerät wieder zusammenzubauen.

8 Kommentare
Althrough a simple fix, one should be weary if the glass is shattered. I just did this, and there were a few spliters left on the adhesive, and of course sticking to it. So if you want to replace your screen due to broken glass, make sure to wear protection and remove the splinters carefully, otherwise you may be tempted to press on the new display to strongly, because you want to stick it to the whole brim.
I completed this fix, and it wasn’t too bad. Just watch out when gluing back the screen not to put glue over the microphone hole at the bottom. This would be the phone microphone mouthpiece, you can see a small notch on the bottom of the screen, beside the “motorola” “m” on the front . I put glue there without knowning and the microphone is now very muted.
Thank you for the heads up about the. microphone hole…
Great article! Keep it up, this really helps out us broke fellows.
DIY OR DIE!!!
What can I do if I broke the cable connected to the back
Dont pry deeper than 3 mm. If you are deeper and just under the glass you will damage the display. The sceen are two layers. Obe witk the veru thin glass and one with a metal frame with display. Yoy want to get under both layers to lift the screen.
Magnus Tuvendal -
Correcting autocorrect… Dont pry deeper than 3 mm. If you are deeper and just under the glass you will damage the display. The screen is two layers. One with the very thin glass and one with a metal frame with the lcd-display. Yoy want to get under both layers to lift the screen.
Magnus Tuvendal -
I don’t have a thermal gun. Here’s what I did. I wrapped my phone in a baggie and an added an oven thermometer into a heating pad and monitored the heat that way. I left it for awhile (to allow all heat to dissipate) and the heat was 189-degrees Fahrenheit. One hour, toasty warm. So I worked with that.
Harry A -
So after one hour at 180 degrees Fahrenheit the base already started buckling and removed itself from the screen. So it was easy to remove the base from the screen. There was some rubber thread that I had to remove. Because of that, I understand that now my phone is not water-tight and I need to treat it as such. But the battery replacement went fine and everything is working great after it was all placed back together. I hope to get a few more years out of my G7 plus!
Harry A -