Einleitung
Bezahle Apple nicht für den Austausch eines kaputten Akkus. Das kannst du selbst machen!


-
-
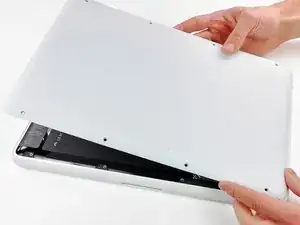
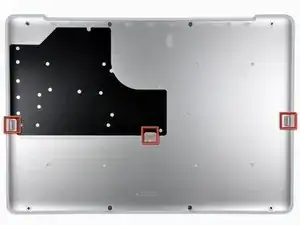
Hebe die untere Abdeckung vorsichtig in der Nähe der Lüftungsöffnung an.
-
Öffne den Spalt weiter mit den Fingern, bis sich die Abdeckung von den verbleibenden Clips löst.
-
-
-
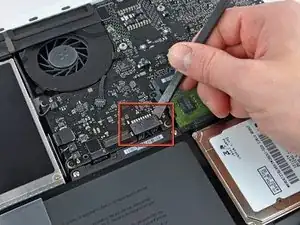
Heble den Verbinder des Akkus vorsichtig mit einem Spudger von seinem Anschluss auf dem Logic Board.
-
-
-
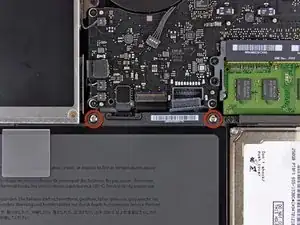
Entferne die beiden 5mm Tri-point-Schrauben, mit denen der Akku am oberen Gehäuse befestigt ist.
-
-
-
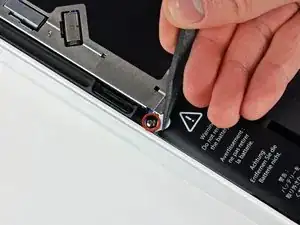
Benutze die Spitze eines Spudgers, um vorsichtig die Ecke des Warn-Aufklebers umzubiegen. Dahinter befindet sich eine Tri-point-Schraube.
-
Entferne die 5 mm Tri-point-Schraube, mit der der Akku am oberen Gehäuse befestigt ist.
-
-
-
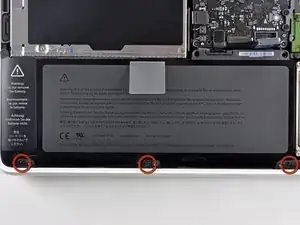
Entferne die drei 3.1 mm Kreuzschlitzschrauben, die den Akku nahe der Kante des oberen Gehäuses befestigen.
-
-
-
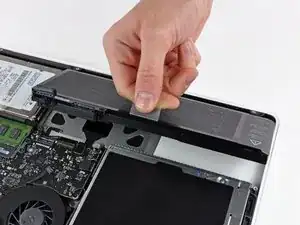
Hebe den Akku an der Plastiklasche an und nimm ihn aus dem oberen Gehäuse.
-
Lade ihn auf 100% und lasse ihn mindestens zwei weitere Stunden am Ladegerät. Ziehe den Stecker und benutze dein MacBook normal, um den Akku zu entladen. Wenn die Ladeanzeige am Minimum ist, dann speichere ab und lasse den Laptop an, bis er von selbst ausgeht. Warte wenigstens 5 Stunden und lade dann ohne Unterbrechung auf 100% auf.
-
Wenn dir nach dem Einbau deines neuen Akkus etwas Ungewöhnliches auffällt oder Probleme auftreten, kann es sein, dass du den SMC deines MacBooks zurücksetzen musst.
-
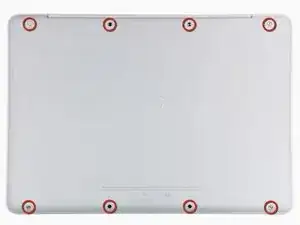
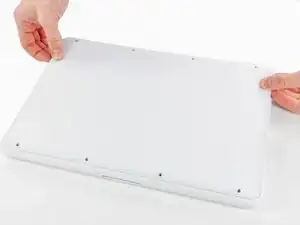

Folge beim Zusammenbau den Arbeitsschritten dieser Anleitung in umgekehrter Reihenfolge.

35 Kommentare
what size is the tri-wing screwdriver used in this guide(0,1,2,3,4,5?)
I bought a tri wing y1 from Wera, but it was way to big.... I guess I'll buy the ifixit bit set, but otherwise I would try y0.
--edit-- Looking at the photo's here of the tri-wing screws, it more looks like my macbook has different screws. Mine are black and as large as the other normal screws.
Looks like the 2010 version has y0 somehow.
Peterdk -
I just replaced the battery on my late 2009 mac and thanks to this and all the other detailed guides it was actually quite simple (save for those cursed tri-wings). Don't feed apple with money you can spend on better things. A battery-removel isn't one of them.
For those that have questions about the size of the bit, every article starts with "Tools". The tri-wing is size Y1 as the guide says. 5mm is the length of the screw itself, not the size of the bit.
Just replaced a battery myself. The replacement battery (from an ebay seller) is supposed to be genuine, but was missing the "Warning, do not remove the battery" sticker and the "Do not throw in the trash" sticker, and the main sticker was glossy with air bubbles. Not sure if fake or not. But have been working great this first night.
This guide was spot on. Followed every step, and used the iFixit kit when doing the repair.
tech -
According to this page http://support.apple.com/kb/HT1651?viewl..., the 8 screws are not identical.
Can anybody tell me where each kind of screw is supposed to go?
Gregoire -
They are all 100% Identical. You were probably looking at a different model, or Apple has entered the wrong information... Hey, It happens...
weeowey weeowey -
The screws on the Late 2009 are identical. The blue lock compound might make tightening some require a little more effort.
svenaustx -
Can I replace it with a SATA 3 cable?
nm -
A1342 macbook does not have the right controller to support sata III
weeowey weeowey -
hi, i just got back from the apple store and they are really keen for me to upgrade to a new laptop since my battery is old and the screen is cracked, so glad i found ifixit i would love to upgrade this puppy! gonna make it a real sleeper! styler hall wrote about sticking 16 gb of ram in his a 1342 ? is this a simply mather of ordering 3 4gb sticks ?aslo i currently have 4 gb and would like to upgrade to 8 ( or indeed 16) does that mean i need to buy all new sticks or can i continue to use the old one and stick a new one next to it ?
thanks again mick van aar, perth western aus.
michelvanaar -
The A1342 will take up to 16 GB of RAM, however, there are only two RAM slots, so use two 8-GB RAM modules. Other World Computing (OWC) is a great reference source for info on exactly which RAM to use with which model; prices are usually much better on EBay though. Add an SSD from OWC and your machine will really scream!
I hope that helps!
gdesbrisay -
Gregoire is right. The 8 screws are absolutely NOT identical, I’m looking at them right now, weeowey weeowey.
John Guzman -
I just wanted to say that, in 2020, i used these instructions to replace the magsafe socket on my A1286, mid-2012, pre-Retina MacBook Pro. The internal layout is not quite the same but close enough for me to do the job. I skipped the steps of fully disconnecting the fans and speakers because of what others had said about breaking the sockets. it just meant I had to be extremely careful when lifting up the main board so that I did not tear and break the connections. I was able to disconnect the old magsafe socket with the board flat and in situ, but there was no where near enough room to be able to aline and press home the new par home. Reluctantly i had to lever up the board. This was difficult as there is a tapped post that holds a screw in the way close to where the USB sockets are, that prevented the board lifting up and out. I had to be quite forceful to manouevre the sockets out from the edge of the case.
Paul Burridge -