Einleitung
Die beiden Mikrofone deines MacBook befinden sich auf einem Kabel, das unter dem Logic Board versteckt ist. Verwende diese Anleitung, um das Flachbandkabel und die Dual-Mikrofone zu ersetzen.


Ersatzteile
-
-
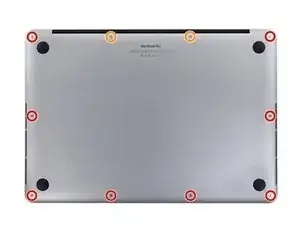
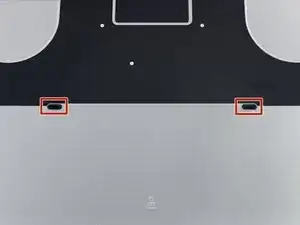
Entferne die folgenden P5 Pentalobe Schrauben, mit denen das untere Gehäuseteil am MacBook Pro befestigt ist:
-
Acht 3,1 mm
-
Zwei 2,3 mm
-
-
-
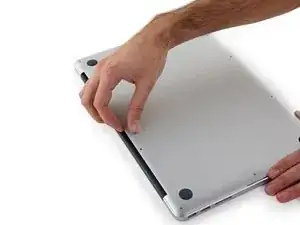
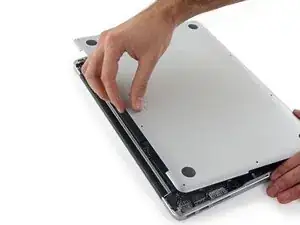
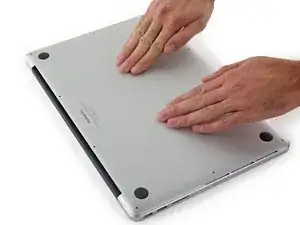
Von der Kante, die dem Scharnier am nächsten liegt, hebst du das untere Gehäuseteil vom MacBook Pro weg.
-
-
-
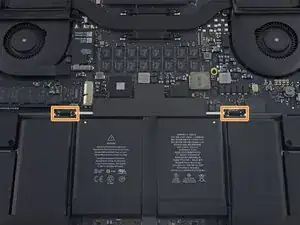
Hebe vorsichtig jede Seite des Akkusteckers an, um ihn aus seinem Anschluss auf dem Logic Board herauszuziehen.
-
Biege den Stecker in Richtung Akku zurück, und stelle sicher, dass der Akkustecker nicht versehentlich mit dem Logic Board in Berührung kommt.
-
-
-
Nutze einen Spudger um die drei AirPort-Antennenkabelstecker nach oben aus ihren Buchsen auf dem AirPort Board zu hebeln und biege sie nach oben und aus dem Weg.
-
-
-
Verwende die Spitze eines Spudgers, um den Stecker des Kamerakabels aus seinem Anschluss auf dem Logic Board zu schieben.
-
-
-
Ziehe die AirPort-/Kamera-Kabel mit den Fingern nach oben vom Lüfter ab.
-
Fädle die Kabel vorsichtig aus ihrer Kunststoffführung.
-
-
-
Entferne die vier 2,2 mm T5 Torx Schrauben, welche die Steckerabdeckungen des I/O Board Kabels befestigen.
-
-
-
Entferne die Steckerabdeckung links.
-
Verwende das flache Ende eines Spudgers, um das linke Ende des I/O-Board-Kabels von der Buchse auf dem Logic Board nach oben zu ziehen.
-
-
-
Entferne die rechte Steckerabdeckung.
-
Verwende das flache Ende eines Spudgers, um das rechte Ende des I/O Board Kabels von seinem Anschluss auf dem Logic Board zu hebeln.
-
-
-
Ziehe das obere I/O-Board-Kabel vom Kleber ab, der es am Lüfter befestigt.
-
Entferne das Kabel.
-
-
-
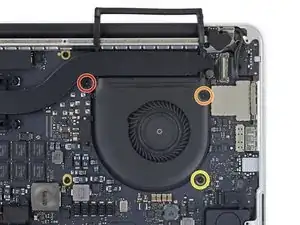
Entferne die folgenden drei Torx T5 Schrauben, welche den rechten Lüfter am Logic Board befestigen:
-
Eine 5,0 mm Schraube mit einem 2,0 mm langen Bund
-
Eine 4,0 mm Schraube mit breitem Kopf
-
Eine 4,4 mm Schraube
-
-
-
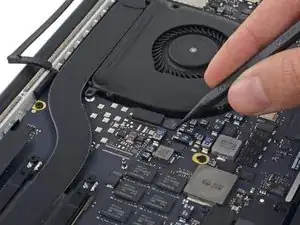
Verwende die Spitze eines Spudgers, um die Halteklappe am ZIF-Anschluss des rechten Lüfter-Flachbandkabels nach oben zu klappen.
-
-
-
Hebe den Lüfter an und schiebe ihn vorsichtig nach hinten, um das Lüfterkabel aus dem Anschluss zu ziehen.
-
Entferne den Lüfter.
-
-
-
Entferne die folgenden drei Schrauben, welche den rechten Lüfter am Logic Board befestigen:
-
Eine 3,6 mm T5 Torx Schraube mit Breitkopf
-
Eine 5,0 mm T5 Torx Schraube mit einem 2,0 mm langen Bund
-
Eine 4,4 mm T5 Torx Schraube
-
-
-
Verwende die Spitze eines Spudgers, um die Halteklappe am ZIF-Anschluss des linken Lüfter-Flachbandkabels nach oben zu klappen.
-
-
-
Hebe den Lüfter an und schiebe ihn vorsichtig nach hinten, um das Lüfterkabel aus dem Anschluss zu ziehen.
-
Entferne den Lüfter.
-
-
-
Entferne die einzelne 2,9 mm T5 Torx Schraube, mit der die SSD am Logic Board befestigt ist.
-
-
-
Hebe das Ende der SSD so weit an, dass es über dem direkt dahinter liegenden Lautsprecher ist.
-
Ziehe die SSD gerade aus ihrer Buchse auf dem Logic Board heraus.
-
-
-
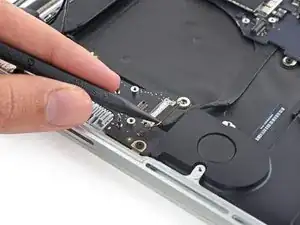
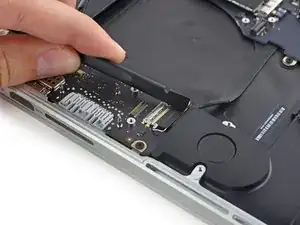
Verwende die Spitze eines Spudgers, um den Verriegelungsmechanismus des I/O-Board-Steckers nach oben zu klappen.
-
Drehe den Spudger um und schiebe das I/O-Kabel mit dem flachen Ende aus dem Stecker heraus.
-
-
-
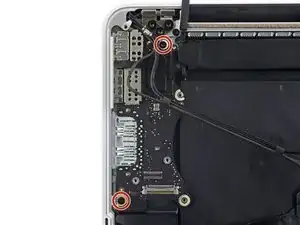
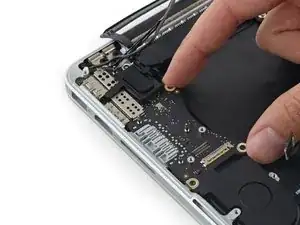
Hebe die Innenkante des I/O-Boards leicht an und ziehe sie zur Mitte des MacBook, also von der Seite des Gehäuses weg.
-
Entferne das I/O Board.
-
-
-
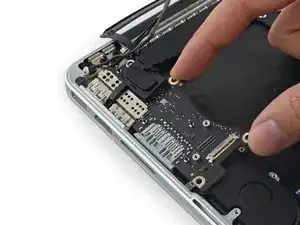
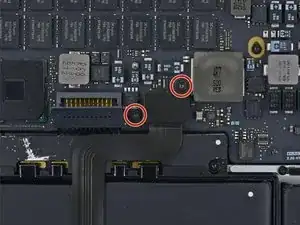
Entferne die beiden 2,2 mm T5 Torx Schrauben, welche die Abdeckung des Touchpad-Kabelsteckers am Logic Board befestigen.
-
Entferne die Abdeckung.
-
-
-
Verwende das flache Ende eines Spudgers, um den Stecker des Touchpadkabels von seiner Buchse auf dem Logic Board zu trennen.
-
-
-
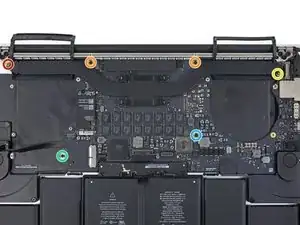
Entferne die folgenden sechs Schrauben, mit denen die Logic Board Einheit am oberen Gehäuse befestigt ist:
-
Eine 3,8 mm T5 Torx Schraube
-
Zwei 5,7 mm T5 Torx Schrauben
-
Eine 5,6 mm T5 Torx Schraube (diese ist silberfarben und hat einen höheren Kopf als die anderen)
-
Eine 2,6 mm T5 Torx Schraube
-
Eine 3,2 mm T5 Torx Schraube
-
-
-
In den folgenden Schritten wird detailliert beschrieben, wie du diese sechs Anschlüsse trennst. Lies dir unbedingt jeden Schritt durch, da diese Anschlüsse verschiedene Bauformen haben und deshalb auch auf unterschiedliche Weise zu trennen sind.
-
Mikrofonkabel
-
Kabel des linken Lüfters
-
Tastaturdatenkabel
-
Kabel des rechten Lüfters
-
Tastaturhintergrundbeleuchtungskabel
-
Displaydatenkabel
-
-
-
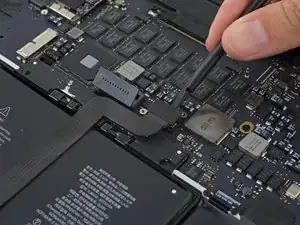
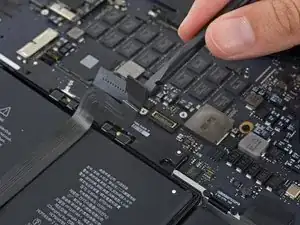
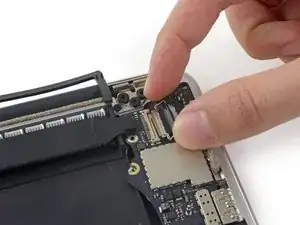
Klappe mit der Spitze eines Spudgers die Halteklappe an der ZIF-Buchse des Mikrofon-Flachbandkabels nach oben.
-
Ziehe das Mikrofon-Flachbandkabel parallel zum Logic Board aus der Buchse.
-
-
-
Verwende das flache Ende eines Spudgers, um den linken Lautsprecheranschluss aus seiner Buchse auf dem Logic Board herauszuziehen.
-
Falte das Kabel vorsichtig nach oben vom Logic Board weg und aus dem Weg.
-
-
-
Mit der Spitze eines Spudgers kannst du jetzt die Halteklappe an der ZIF-Buchse des Tastaturdatenkabels hochklappen.
-
Ziehe das Tastaturdatenkabel aus seiner ZIF-Buchse heraus. Achte darauf, dass du parallel zum Logic Board ziehst und nicht gerade nach oben.
-
-
-
Verwende das flache Ende eines Spudgers, um den linken Lautsprecheranschluss aus seinem Anschluss auf dem Logic Board herauszuziehen.
-
Falte das Kabel vorsichtig nach oben vom Logic Board weg und aus dem Weg.
-
-
-
Benutze die Spitze eines Spudgers, um den Anschluss für die Hintergrundbeleuchtung der Tastatur von der Buchse auf dem Logic Board nach oben zu ziehen.
-
-
-
Verwende die Spitze eines Spudgers, um den Verschluss des Displaydatenkabels nach oben zu klappen und ihn in Richtung MagSafe 2-Powerport zu drehen.
-
-
-
Ziehe das Displaydatenkabel gerade aus der Buchse auf dem Logic Board heraus.
-
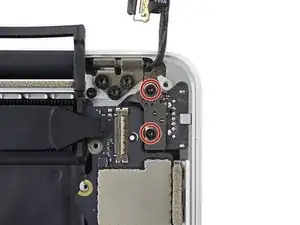
Biege das Displaydatenkabel vorsichtig zum Displayscharnier hin, um die Schrauben auf dem MagSafe 2 Board freizulegen.
-
-
-
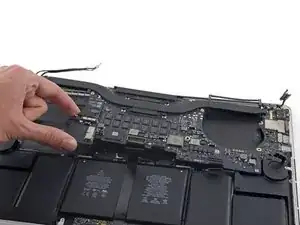
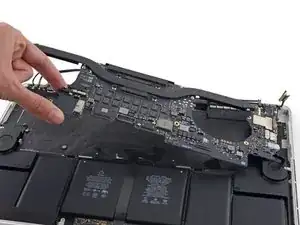
Hebe die ganze Logic Board Einheit an und ziehe sie von der Wand des oberen Gehäuses weg.
-
-
-
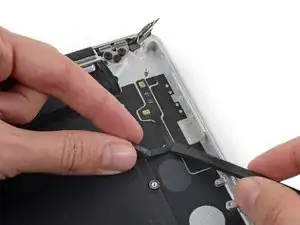
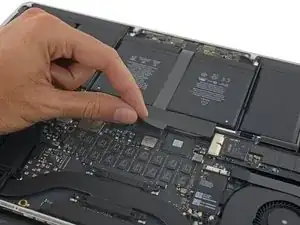
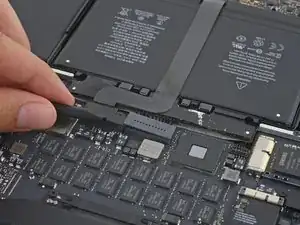
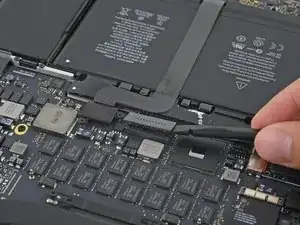
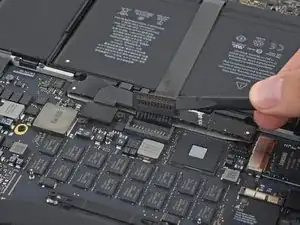
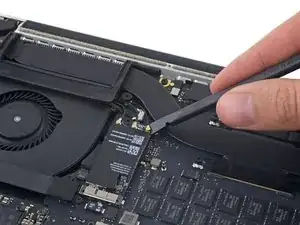
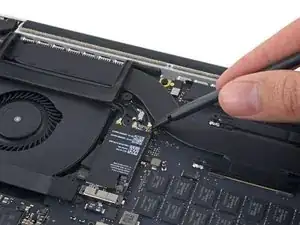
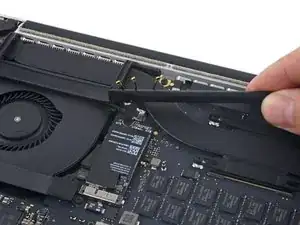
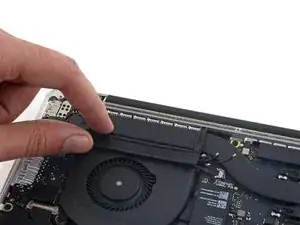
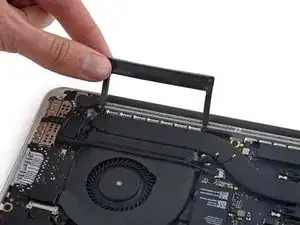
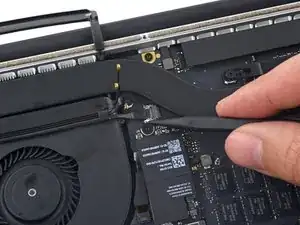
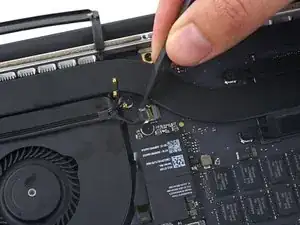
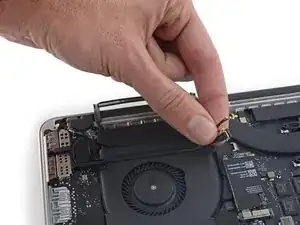
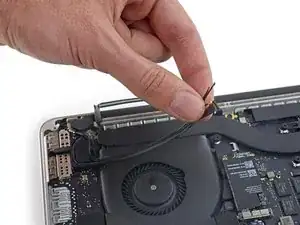
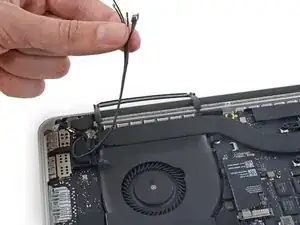
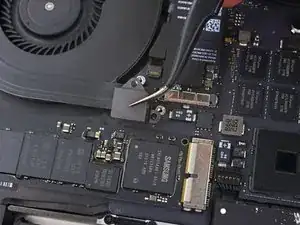
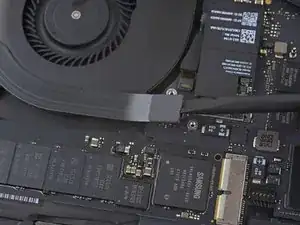
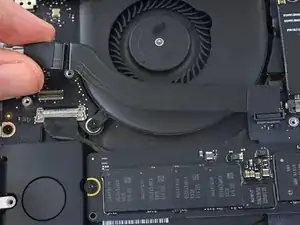
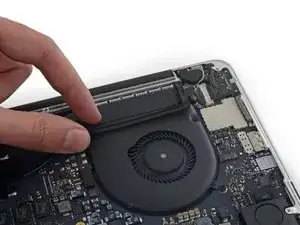
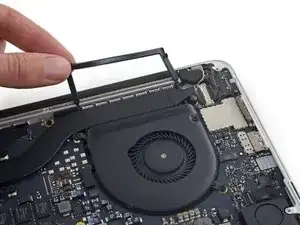
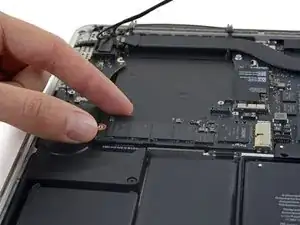
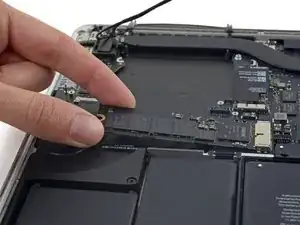
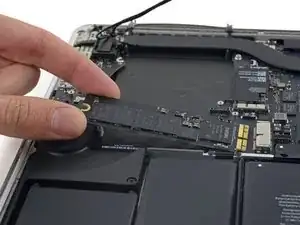
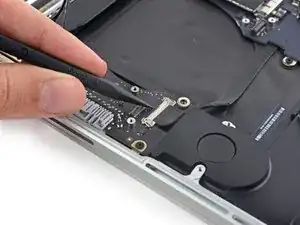
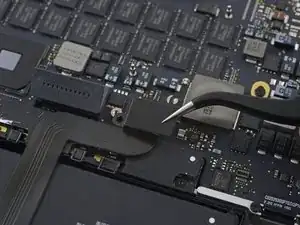
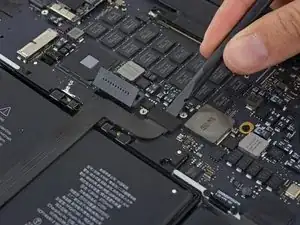
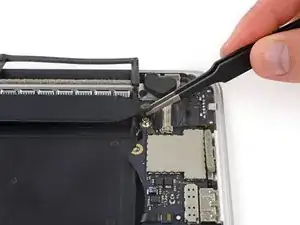
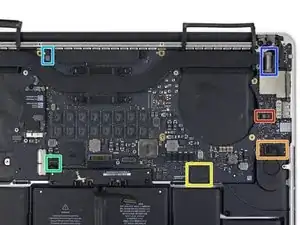
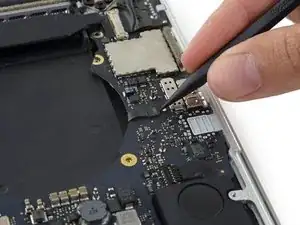
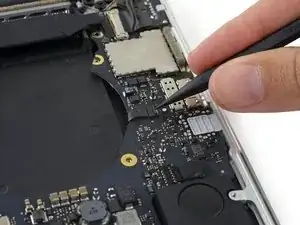
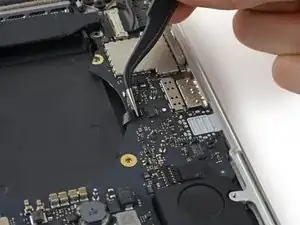
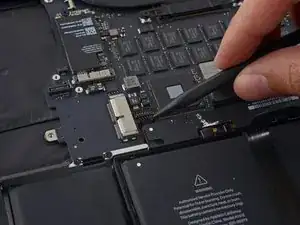
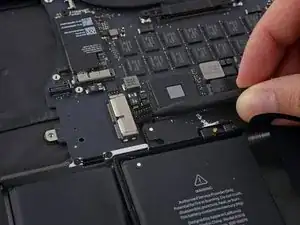
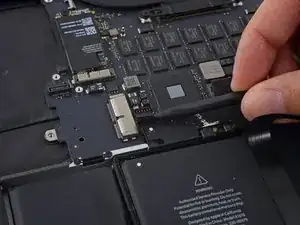
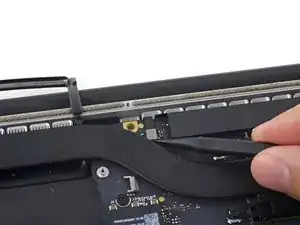
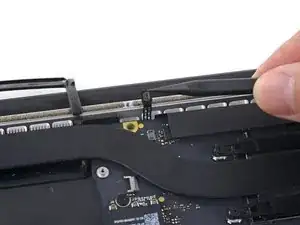
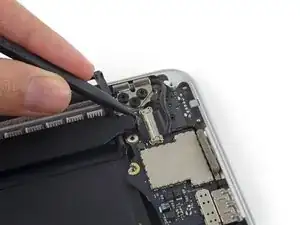
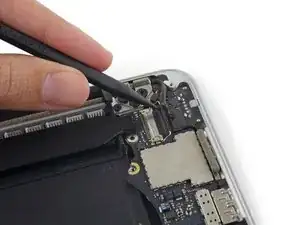
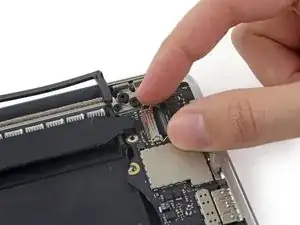
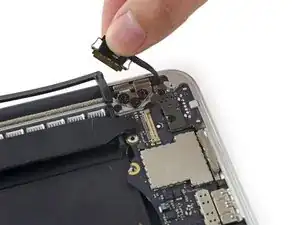
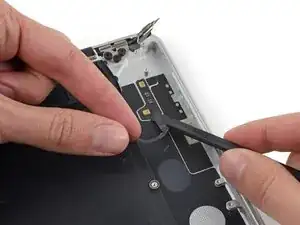
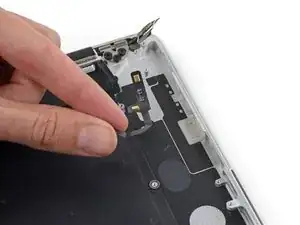
Ziehe das Mikrofonkabel vorsichtig nach oben und schiebe gleichzeitig das flache Ende eines Spudgers unter das Kabel, um den Klebstoff zu lösen, mit dem es am oberen Gehäuse befestigt ist.
-
Entferne das Mikrofonkabel.
-
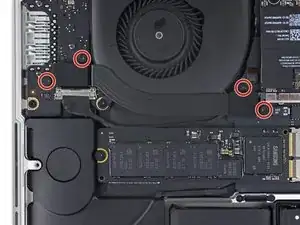
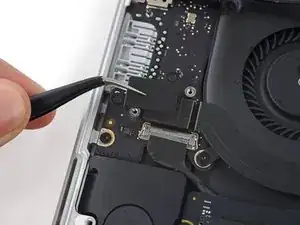
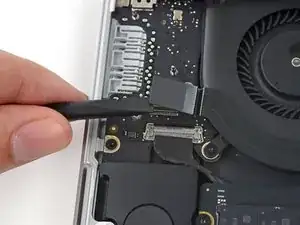
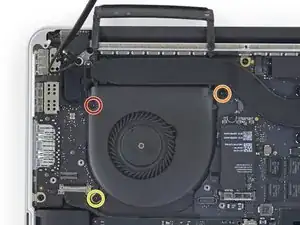
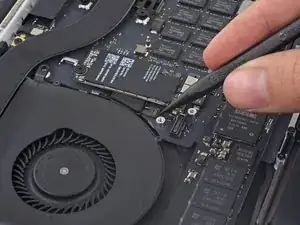
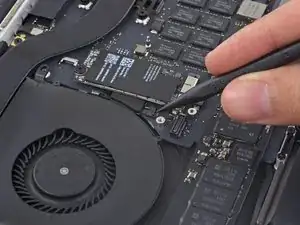
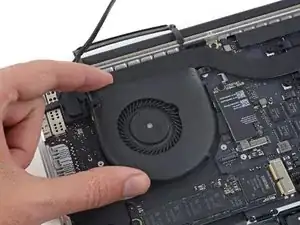
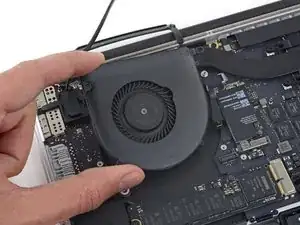
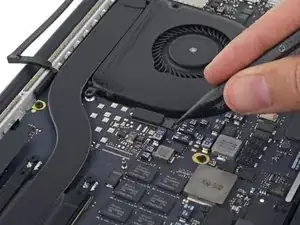
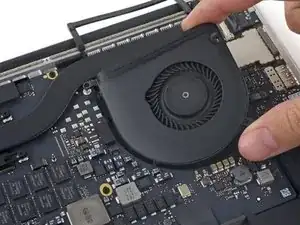
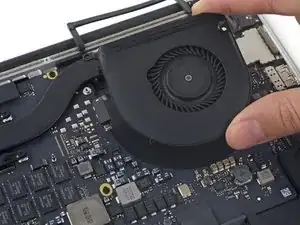
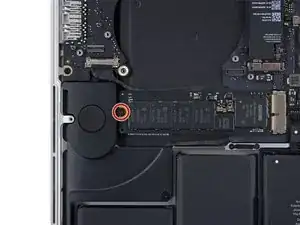
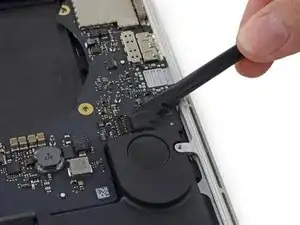
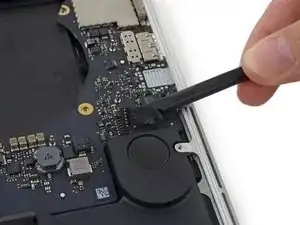
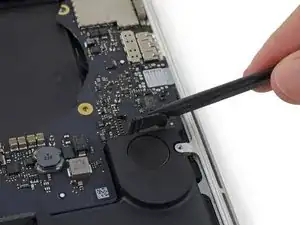
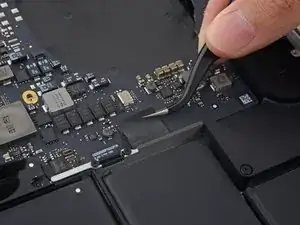
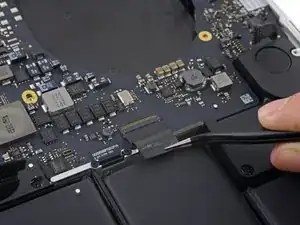
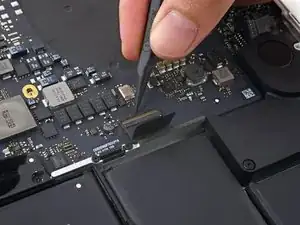
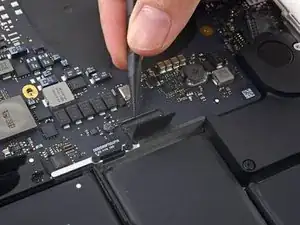
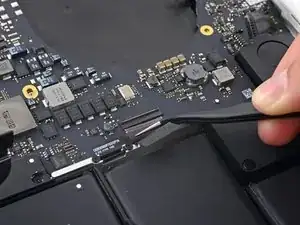
Um dein Gerät wieder zusammenzusetzen, folge den Schritten in umgekehrter Reihenfolge.

Ein Kommentar
Dear Andrew,
Thank you so much for an amazing guide. The only trouble I have is sourcing the part. The only microphones I can find online are 2012-2013 compatible models.
Apple Part #:
923-0100
Manufacturer Part #:
821-1571-A
Are these the same part, and if not do you by any chance have a suggestion for finding the correct part number?
Best regards,
Rob
The number of screws listed here is wrong on my model. I had four of the smaller size.
anonymous 1286 -
Just to add to my comment above (I can't edit it because it's anonymous), my MacBook Pro is a mid-2015 15in model 2.8GHz (A1398; EMC2881). For the bottom case it uses six 3.1mm screws, and four 2.3mm screws at the clutch/hinge side of the MacBook Pro. I tried using a 3.1mm screw at the clutch/hinge end, as described in the main article, and they don't fit. It has to be four 2.3mm screws.
anonymous 1286 -
The instructions below have you basically taking ALL of the guts out of case. I’ve been doing my own apple repairs since before ifixit was a thing and this one is a handful. My battery was swelling and I wanted to remove it before it burst or bent the case so I took it out without having a replacement and it occurs to me that aside from using the solvent (liquid) to remove the adhesive, you could probably do this only taking the trackpad ribbon out. I have mine reassembled now and will research the best battery to buy but I think installation will take about 5 minutes. See if you can slip a plastic gift card under the battery and wag/saw the adhesive out without the solvent before you go through all of this. It might work. Note, don’t bend or put too much stress on the battery and certainly don’t puncture it…
br1ansk -
Battery Recall for 15-inch MacBook Pro Retina mid-2015. Check Apple’s site for recalls, and put in your serial number. They replaced my swelling battery for free, regardless of warranty.
Steve -
As we are only replacing the battery, you can safely skip steps 6-26 and 28-48, no need to disassemble the computer to pull out the battery. Use nail polisher remover I was able to pull a super bloated battery out, without disassembling my MacBook.
John Sikking -
I’m having a problem trying to get the screws off. I have a set of pentalobe screwdriver set. I found one screwdriver that fits perfectly on one set of screws, but I am unable to unscrew it. I tried using some force pushing the screwdriver into the screw, but nothing happens. Any suggestions?
henry_k_wong -
All the screws on mine are the same length for some reason.
ccfman2004 -
I would recommend the first step is: Run the battery down to ZERO before doing any next step. This reduces risk to you, people nearby, to the MBP and greatly reduces the risk of fire. Step 2 should be: Double-check that the battery is at zero.
I like others listed below and on YouTube, disagree with these full tear down 70+ steps being the only focus. I get that I have to be careful not to get the acetone solvent near the speakers. I skipped 25+ steps by: tilting the MBP away from the speakers and using very little acetone solvent. More pressure with the plastic cards and only a few drops of solvent. While giving the full set of instructions is fine it should be very clear that you can (at the user’s own risk) do this.
Kenneth Schleede -
As above—I consider full disassembly to be far riskier to fragile cables and connectors than the risk for solvent spillage. I did steps 1-5 and 46-74. No issues. I HIGHLY recommend the iFixit magnetic Project Mat. It’s a white marker board surface gridded into squares and invaluable for labeling part sizes/steps in disassembly.
philtrit -
As above too. I benefitted from the advice. From step 51 onwards, I found a easier way using tip from China battery seller. Use a 2” width plastic scraper/plastic paint scraper to poke under the battery. Use moderate strength to poke and avoid rough handling of the battery so as not to puncture it. There is no need to pry the battery to avoid stressing it, just use a firm poking action under the battery and the double sided tape adhesive will yield. After 5 min of such poking, the entire battery pack can be removed without the hassle of pouring the adhesive remover from step 51 onwards. Get a scraper with a stronger handle so that it is more comfortable to poke.
https://www.aliexpress.com/item/32889670...
Emma Pn -
Heads up as you go…we (husband/wife team) had a notebook that when screws/covers were removed, we marked the step # and actually taped the screws into the notebook noted by the step number. This was very helpful on reassembly and we knew we would be using the exact screw into the original screw hole.
Ann Brainard -
After replacing the batteries myself, I wouldn’t even consider doing it again. Not that it’s difficult to do—that’s not the issue. The issue is aftermarket batteries. I’ve been using notebooks for well over 30 years, and never had satisfaction with aftermarket batteries.
Modern lithium batteries are an amazing technological feat, but a dangerous one. So even putting aside that I’ve never found any aftermarket batteries with quality anywhere near original, I learned “cheap” aftermarket lithium batteries are downright dangerous.
After doing research into what’s involved with manufacturing lithium batteries, I know there are so many corners to cut, you’ll end up with junk regardless of what you pay.
A week after replacing my batteries with those from iFixit, they showed clear signs of failure. Thank goodness iFixit refunded my money.
After having Apple replace my batteries, everything is back to like-new. For my $199, I got not only excellent batteries, but a new keyboard and trackpad as well. That’s it’s done!!!
AnnoniMoose -
I found an Apple Support link that said MBP battery replacement was $199, but the 2 Apple Stores near my house would not provide any appointments. Instead, I scheduled an appointment with and “Apple Authorized Service Provider” & that repair center quoted about $750 to replace the battery.
I refused, went home, & opened a chat with Apple Support.
After a lengthy & painful chat session where the Apple tech didn’t want to provide a battery replacement quote (he feared other issues with the MBPr), he finally gave me an Apple price of just under $650 to replace the battery.
Did you go into an Apple store, or mail it in? I’m struggling to reconcile a price of $199 to get a battery + keyboard + trackpad against what I was just quoted 2 weeks ago. The new track pad & keyboard might have been due to repair tech error. i.e. they trashed those repairing your batter & had to toss them in.
Bartt.Shelton@gmail.com -