Einleitung

Haben die Gummifüße an deinem MacBook schon mal besser ausgesehen? Diese Anleitung zeigt dir, wie du sie austauschen kannst.

  1. XxSVygoKg3BQZUeK
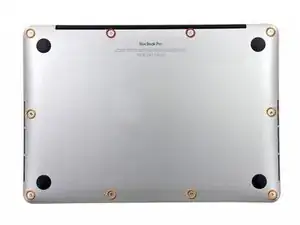
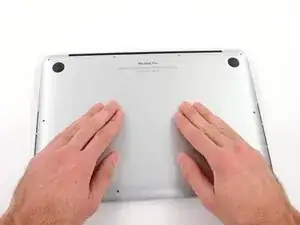
    • Entferne die folgenden zehn Schrauben, mit denen das untere Gehäuse am oberen Gehäuse befestigt ist:

    • Zwei 2,3 mm P5 Pentalobe Schrauben

    • Acht 3,0 mm P5 Pentalobe Schrauben

    • Halte während der ganzen Reparatur deine Schrauben gut geordnet und achte darauf, dass sie genau an ihren alten Platz zurück kommen, sonst könnte dein Gerät beschädigt werden.

    If don’t have one of those neat project mats, then you can use small pieces of flattened blu-tack to hold the screws. If you arrange them in the shape of your mac book cover, and put the screws down methodically, you can get a one-to-one mapping of the screws to the correct screw holes.

    Toby Thurston -

    Or you can use an ice tray where you put the screws and the parts in separate bays in the same order as they come in the instructions.

    timofej.se -

    This is great! I used a small magnetic white board, and wrote on it to identify the parts as I went. This whole process, from the fast shipment to the great instructions to the complete, high quality, tool kit has been great. I’m typing this comment on my resurrected laptop. Thank you! Sue

    Susan Greer -

  2. TZjAGsfhlId3q36t
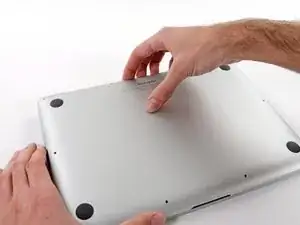
    • Versuche mit den Fingern zwischen das obere und das untere Gehäuse zu kommen.

    • Ziehe das untere Gehäuse behutsam vom Oberen weg.

    • Entferne das untere Gehäuse und lege es zur Seite.

  3. q3ulIPMQTbiPuDUF
    q3ulIPMQTbiPuDUF
    muPIBpQokGnUUXJP
    SLwb4KCgFZKfLR2B
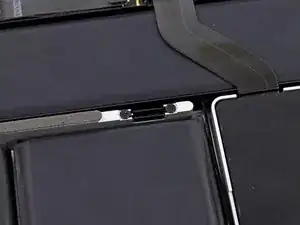
    • Das untere Gehäuse ist in der Mitte durch zwei Plastikklammern mit dem oberen Gehäuse verbunden.

    • Drücke beim Wiederzusammenbau das untere Gehäuse in der Mitte leicht an, damit die beiden Plastikklammern wieder einrasten.

  4. RIRDFvMa45YxjgXa
    RIRDFvMa45YxjgXa
    lJxlSYN1HJ1EPEAN
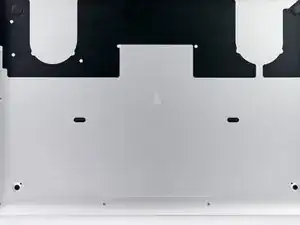
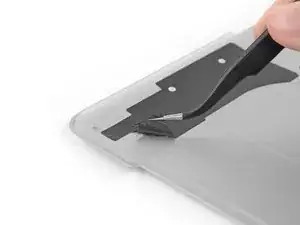
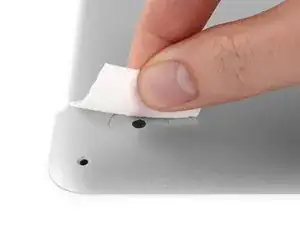
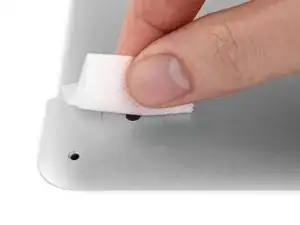
    • Ziehe alle Aufkleber von den Füßen, die du ersetzen willst, auf der Rückseite des Rückgehäuses ab.

    • Diese Aufkleber lassen sich nicht wiederverwenden. Das macht nichts, dein MacBook braucht sie nicht unbedingt.

    If you take an exact knife or similar and trace out a section around the feet, you can leave the rest of the sticker in tact. I found it easier to remove a small section of the sticker as it was fairly well adhered.

    Stephen Chan -

    @Stephan Chan - Your suggestion was perfect. Cutting away the small section of sticker where the feet go is definitely the way to do it.

    seattlehudson -

    I agree with you @gusto5 (Stephen Chan) - cutting out a small circle in the sticker with a craft knife is much easier. Just to be on the safe side, since it did expose a little of the aluminum of the case, after I’d stuck the replacement foot and held it in place for 30 seconds, I put a small piece of Scotch tape over the hole I’d cut in the sticker on the back.

    Owen Edwards -

    Received a quicker delivery of the feet replacement kit. Followed the suggestion and was quicker and boots (feet) flashed fit on bottom case.

    Albert Evangelista -

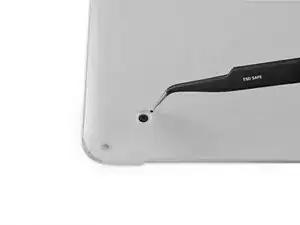
    If, like mine, all your feet have sheared off, you may be able to pry the center bit of plastic left in the lid at each foot out with tweezers. Obviously don't go digging deep or forcing things, but if you are lucky like I was then you don't need to remove all the screws and the lid. My new feet went in well and seem really well stuck. Make sure you clean the surface of the aluminium extremely well.

    I didn't find any need to cut the plastic backing. I found that each foot easily came off the backing and I grabbed it with the tweezers.

    I put a pencil mark on the lid showing the position of the little "key" nub and made a mark on the foot too, showing its position. This allowed me to align the "key" nub with it's hole easily.

    frostyfriday -

  5. vClZDXpWhxMDJNIe
    vClZDXpWhxMDJNIe
    X1sYxJb1XmiBnJEG
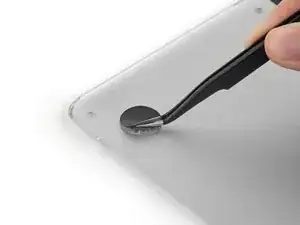
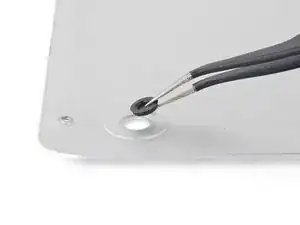
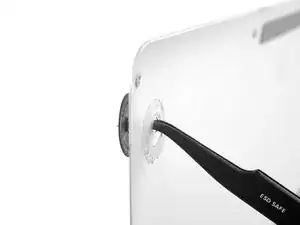
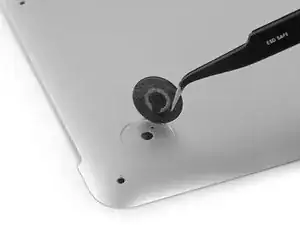
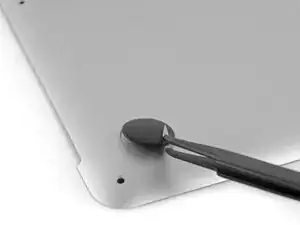
    • Entferne alle kaputten oder beschädigten Füße.

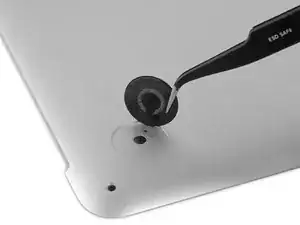
    • Wenn der Fuß, den du ersetzen willst, noch intakt ist, kannst du ihn mit einer Pinzette von innen herausdrücken.

    • Wenn sich der Fuß nur schwer entfernen lässt, dann kannst du die Stelle mit einem Haartrockner oder einem Heißluftgebläse erwärmen und den Kleber lösen.

    There are large black stickers in the way of removing this little piece on my A1502 Early 2015 MBP. How do we proceed from here?

    Jason Protzman -

    Hey Jason! You can remove those stickers entirely, or just peel them back enough to remove the foot and then cut away the peeled part of the sticker.

    Taylor Dixon -

    Is the larger feet shown in picture 1 of this section for the MacBook Pro. I am assuming the second picture refers to the Retina MacBook Pro?

    Khushal Varsani -

    All the pictures and text in this guide refer to the Retina MacBook Pro! The The Unibody MacBook Pro has its own feet replacement guide.

    Taylor Dixon -

    I think what Khushal meant was that picture 1 doesn’t represent the lower case foot hole of the Retina model, the hole left after the removal of the foot is too big. While the 2nd picture seems indeed accurate.

    fbianchife -

    Can the macbook walk? 🤣

    Yanny 57 -

  6. G15X4A5dMSaMfGZw
    • Reibe die Vertiefung für den Fuß mit einem Klebstoffentferner ab und entferne alle Klebstoffreste.

    The adhesive is on both sides of a clear plastic sheet that sits in the foot cavity. It is easily missed but appears shiny when holding the case up to light after removing the rubber foot. If you look at the image in Step 9 below you can also see the sheet on the case side of the rubber foot (note this is not the same thing as the plastic sheet that the feet are attached to, this one is very thin and has adhesive on both sides). I applied adhesive remover twice and let it sit for a few minutes to dissolve the adhesive under the pad, then scrubbed with a bit of pressure to get that clear sheet removed from the foot cavity, but am glad I did.

    James -

    For me, the adhesive remover was not strong enough, but I was able to apply acetone nail polish remover to remove the remaining adhesive before wiping it down with alcohol.

    Joseph Wilk -

    Thank you so much, James, for mentioning the clear adhesive! I would’ve completely missed it had I not seen your comment!!

    Tina Nakai -

    My adhesive remover didn't work, but what did work was gently scraping with a knife. This is for the clear adhesive mentioned by James.

    olive long -

  7. awVcxhouY56dJWmT
    • Wische die Vertiefung für den Fuß mit einem mit Isopropylalkohol getränkten Pad aus, so dass wirklich alle Klebstoffreste beseitigt sind und die Klebestelle gut vorbereitet ist.

  8. Mnb5F3feRRcqjTLa
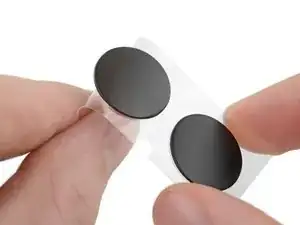
    • Ziehe einen Ersatzfuß von der Schutzfolie ab.

    • Der Kleber ist ziemlich stark - löse wirklich nur den Fuß ab und zerreiße nicht die Schutzfolie.

  9. uexDpCgnLZZtrCd3
    uexDpCgnLZZtrCd3
    TXNVHgMvNWanjALH
    FyJkgDrE1tluS12y
    • Richte den neuen Fuß genau in der Vertiefung aus.

    • Der Fuß hat eine kleine Noppe am Rand, die genau in das kleine Führungsloch in der Vertiefung passen muss.

    • Drücke den Fuß immer noch exakt ausgerichtet nach unten.

    • Überprüfe von der Gehäuseinnenseite her, ob der Fuß wirklich richtig sitzt. Die kleine Noppe muss von innen ein wenig in dem Führungsloch sichtbar sein.

    Matching the alignment nub with the small hole is easier if you align the point of the tweezers with the nub. The tweezer tip then acts as a reference point for matching the nub with its hole.

    Paul Jacobson -

  10. dwZ1hXCiq6bTTI2A
    dwZ1hXCiq6bTTI2A
    DadSFPovI4YwTLHB
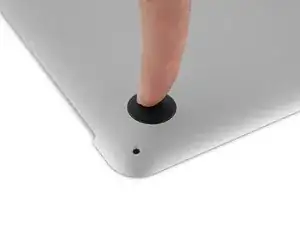
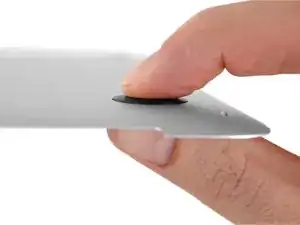
    • Drücke den neuen Fuß mit dem Finger fest. Drücke ihn dann noch kräftig an, indem du den Fuß von jeder Gehäuseseite her zwischen Zeigefinger und Daumen zusammenpresst.

    • Halte diesen Druck 30 Sekunden lang an, so dass der Kleber durch den Druck fest wird.

    • Wiederhole die letzten sieben Schritte für alle Füße, die ausgetauscht werden müssen.

Abschluss

Um dein Gerät wieder zusammenzusetzen, folge den Schritten in umgekehrter Reihenfolge.

Taylor Dixon

Mitglied seit: 26/06/18

58866 Reputation

3 Kommentare

On the inside of the cover of my A1502 Early 2015 MBP, two of the four feet are covered by large black stickers. So, how do we remove the little piece left behind when we remove any foot that is damaged? Do we just cut through the large black sticker or remove it?

Jason Protzman -

This review was helpful, but it didn’t mention the black stickers on the inside of the lower case. I ended up poking a small hole through the black stickers to get the remaining pieces of previous feet out.

Taylor Caddel -

Jason and Taylor, the stickers you mention are on Step 4 of this guide.

Adriel Peterson -