Einleitung
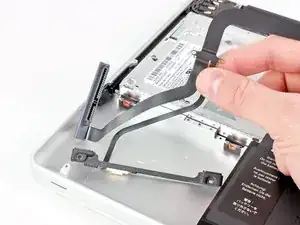
Folge dieser Anleitung, um ein beschädigtes Festplattenkabel auszutauschen. Das Festplattenkabel enthält auch die LED für den Ruhezustand und den IR-Sensor.
Werkzeuge


-
-
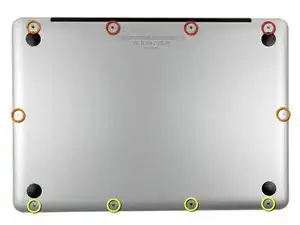
Entferne die folgenden zehn Schrauben:
-
Drei 14,4 mm Kreuzschlitz #00 Schrauben
-
Drei 3,5 mm Kreuzschlitz #00 Schrauben
-
Vier 3,5 mm Kreuzschlitz #00 Ansatzschrauben
-
-
-
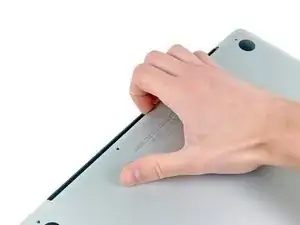
Löse mit den Fingern in der Nähe vom Ventilator die Gehäuse-Unterseite vom Hauptteil des Gehäuses.
-
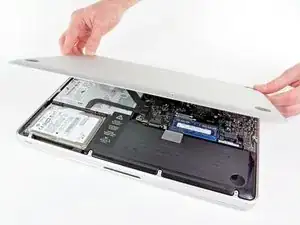
Entferne die Gehäuse-Unterseite.
-
-
-
Löse mit der Kante eines Spudgers den Akkuanschluss nach oben, weg vom Sockel auf dem Logic Board.
-
-
-
Biege das Akkukabel vorsichtig weg vom Sockel des Logic Boards, damit es sich nicht aus Versehen beim Arbeiten wieder verbindet.
-
-
-
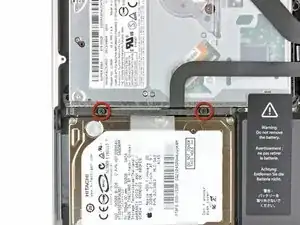
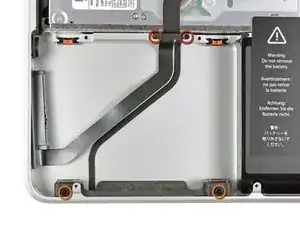
Entferne die beiden Phillips Schrauben, die die Festplattenhalterung an dem oberen Gehäuse befestigen.
-
-
-
Verwende das flache Ende eines Spudgers, um den Festplattenkabel-Stecker aus seiner Steckbuchse zu hebeln.
-
-
-
Entferne die folgenden vier Schrauben:
-
Zwei 3 mm Kreuzschlitzschrauben
-
Zwei 9,7 mm Kreuzschlitzschrauben
-
-
-
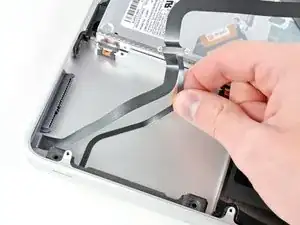
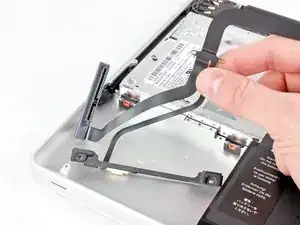
Ziehe vorsichtig das dünne IR-Sensor/Ruhezustands-LED-Flachbandkabel von dem Kleber, der es am oberen Gehäuse sichert, ab.
-
-
-
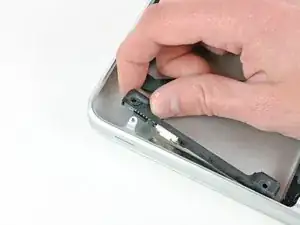
Ziehe die vordere Festplattenklammer, die den IR-Sensor/Ruhezustands-LED enthält, weg von der vorderen Kante des oberen Gehäuses.
-
-
-
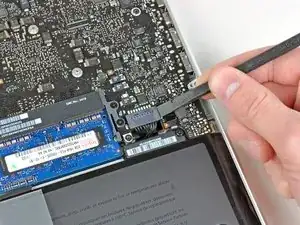
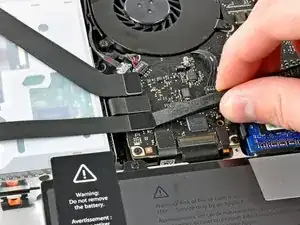
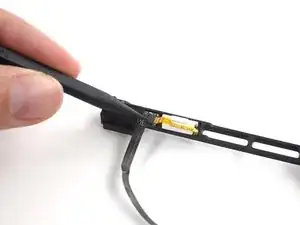
Verwende die Spitze eines Spudgers, um den "Hebel" am ZIF-Verbinder (links im ersten Bild) am Festplattenkabel zu öffnen. Der Verbinder kommt noch nicht heraus, siehe den nächsten Punkt.
-
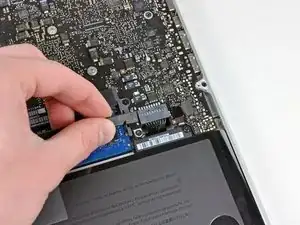
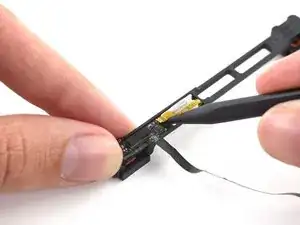
Ziehe behutsam das gelbe Sensorklammerkabel aus dem ZIF Verbinder. ( Nach rechts, siehe zweites Bild)
-
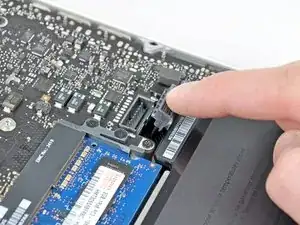
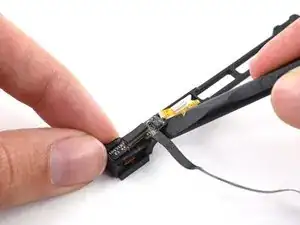
Verwende das flache Ende eines Spudgers, um das Festplattenkabel aus der Sensorklammer, an der es befestigt ist, zu hebeln.
-
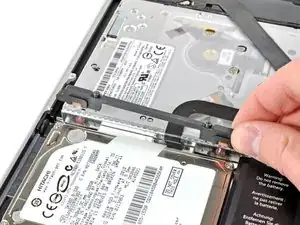
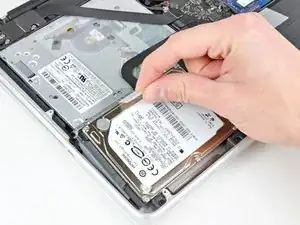
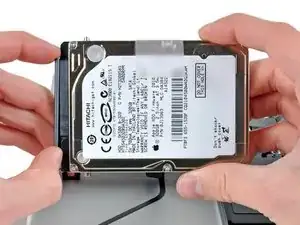
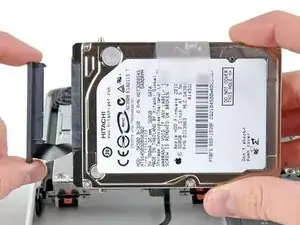
Um dein Gerät wieder zusammenzusetzen, folge diesen Anweisungen in umgekehrter Reihenfolge.

49 Kommentare
Thank you Ifixit and Andrew "Optimus" Goldberg, the parts and tools arrived today i went to the shop to buy lunch when i had returned (15 mins later) my Husband had replaced the part (hdd cable) and my Macbook pro is super speedy again. Nice repair guide thank you i doubt i can say thank you enough.
After many hours of trying to get my SSD drive to work, I read elsewhere that other users had issues with the HD cable that came with the laptop. From when I opened the envelope until my SSD booted was less than 30 minutes. If you have the right tools this is an easy fix. Just keep in mind that there is adhesive on the cable that goes to the bracket -- don't forget to peel off the paper backing and line it up correctly.
mbj -
Hello, I have a mid 2009 Macbook pro 13. I have bought a hard disk cable that looks almost the same as the original one except for greater width and shorter length. I guess that this new cable fits the 2012 model, SO YOU MAY HAVE TO UPDATE THE GUIDE accordingly.
Electrically the wider cable also works on the mid 2009 model (at least for disk access) though it does not fit mechanically.
My friends be careful when you buy this part.
How much weight can I save by removing the optical drive?
gunes314 -
You can save a lot of weight if lets say your installing a solid state drive or putting in a second hard drive but if you know that you use the CD/DVD disc drive a lot then you might just want to leave the drive alone.
Marshall WahlstromHelgren -
Tip: Use one of those weekday pill holders to have a cheep way to store screws you remove and each day of the week can be for different sizes or parts. It has been handy to have (much less expensive than the magnetic mat.
Robert Wacker -
Hello, where can I buy the screws I need in case I lose one of them?
taylornya -
iFixit sells a kit: MacBook Pro Unibody Lower Case Screw Set
Darrell Johnson -
I have one stripped screw... How opening without drill it?! Any suggestions please?
rodrigosady -
I also stripped a couple screws. I wasn’t able to open it up without drilling. After drilling the heads and removing the cover it was easy to hacksaw the tip and unscrew with a standard driver.
Michael Wilkens -
We have a guide for that!
Wie man eine rundgedrehte Schraube entfernt
Sam Omiotek -
My top tip - make sure you buy good quality Phillips screwdrivers and a magnetic holder. Cheap screwdrivers won’t get the screws undone safely. Without a magnetic holder you have no chance of getting the tiny crews in and out safely.
jeremyyoung -
A good Phillips 00 is your friend here. Also, when reinserting the screws, gently start anticlockwise and you wil feel a click at the start of the thread. This tells you you’re in the right place and less likely to cross-thread through force in the wrong place.
Iain Boyd -
I feel like these are 000 screws. Amazon sales describe them as such and my 000 screwdriver fits better
cam2000deluxe -
Before ordering a new Trackpad remove the existing battery and try clicking the Trackpad. If it clicks OK with the battery out the source of problem is likely a swollen battery, which should to be replaced even if it still works to some degree. From the side of the battery you will likely see the soft part of the battery bulging beyond the hard case.
Patrick Langvardt -
That’s absolutely correct as I can testify. With the battery removed I also adjusted the T6 set screw that adjusts the sensitivity of the trackpad click, evidently someone had cranked mine down tighter than the factory setting.
Gary Register -
Le quatrième paragraphe dans les instructions en français n’est pas correct : ce ne sont pas les 2 petites vis, mais les 7 petites vis qui sont inclinées. Et les 3 grandes sont bien verticales.
Degeorges -
Bonjour ! Merci de votre observation. J’ai corrigé la traduction. iFixit étant un wiki, n’hésitez pas à modifiez si vous remarquez une erreur :) Encore merci de votre attention et à bientôt !
Claire Miesch -
Tip: if you have a magnetic screw mat or similar, lay the macbook over the mat to make sure it catches any screws that may decide to fall of and hide under your table
Moritz -