Einleitung
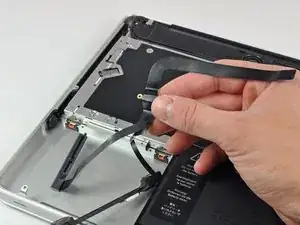
Benutze diese Anleitung, um das Festplattenkabel auszutauschen. Bei einem neuen Festplattenkabel ist auch gleich ein neuer Infrarotsensor dabei.
Werkzeuge


Ersatzteile

-
-
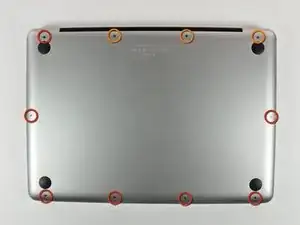
Entferne die folgenden 10 Kreuzschlitz-Schrauben, die die Gehäuse-Unterseite des MacBook Pro 13" Unibody befestigen:
-
Sieben 3 mm Schrauben.
-
Drei 13,5 mm Schrauben.
-
-
-
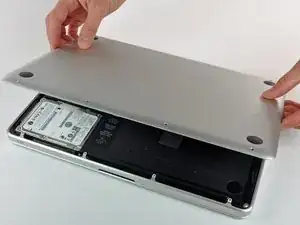
Hebe die Unterseite vorsichtig an und drücke sie Richtung Rückseite des Laptops, um die Halterungsclips zu lösen.
-
-
-
Löse mit der Kante eines Spudgers den Akkuanschluss nach oben, weg vom Sockel auf dem Logic Board.
-
-
-
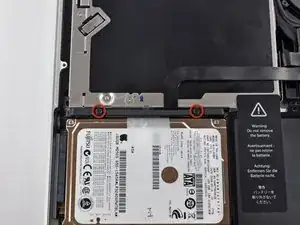
Entferne die beiden Kreuzschlitzschrauben, die die Halteklammer der Festplatte am oberen Gehäuseteil sichern.
-
-
-
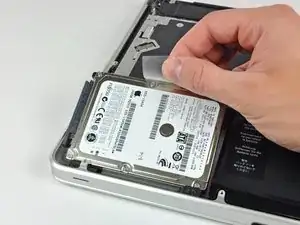
Hebe die Festplatte aus ihrer Halterung indem du an der Zuglasche ziehst. Achte dabei auf das Kabel mit dem sie am Computer angeschlossen ist.
-
-
-
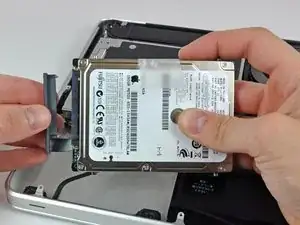
Entferne das Festplattenkabel, indem du seinen Verbinder gerade aus der Festplatte heraus ziehst.
-
-
-
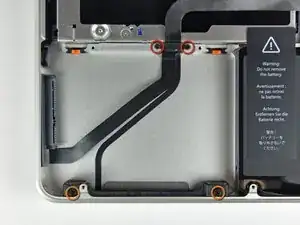
Entferne die folgenden vier Schrauben, mit denen die Festplatte und das IR-Sensorkabel am oberen Gehäuse befestigt sind:
-
Zwei 1,5 mm Kreuzschlitzschrauben
-
Zwei 9,5 mm Kreuzschlitzschrauben
-
-
-
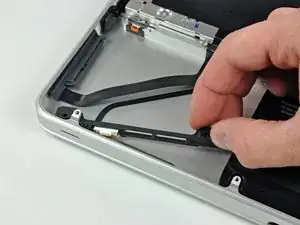
Schiebe die Halterung der Festplatte und des Infrarotsensors von der Kante des oberen Gehäuses weg.
-
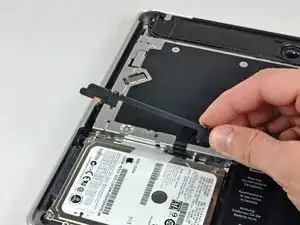
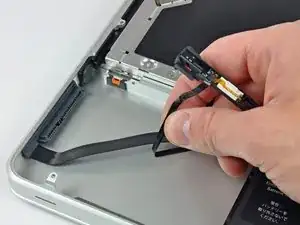
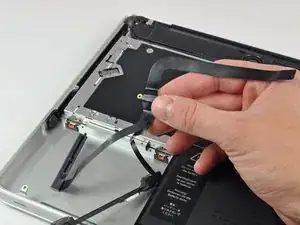
Löse behutsam das Kabel zur Festplatte und zum Infrarotsensor vom oberen Gehäuse ab.
-
-
-
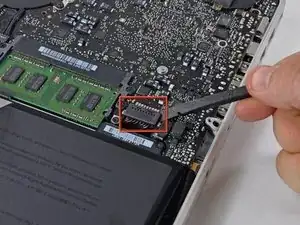
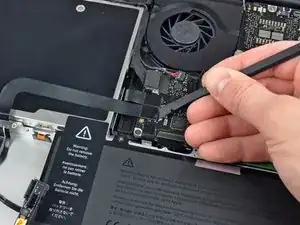
Heble den Stecker am Festplattenkabel mit dem flachen Ende des Spudgers vom Logic Board hoch.
-
Um dein Gerät wieder zusammenzusetzen, folge den Schritten in umgekehrter Reihenfolge.

6 Kommentare
Fantiastic!!
I had an SSD installed but it stopped working after a few months and I got the flashing question mark folder. It was very odd as the disk drive still worked, and the SSD did externally. Heard it could be the SATA as SSDs are more sensitive to damaged cables, so replaced it on the off chance and it worked! Definitely recommend trying this first if you have had the same problem
AC1 -
Wow, this worked so GOOD! ...and those derps at the local Apple retailer told me to "let the computer go, and take a look at the new ones we have here!"
Did troubleshooting with ifixit, ordered part from ifixit and followed step-by-step guide provided by ifixit! You guys rule!
Many thanks from Sweden!
This worked like a charm. My mid 2010 MacBook Pro is back. Although it was temping to claim my Mac as dead and buy the latest baddest MacBook, I had to try a $50 fix. It worked. I saved over $1200 now. I want to see how long my 2010 Mac lasts now. Thanks ifixit.com.
Compare the short screws carefully before reinstalling them. The shouldered screws go in the holes on the front edge.
David Kilbridge -
Before I started removing any screws I took a piece of paper and drew the bottom of the laptop and put a piece of double-sided tape in the spot where each screw goes. That way when I took out the screws, I could put them on the tape so I knew exactly which screw went in which spot. I did the same thing for dismantling the inside on another sheet of paper, then a third sheet for the screen after getting the front glass off.
mastover -
I use a similar technique: I print out the iFixit manual for the job, and Scotch-tape down the screws/brackets/cables I remove at each step next to the component descriptions. That way, when I'm reassembling, the bits are taped right next to the photo of where they came from.
adlerpe -
That's exactly what I do for all my repairs! It's the best way to keep track of all of the parts ' original location and to make sure that you don't miss any parts during reassembly.
joyitsjennie -
Great idea and one I use often
Thomas Overstreet -
Excellent idea! Thanks for sharing it here.
Laura Sharkey -
I used a 00 that fit but the screws were very tight so I used a tiny paintbrush with some wd40 on it and put it around the edges of the screws. Worked like a charm
valentinedhdh -