Einleitung

Akku lösen. Interne Voraussetzung.

Werkzeuge

  1. Eyo2p2BYesPQBNEc
    Eyo2p2BYesPQBNEc
    BFghqfctKoeQMJon
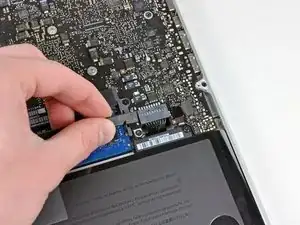
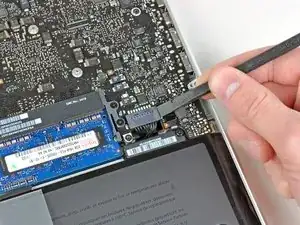
    • Löse mit der Kante eines Spudgers den Akkuanschluss nach oben, weg vom Sockel auf dem Logic Board.

    • Es ist hilfreich, beide kurzen Seiten des Anschlusses gleichzeitig nach oben zu hebeln. Sei vorsichtig mit den Ecken des Anschlusses, da diese sehr leicht abbrechen können.

    Is this step of removing the battery connector required?

    manodh -

    yes - as with disassembly of any electronic component you have to remove any power source. You don't want to accidentally turn the Mac on

    khull -

    Prying the battery connector off does not take much force. I did exactly what the guide suggested (walked it off back and forth) with the spudger without any problems. Just be very gentle, much like with anything inside laptops, they are very fragile and need to be worked with carefully. A+ instructions, battery replacement was a success.

    aekinaka -

    Be patient on disconnecting this one. It worked for me step by step, little by little.

    Phil Wagner -

    I used the nails of thumb and pointer finger simultaneously - worked pretty fine

    Reinhard Kaune -

  2. CACTEGtNtEikmgfJ
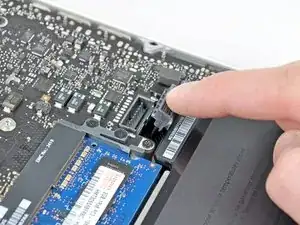
    • Biege das Akkukabel vorsichtig weg vom Sockel des Logic Boards, damit es sich nicht aus Versehen beim Arbeiten wieder verbindet.

    I put some tape between the connector and socket while working on the drive.

    Stephen Smith -

    That's a good tip

    Anrothan -

    Great tip, I did that too

    Ahmed Mahran -

    One other note: The screw heads fit flush with the curvature of the case -- which means that they aren't exactly horizontal. In other words, they aren't perpendicular to the table that the computer is resting on. Don't try to force them straight in vertically, because you'll risk cross-threading them. (nearly ruined one screw hole myself!)

    lelandjordon -

    On my MacBook Pro, the connector seems to be an integral part of the battery.

    Jerry South -

    I suspect it’s just like the special screwdriver required for seatbelts on cars – to discourage regular consumers from attempting repairs. Of course, this only encourages consumers to use the wrong tool to attempt to repairs

    colleenthompson -

Abschluss

Arbeite die Schritte in umgekehrter Reihenfolge ab, um dein Gerät wieder zusammenzubauen.

Andrew Bookholt

569578 Reputation

0 Kommentare