Einleitung
Let's remove the top board of the MacBook Core 2 Duo model and exchange it for a new keyboard / track pad.
-
-
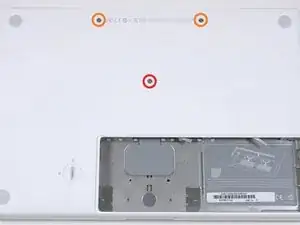
Please remove the following three screws:
-
One Phillips # 000 screw (screw head: diameter 5 mm, thickness 0.75 mm) of 11 mm in length in the middle of the case is one
-
Two Phillips # 000 screws (screw head: diameter 5 mm, thickness 0.75 mm) with a length of 14.5 mm are two
-
-
-
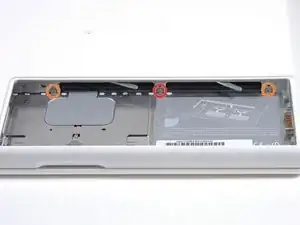
Take out the battery and the 3 screws inside the battery compartment.
-
One 3mm long phillips head #0 screw (Screw diameter: 2.75mm)
-
On either side there are two 4mm long Phillips head #0 screws. (Screw head diameter is 2.27mm)
-
-
-
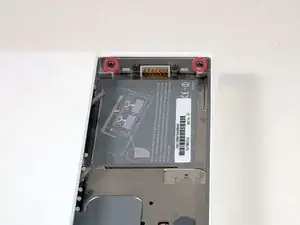
Please remove the following two screws at both ends of the partition on the right side of the battery. (The screw closer to the battery connector is only fixing the battery connector, so it is not necessary to remove it.)
-
Two Phillips # 000 screws (screw head: diameter 4 mm, thickness 0.5 mm) with a length of 6.25 mm are two
-
-
-
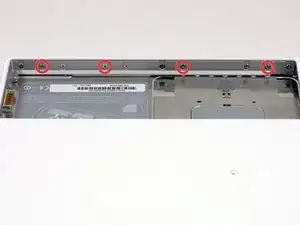
Please remove the four screws indicated by the red circle of the image on the partition of the battery on the front side of the main unit. It is the 2nd, 4th, 7th, 9th screw from the left.
-
Four Phillips # 000 screws (screw head: 4 mm diameter, 0.4 mm thickness) with a length of 3.25 mm
-
-
-
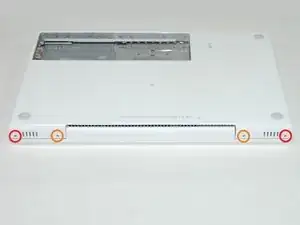
Please remove the following four screws on the back side of the computer:
-
The long screws are inside and the short screws are outside both ends.
-
There are two Phillips # 00 screws (shank dimension: 2.2 mm in diameter, 2 mm in length) (screw head: 3.2 mm in diameter, 0.5 mm in thickness) with a long 11 mm shank
-
There are two Phillips # 00 screws (shank dimension: 2 mm in diameter, 3.75 mm in length) (screw head: 3.2 mm in diameter, 0.5 mm in thickness) with a shank of 7.25 mm in length
-
-
-
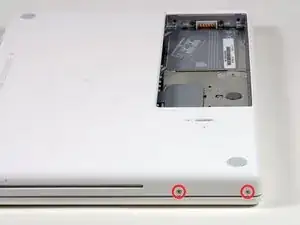
Please remove the two screws on the optical drive side of the computer.
-
Phillips # 00 screw with shank of 5.2 mm in length (Shank dimensions: diameter 2.3 mm, length 3.5 mm) (screw head: diameter 3.2 mm, thickness 5 mm)
-
-
-
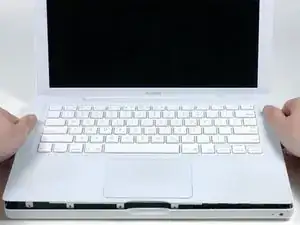
Let's detach the top board on the principle of lever (lever) so that it goes around from the screen side to the front side of the computer. If you use the plastic opening tool or a stiff guitar pick, you can easily remove it.
-
-
-
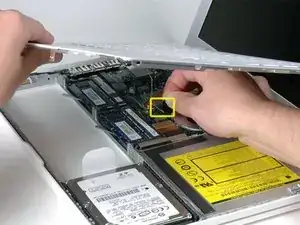
While lifting the top board, please pull the black tab on the connector part of the silver cable upwards and remove the connector.
-
How about trying as an opportunity to remove dust, hair, etc while removing the top board? The best is to use a can containing compressed air. If you do it with a solid brush made of building materials (using common animal hair), static electricity will be generated and you can destroy your computer.
-
To assemble your device, please follow these steps in reverse order.