Einleitung

  1. Eu6N1goQqBDaN2uH
    Eu6N1goQqBDaN2uH
    h2XmuUl3fJ4nlZWv
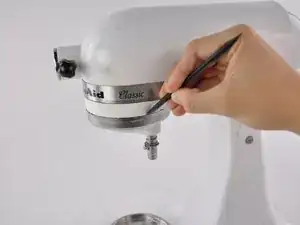
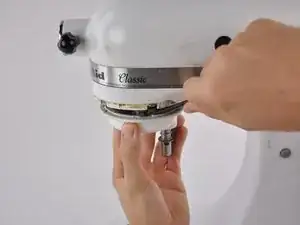
    • Entferne vorsichtig mit einem Spudger den Abtropfring aus Aluminium.

    Unplug the Mixer.

    Mike Reckner -

    Good call! Nobody likes digital trauma

    David Brand -

  2. xR3DfHjZ4kcSlfNy
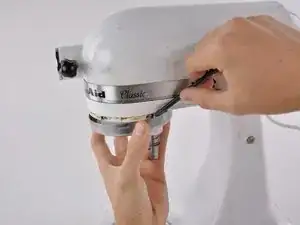
    • Treibe mit einem 4 mm Durchschlag und einem Hammer den Splint von der Getriebeabdeckung.

    This should be a 5/32 inch or 4mm punch.

    Patrick Hailstone -

    For mine it is so stiff and I cant put out the pin with hammer

    Omid -

    The pin is not moving: is there any other way of removing it or completing the job without removing it?

    ollver -

    My pin is stuck too, are there any other ways?

    Nabil Baker -

    Can the pin be hammered from either side. It won’t budge

    Sally Stier -

    Just keep at it, mine didn’t budge for a while

    Robert Chauharjasingh -

    No way. I ‘ve tried for an hour and it didn’t move at all. But I ‘ve found a solution. I drilled it out. First with 2mm then with a 3mm drill. Then I could easily remove it. The replace part is a 4mm x ~22.5mm grooved pin (half-length-center-grooved; ISO 8743).

    Zwiebeljack -

    Mine was also stubborn. I laid the machine on the side and sprayed WD-40 in the pin several times. Waited 30 min and then it came out easy.

    Petter Hellevik -

    If you need to buy a pin punch set, get ones with knurled handles (crosshatching of the metal) which are much easier to hold onto. I had to try one side then the other and WD-40 to get it out. Also figure out to how to position the mixer and what lean your hand agains while holding the pin to keep it steady so you can make multiple, accurate strikes.

    When re assembling, when it came to aligning everything, i found using a small pin punch to poke all the way through helped. Then i started in on hammering the pin back in.

    Linda Przybyszewski -

    Can’t get it back in when reassembling. Any ideas?

    Michael Rosman -

  3. TPB4OFeHEsPXopCI
    TPB4OFeHEsPXopCI
    o2tXVtmSBVTWehXs
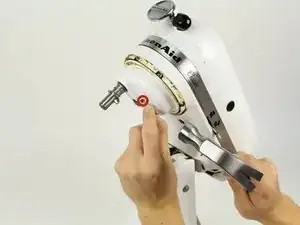
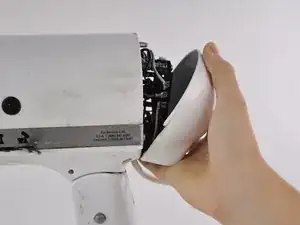
    • Hebele die Getriebeabdeckung mit einem Spudger vom Getriebeschaft.

    My spudger must have been cheap, it bent, so i wrapped a flat sided screwdriver in a rag instead.

    when reassembling, the alignment can look and feel almost be correct but the shaft wont come out far enough to let you out the pin back in, i needed to take off twice and then it slid in perfectly and everything in the rotation moved much more easily

    Linda Przybyszewski -

  4. fkDXtyoEScKCEEZH
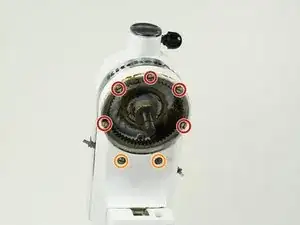
    • Drehe die fünf 28 mm Flachschrauben mit einem Schraubendreher aus dem vorderen Motorgehäuse.

    • Mit dem gleichen Schraubendreher kannst du auch die beiden 28 mm Sicherungsschrauben herausdrehen.

    • Eine der Sicherungsschrauben hat einen besonderen Ausdrehschutz. Verwechsele sie nicht mit den anderen Schrauben am Motorgehäuse.

    Hier Werder mittlerweile Vierkantschrauben in 3/32 Zoll verbaut. Wie bekomme ich die auf?

    Chris -

    Classic Plus uses a square-drive screw. You’ll need #1 size.

    Robert Kyle -

  5. lTt2TCQlkknuCOxv
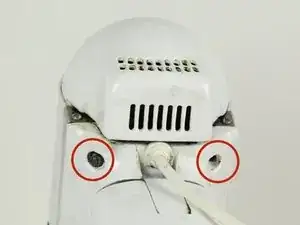
    • Drehe die Maschine um. Entferne mit dem gleichen Schraubendreher auch diese beiden 28 mm Sicherungsschrauben.

    • Eine der Sicherungsschrauben hat einen besonderen Ausdrehschutz. Verwechsele sie nicht mit den andern Schrauben am Motorgehäuse.

  6. R2E2oEdUfVYa2Njk
    R2E2oEdUfVYa2Njk
    4unrvrfJexJ53BL5
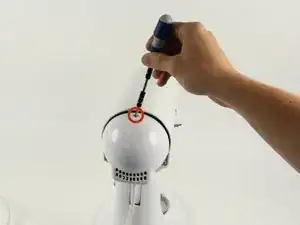
    • Entferne die 10 mm Kreuzschlitzschraube #2 oben an der rückwärtigen Abdeckung.

    • Die rückwärtige Abdeckung ist nun frei.

    When I removed this, 2 nuts were in there lose. I cannot tell where they came from.

    Nila Tae -

  7. oi1sMTkmwcR6UGSb
    oi1sMTkmwcR6UGSb
    N1jCC2LCOm2QFREa
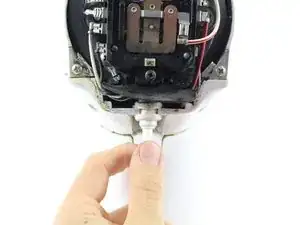
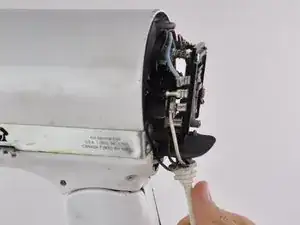
    • Ziehe vorsichtig das Netzkabel aus der Bucht am Gehäuse.

    • Jetzt ist die Abdeckung des Motors frei vom Standfuß der Maschine.

    For the KSM90BU model, take a set of needlenose pliers and carefully rotate the plastic clip 90 degrees, then pull the cord out of the notch.

    Charles Lester -

  8. p5Z6TwauhsQGQH3T
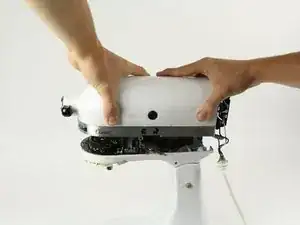
    • Hebe die Motorabdeckung vom Standfuß nach oben ab.

    • Lege das Gehäuse mit der Öffnung nach oben, damit kein Schmiermittel herausläuft.

    Und wie komme ich nun an den Motor zur Reinigung des Unterbrechers?

    Arbeitsgruppe Dialog -

    ich habw eine 5KSM150, leider lässst sich die Motorabdeckung nicht entfernen, alle vorhergehenden Schritte wurden wie beschrieben erledigt

    kann hier jemand helfen?

    Marius Quaschinski -

    Hi all, for your information: I also have the model 5ksm150 and managed to remove the top of the machine with a lot of effort, wiggling back and forth until it came out. That worked after about 10-15 min :-) Now the good mixer works again!

    Francois -

    Any tips for doing this? It’s very stuck!

    Marina Juarez -

    I cannot remove the housing cover… it is stuck. Any tips?

    Marina Juarez -

  9. ZM5HJ4dmTyMCDbQY
    ZM5HJ4dmTyMCDbQY
    s4XQJpMqwbDXMyuD
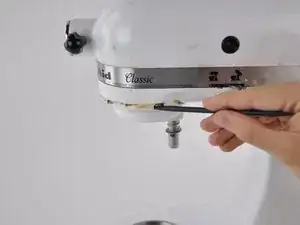
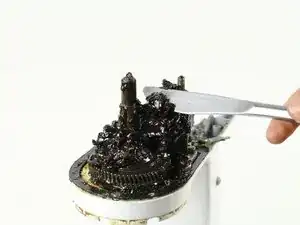
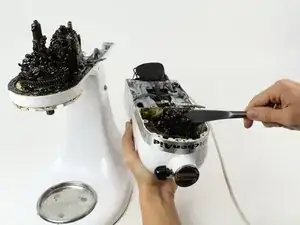
    • Entferne das Fett mit einem Spachtel oder einem Küchenmesser.

    • Gib das Fett wieder in den Motordeckel zurück.

  10. R5EmNsEFuJi6aZPD
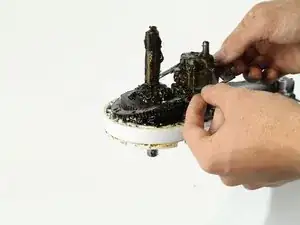
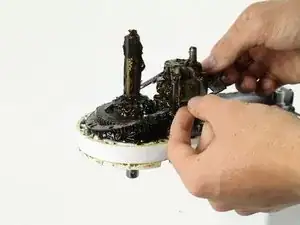
    • Hebe die Dichtung mit einem Spudger oder der Hand hoch und entferne sie.

Abschluss

Um dein Gerät wieder zusammen zu setzen folge den Schritten in umgekehrter Reihenfolge.

Joey Gavin

Mitglied seit: 13/10/14

214 Reputation

Ein Kommentar

I got all the way to the last step of replacing the pin when i notice the mixer seemed to lock there in place and not move. What did i do wrong?

Dawn dawn6463@yahoo.com

Dawn Bennett -