Einleitung

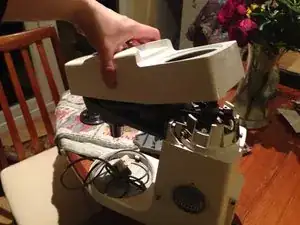
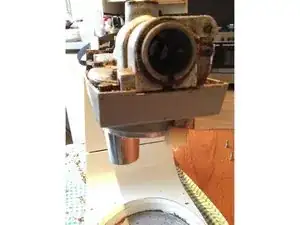
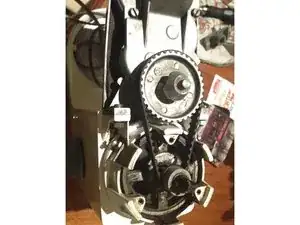
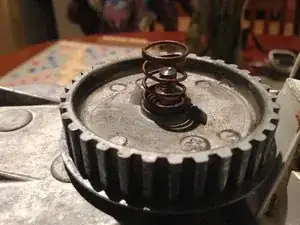
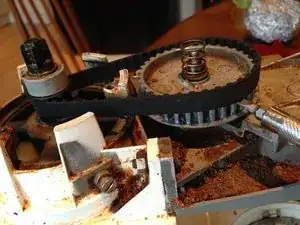
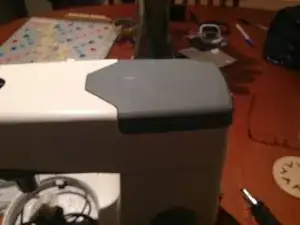
Um an das Getriebe zu gelangen musst du die obere Hälfte des Maschinenkopfes abnehmen. Häufige Fehlerquellen sind der Antriebsriemen, ein Getriebeschaden, meistens aber ein Plastikantriebsrad.

  1. dDpLWUkWZKevYY3V
    dDpLWUkWZKevYY3V
    q5bWvLYEBP2HUJjW
    • Ziehe vor Beginn der Reparatur den Netzstecker.

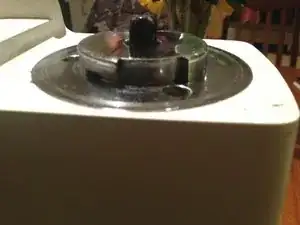
    • Entferne den Deckel vom Hochgeschwindigkeitsanschluss. Wenn dieser Deckel fehlt, läuft auch der Anschluss mit niedrigen Drehzahlen nicht, weil er von diesem Deckel angekuppelt wird.

  2. w2QLekkT1qSDevNI
    w2QLekkT1qSDevNI
    ibVwQrVkRMsq4WyK
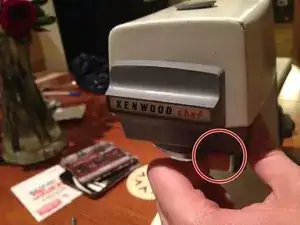
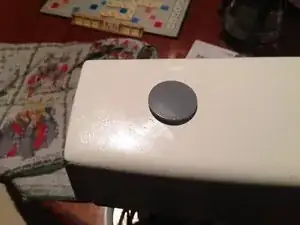
    • Entferne auch das Kenwood-Chef-Logo, welches den vorderen Anschluss abdeckt. Drücke den weißen Hebel zur Seite und ziehe dann das Logo vom Gerät ab.

  3. rr66TPkLGXRmu5Gg
    rr66TPkLGXRmu5Gg
    kaMeS4eTBVkAPKWV
    2NuLBFaN3jRPVYAR
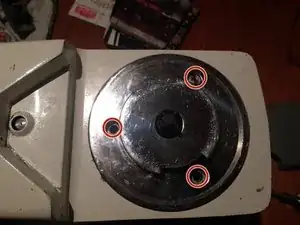
    • Drehe die drei Schrauben heraus, mit denen der Hochgeschwindigkeitsanschluss befestigt ist. Hebe danach den Anschluss heraus.

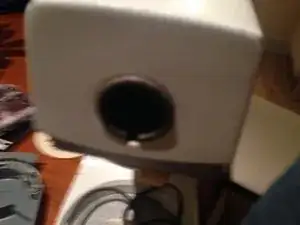
    • Nimm dann den Deckel vom anderen Anschluss oben am Gerät ab.

  4. L2NShciOaJVbRoOs
    L2NShciOaJVbRoOs
    lZSOWdRc3IQf2OIC
    XLvHLZOrmdM21rCR
    • Hebe die Getriebeabdeckung zur Vorderseite des Gerätes hoch - er sollte gerade herausgleiten.

    • Du findest darunter wahrscheinlich einige Rückstände von Backzutaten aus den letzten Jahrzehnten!

  5. KB6efCJR2poVDQOJ
    KB6efCJR2poVDQOJ
    yKtrPqwuSv5FI6Xp
    faRbbFSGqxfWtEYG
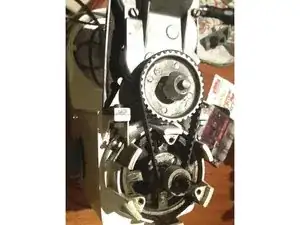
    • Jetzt kannst du den Antriebsriemen abnehmen. Wenn er abgenutzt war, dann ist vermutlich nur noch der Hochgeschwindigkeitsanschluss gelaufen. Er lässt sich leicht mit einem Schraubendreher abziehen.

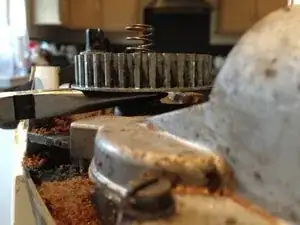
    • Du musst das große Zahnrad oben anfassen und die große Kegelmutter darüber abschrauben. Passe auf, dass die Feder darunter nicht wegfliegt.

    • Zuerst muss das Zahnrad fixiert werden, indem du die die Rührwerkzeuge festhältst - entweder mit Hilfe einer zweiten Person oder klemme sie mit einem geeigneten Holz fest. Löse dann die Kegelmutter mit einem Gabelschlüssel. Eventuell merkst du, dass sie sich bald löst, drehe dann die Mutter so behutsam auf, dass die Feder nicht davon fliegt.

    • Entschuldigung für nicht ganz richtig aufeinanderfolgende Bilder - einige wurden erst beim Zusammenbau gemacht.

    Hey Josh

    Is there a pin or something between the lid and the dog? I can't get the %#*@ thing to engage!

    Rebecca Coleman -

    Rebecca - the liquidiser outlet cover has a pin which should push down on the clutch dog to make it engage. If the clutch dog has worn prongs or a stripped thread it may need to be replaced.

    Benjamin Daniel -

  6. jOTtC6jCFb1iLDn4
    jOTtC6jCFb1iLDn4
    xQw3TFaRLjBj3GIp
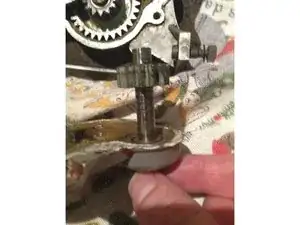
    • Wenn du nur das große Zahnrad austauschen musst: hier ist die Gelegenheit. Mit einer Zange kannst du es hochheben. Beachte aber, dass dieses Zahnrad auf einem Kunstoffantrieb im Inneren des Getriebes befestigt ist, und das ist meistens die Fehlerquelle, wenn der Anschluus mit niedrigen Drehzahlen nicht mehr richtig arbeitet.

    • Drehe nun die Schrauben heraus, mit denen das Getriebe am Gehäuse befestigt ist. Im Bild ist eine gezeigt, auf der anderen Seite ist noch eine. Wenn der Motor defekt ist, ist es vielleicht nicht unbedingt nötig.

  7. nP53eqovO2ZL3die
    nP53eqovO2ZL3die
    1ewwTYyLrmbcdB11
    qnyVZpD2QeIpUAWJ
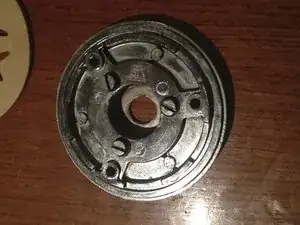
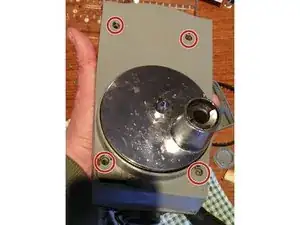
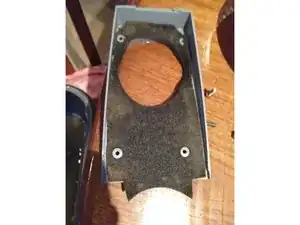
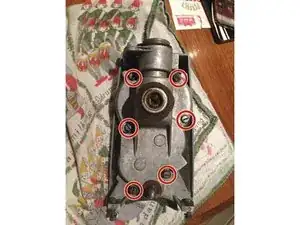
    • Entferne den Kunstoffdeckel unten am Getriebe. Vermutlich fallen dann jede Menge alter Krümel heraus. Im ersten Bild siehst du, an welchen Stellen die Schrauben sitzen. Ziehe den Deckel über den Plastikhebel vorne am Gerät.

    • Jetzt kannst du an die untere Kunstoffabdeckung gelangen. Eine gute Gelegenheit, den Deckel und den Antriebsriemen gut zu säubern.

    • Schaue dir an, wie schön das Kenwood -Getriebe ist (Bild 3) Tauche es nicht in Wasser ein, entferne aber die 6 Schrauben, um hineinzukommen.

  8. SrvC5FnsT6HKUWhY
    SrvC5FnsT6HKUWhY
    euLiDUSaPHcYgAgB
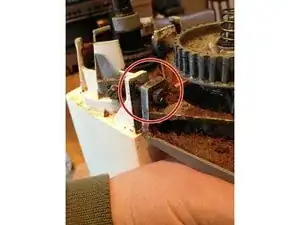
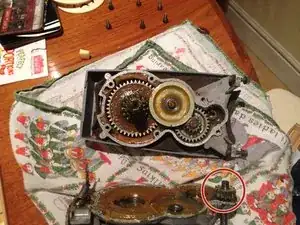
    • Öffne nun das Getriebe. Unter dem Deckel kommt ein immer noch gut geschmiertes Getriebe zum Vorschein. Die Hauptfehlerquelle ist das mit einem roten Kreis markierte Zahnrad. Entferne es und ersetze es durch ein Neues.

    • Folge zum Zusammenbau den Schritten in umgekehrter Richtung.

    We have one of these old beauties and will never part with it. My only question is, if I take the mixer apart and find I need a part or two, where do I get them from? We live near Gosford NSW. Any ideas will be greatly appreciated. Thank you.

    Steve Toomer -

    Excellent guide.  Only omission.  The dog on top of the gear. Is it lift off  or screwed, if so is it anti clock to unscrew

    Dhanji -

    Is the dog on top of the large gear, screwed? If so, does it come out anti clock or clock?

    Dhanji -

    These instructions are also applicable (near enough) to the KM331 model.

    Andy Davis -

    Thanks for sharing!Just in case the repair grease is not available locally (nationally), here’s a good alternative:

    > Super Lube 71150 Synthetic Grease PTFE Extreme Pressure High Temperature

    It is food safe (NSF H1 registered), hast the same NLGI viscosity rating as the original Shell grease (NLGI grade 2), doesn’t brake down over time and is reasonably priced. Works perfectly fine in my A701A.

    Flippo Froehlich -

Abschluss

Um dein Gerät wieder zusammenzusetzen, folge den Schritten in umgekehrter Reihenfolge.

Josh Watson

Mitglied seit: 28/11/11

1593 Reputation

18 Kommentare

Hi I get a slight screeching noise between speed Two and three do you think this is anything to worry about.

The mixer seems perfect at maximum speed.

D MORRIS.

David Morris -

Hi,

I’m not entirely sure, but it sounds like the gearbox (or another part of the drive) may need greasing? The grease can dry up over time and it would lead to that.

Thanks,

Josh

Josh Watson -

what kind of oil do you use in the gearbox

Mark Corkum -

What type of grease is used in the gearbox (my earlier question was an error)

Mark Corkum -

I’m not sure on the exact spec for the grease, but make sure you get Food Grade grease - it isn’t a sealed unit. Googling Kenwood Food Grade grease finds a few sellers - I can’t remember what I used exactly but it was definitely food grade grease, not kenwood specific though.

Josh Watson -

Kenwood’s service manual specifies to use 133gr (4 3/4ozs) of Shell L.G.P.1 62814 or Shell L.G.P.1 62819. I was not able to find the specs for this grease. As the separation between the gear box and the food is properly solved I think the use o food grade grease is not mandatory, but I would recommend it anyway. Search for e.g. ‘Food Grade White Lithium EP Grease’. Kenwood Swiss no longer services those machines but the front-desk girl recommended to use just Vaseline - I really doubt about this…

I collected many links to instructionas and spare parts in a youtube playlist: https://www.youtube.com/playlist?list=PL...

There is a variety of kits available that contain grease and other spare parts you might need to repair your Kenwood. It might be a good idea to replace at the same time brushes, resistors and capacitors of the motor.

The service manual recommends to press the grease after reassemly into the gearbox one youtube guy just used a scraper to fill the box before assembly.

Walter Schütz -

Walter, Thanks for adding the service manual spec.

I’d definitely make sure to use food grade grease as the gearbox seal isn’t necessarily perfect. The gearbox on my machine above is full of cake crumbs from over the decades. Also, If you use the anything too viscous it will find its way into the mixing bowl.

Josh Watson -

Our Kenwood just came to a halt! I have dismantled as you suggest and it appears that the gearbox is OK but the orbital crank pinion has lost a couple of teeth.

It seems to turn ok now but will it do permanent damage if I do not get another pinion?

Peter Cameron

Peter Cameron -

Hi, I have absolutely no power or noise from my A701. I’ve checked the plug fuse. Any ideas?

Timothy Wright -

Hi, mine has done the same - it might be the bushes? I don’t know for sure; we replaced ours. However; it’s up the loft, so if lockdown carries on for much longer, expect a bush replacement guide :)

Josh Watson -

my planet hub model a701a does not turn when loaded under heavy bread stirring conditions. the drive shaft turns as both low speeds (upper and front) work correctly but the spin loosens the planet nut. the actual problem is the inside f the planet hub hole has been worn larger so that the hub does not engage the flat of the shaft. any ideas where one could get a replacement hub or complete assembly, thanks. enjoyed the vid.

donna.verner -

Mine was working great - turned it off to add water and then refused to turn back on again. Could it be the motor?

vmonsta -

My Kenwood Chef Classic fell off counter but carried on mixing. Cover is slightly scew and beaters dont touch bottom of bowl. Is this easy to fix? Still works.No funny sounds.

dennii.dorning -

Hi, I’m not sure which model I have, but she has a dark blue top. My dough was very stiff, and she now makes a bad noise, kind of ticking. Dough hook still spins. Which part do u think I broke? And how do I work out which model she is please?

Breadmaker -

Hi

I have an kenwood A701A vintage mixer, it is still working but has an electrical burning smell, any ideas what might be wrong

it probably needs a service does anyone do this? For this kenwood mixer

Lorna ketner -

Thanks for sharing!Just in case the repair grease is not available locally (nationally), here’s a good alternative:

> Super Lube 71150 Synthetic Grease PTFE Extreme Pressure High Temperature

It is food safe (NSF H1 registered), has the same NLGI viscosity rating as the original Shell grease (NLGI grade 2), doesn’t brake down over time and is reasonably priced. Works perfectly fine in my A701A.

Flippo Froehlich -

This was an excellent summary of the steps involved. I have now re-greased the gearbox and it is a lot quieter. Could I suggest one change to the steps involved? It concerns step 5; Removing the dog nut with a spanner. The suggestion is to get another person to hold the K-Beater attachment part still whilst unscrewing the dog nut. This I found impossible due to the gearing which makes it impossible to hold the K-beater attachment part still!! I found using a piece of dressed timber about 120 mm long (and 15 mm wide x 10 mm high) and placing it between the K-beater attachment part and the frame of the machine, easily allowed the dog nut to be undone. Replacement was simply putting the timber the other side to enable tightening up. (Not over tight mind). Great set of instructions. Thankyou.

John Heydon -

Thanks for that tip John - I’ve added it to the guide!

Josh Watson -