Einleitung

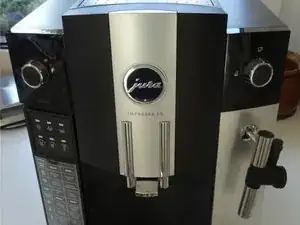
Wenn der Kaffee dünn wird können die Mahlsteine abgenutzt sein. Die Mahlsteine sind nicht scharf genug, um den Kaffee sauber zu zerkleinern. Die Anleitung trifft auf viele bauähnliche Modelle von Jura, AEG, Krups zu.

  1. oAmeijaCC2dcKREj
    • Die Anleitung trifft bei fast allen Geräten von Jura und bauähnlichen Geräten von AEG, Krups zu.

    • Vergiss nie den Netzstecker zu ziehen!

    • Hebe den Wassertank heraus.

  2. hWFrkZyk5rUtXkTy
    hWFrkZyk5rUtXkTy
    KjP1dAQQBufNqGqw
    x5oEOWSWEmY5lCHg
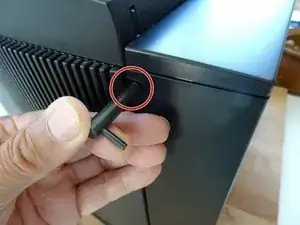
    • Auf der Rückseite befindet sich eine Hürde: vier Ovalkopfschrauben, sie sehen aus wie Nieten. Mit speziellem Werkzeug lassen sie sich herausschrauben. Bei iFixit ist das Oval Drive Bit Bestandteil bei Werkzeugsammlungen, du erhältst es auch bei Jurahändlern oder findest es im Internet. Der Hersteller will uns so den Zugang erschweren!

    • Drehe die Ovalkopfschrauben mit geeignetem Werkzeug heraus. Wer keines hat muss vorsichtig eine Zange verwenden. Es ist eine gute Idee, sie später durch "normale" Schrauben zu ersetzen.

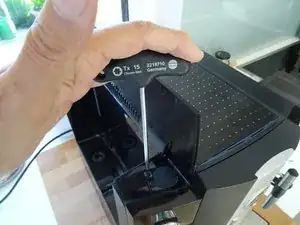
    • Unter den beiden Deckeln sind zwei Schrauben, meistens TX 15. Drehe sie heraus. Hebe die Oberseite hoch und entferne sie . Sie klemmt manchmal etwas.

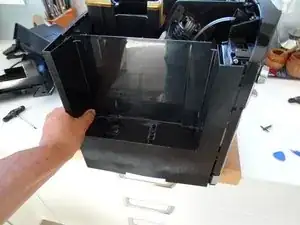
    • Schiebe die beiden Seitenteile etwa 1 cm nach hinten, das klemmt häufig. Falls nötig, setze ein Plastikwerkzeug in den Spalt zwischen Vorderseite und den Seitenteilen ein und vergrößere vorsichtig den Spalt. Dann lassen sie sich leicht abnehmen.

  3. YaBhqoiu4lQBv2Uw
    • Die Anleitung trifft bei fast allen Geräten von Jura und bauähnlichen Geräten von AEG, Krups zu. Der Erfolg der Reparatur ist frappierend!

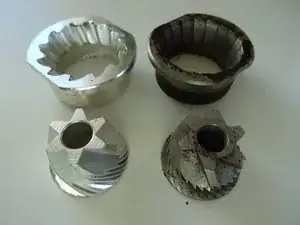
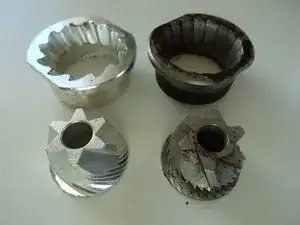
    • Auf Bild sind links die alten und rechts die neuen Mahlsteine zu sehen. Sie bestehen jeweils aus Mahlring und Mahlkegel.

    • Für diese Repararatur müssen die Seitenteile nicht unbedingt entfernt werden.

  4. 2VJSsKksIuANZuW1
    2VJSsKksIuANZuW1
    yGbbUGRJChgNBJmI
    • Ziehe den Mahlwerkseinsteller nach oben. Merke dir die Einstellung, am Besten fotografierst du sie.

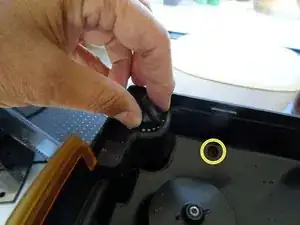
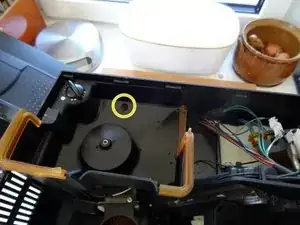
    • In zwei Vertiefungen befinden sich die Schrauben, die den Kaffeebehälter halten. Zuerst säubern, dann lösen. Der Schutzdeckel über der Mühle braucht nicht entfernt werden.

  5. 1GJ5xf1HolWthJHU
    1GJ5xf1HolWthJHU
    OhtGlg5ausNWZCjC
    61AfoNOtYcQxjPQT
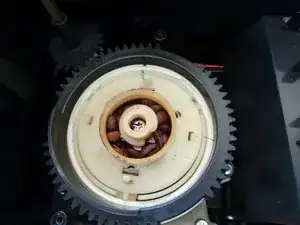
    • Die Mühle liegt offen. Fotografiere die Einstellung, ziehe dann die Achse mit dem Zahnrad des Einstellers mit etwas Kraft nach oben.

    • Auf dem Mahlring befindet sich je nach Modell noch eine Silikondichtung. Zieh sie einfach nach oben ab.

    • Beachte die Werksmarkierungen, hier grün. Das muss zum Schluss wieder so eingestellt werden. Drehe den schwarzen Zahnkranz etwa 90 Grad gegen die Uhr. Damit ist der komplette Mahlring mit Einsatz frei und kann nach oben gezogen werden.

  6. aPM6tFmJhyUEFPw5
    aPM6tFmJhyUEFPw5
    mSjeHiilmSYWXp2l
    YFxePWOkt1lfGGH2
    • Beim nächsten Schritt vorsichtig sein, damit drei kleinen Federn, Kugeln und Hülsen nicht verloren gehen.

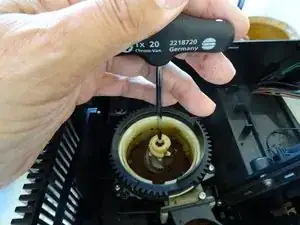
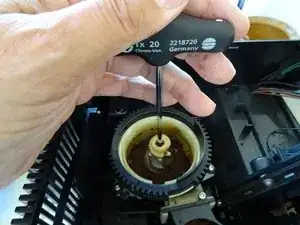
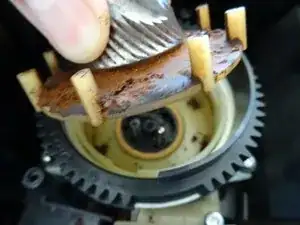
    • Der Mahlkegel ist mit einer langen Torx T20 Schraube befestigt. Der Schraubenkopf ist oft mit Resten von Kaffeebohnen bedeckt. Lege den Kopf frei und drehe die Schraube gegen den Uhrzeigersinn heraus.

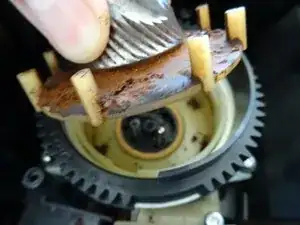
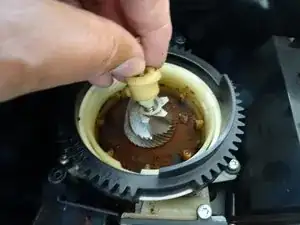
    • Nun kann der Bohneneinzug (die kleine weiße Schnecke) entfernt werden. Vorsichtig lässt sich nun auch der Mahlwerkskegel samt Antrieb hochheben.

    Grinder screws are often left-hand screws. I assume this is not the case since it isn’t noted.

    Lisa W -

    Yes, that's true with Jura and others: open it counterclockwise . And you're right: the grinder screws in Saeco machines is left-handed, open it clockwise.

    VauWeh -

  7. GepSEhaBw6JbTTVG
    GepSEhaBw6JbTTVG
    5qf5c4YiAOIkp3Hx
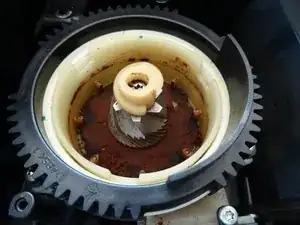
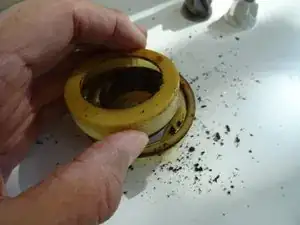
    • Meistens ist die Mühle zugeklebt. Alles muss wieder schön sauber werden, dadurch wird das Aroma des Kaffees wieder gut.

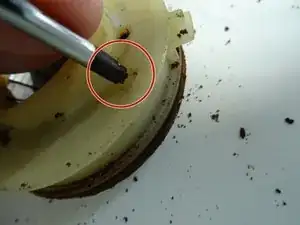
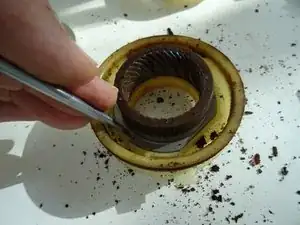
    • Der Filzring um den Antrieb kann mit einer Nadel vorsichtig angehoben und dann gesäubert werden. Das Innere der Mühle kann mit Pinsel und feuchtem Tuch gereinigt werden, der Mitnehmer mit Spülbürste und warmem Wasser. Ordentlich abtrocknen lassen!

  8. tRZkRWYGjIefIaKH
    tRZkRWYGjIefIaKH
    qjvvZUOHeVpIkoN5
    oXxeMxUVxllQvEKp
    • Die beiden kleinen Klinken hineindrücken, dann abwechselnd links und rechts drücken, dann kommt der Deckel heraus

    • Zwei Klammern halten den Ring, einfach wegdrücken, dann ist er frei.

    • Alles wird gereinigt, dann der neue Ring eingedrückt und der Deckel wieder eingeclipst. Damit ist der Mahlring getauscht.

  9. TQPSPKUFKZbAXuF6
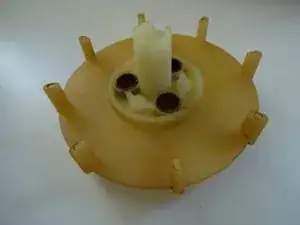
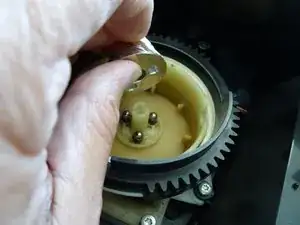
    • Zuerst den gereinigten Mitnehmer einlegen, dann die drei Hülsen, Federn und Kugeln. Nun den Mahlkegel auf die drei Kugeln passen.

    • Dann die Einzugsschnecke einpassen, Zentralschrauben eindrehen. Beim Eindrehen den Kegel nach unten drücken und darauf achten, dass alles ineinandergreift.

    • Diese Schraube dreht in Kunststoff hinein. Wenn sie nicht richtig greift, geht das Gewinde kaputt. Drehe deswegen zuerst gegen den Uhrzeigersinn, bis du spürst, dass der erste Gewindegang greift. Drehe dann erst fest.

    I think the balls have to go first. That way the middle stone can slip if the grinder is blocked.

    That is also what the exploded diagram that circulates online seems to show.

    Comments appreciated.

    Mark -

    I did this fix many times: the balls are on top oft the springs! They do fit into the corresponding holes in the underside of the cone, as you can clearly see in the picture. If the cone is stopped by e.g. a little stone, the balls come out of the holes saving the motors life.

    VauWeh -

    Thank you for the explanation! It is clear now.

    Mark -

    Everything is in right place

    I push as hard as I can. But it seem the that the screw is turning in the void. I remove all the part to see if the hole was strip , the screw seem to enter firmly

    jason warren -

    In this case I fear, you have to buy a new grinder. Replacing it is straightforward.

    VauWeh -

    i find a bit longer screw and it work but now the black ring is spinning in the void. the black outer ring and the white outer ring are suppose to be turning together ?

    jason warren -

    I have one more spring and ball, that are half a diametr of the rest. Can’t figure out where do they go?

    Aleksandr Sevastjanov -

    Might be the ball and spring beyond the big black gear, makes the “click", when turning it.

    VauWeh -

    Thanks. I followed the steps on the Nivona grinder and replaced the springs and the balls in the exact order. Now the grinder can only grind finely and this is too find for my brewer and hence my espresso machine is clogged. Can anyone see what when wrong after the reassembly?

    haydaru -

    I think the parts don't fit together properly. First: There are three holes on the bottom of the cone that the balls must fit into. Second: at the bottom of the helix are two tabs that must fit into corresponding grooves.

    VauWeh -

  10. jGuM4GiVfciS3CZA
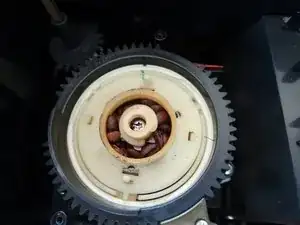
    • Mahlring einlegen. Das schwarze Zahnrad wird wieder soweit nach rechts gedreht, bis die drei Markierungen fluchten. Dann die Antriebswelle des Einstellers wieder so einsetzen, wie es ursprünglich war

    • Neue Mahlsteine haben aber nicht unbedingt die gleichen Einstellungen wie die alten. Du findest einen guten Anhalt für die Einstellung des Mahlwerks, wenn du zuerst den Einstellring soweit wie möglich nach rechts drehst und dann vierzehn Rasten nach links. Das ist etwa die mittlere Einstellung, die ursprünglich markiert war.

    • Es ist gut zu prüfen, ob das Mahlwerk sich frei dreht. Man kann den Mahlguttrichter entfernen und von der Seite auf die Mahlsteine schauen.

    • Dann die restlichen Teile in umgekehrter Reihenfolge montieren.

    • Du kannst den Mahlgrad schön einstellen, indem du eine leere Klopapierrolle senkrecht auf die offene Mühle stellt und dort ein paar Kaffeebohnen einfüllst. Stecke den Stecker ein (Vorsicht!), wähle eine Tasse Kaffee und beobachte direkt, wie das Kaffeemehl aus der Mühle herauskommt.

    i turn the black gear but the white one doesnt turn any more , they are suppose to turn together?

    jason warren -

    By turning the the black gear the grinder ring moves a little bit up and down and changes the grinder setting. The white ring holding the grinder ring indeed does not move. Or do you mean the big white gear beyond the black one? If the black and the white gears are not connected, press firmly the black gear down, until it clicks in.

    VauWeh -

    i remove a part the black and the white ring, it seem that there was black pin on the black ring that was maybe glue to the white ring ? but it seem broken or unglue , it whitish on the tip like if it was broke

    unless i see nothing that make those 2 ring jam together. maybe i should try to reglue with a dot of epoxy ?

    jason warren -

    Buy a new one, it's cheap! It ist just clicked in. Good luck.

    VauWeh -

    Thanks ! Alot!

    jason warren -

    Super Anleitung. Die neue Mahlsteinen war deutlich anders als die alten. Ich habe die Einstellring so weit wie möglich nach rechst gedreht, dann 14 Zähnen nach links, wie beschrieben. Die Maschine malt jetzt perfect. Danke.

    Joe Crites -

    if you move the ring fourteen clicks back, it means maximum opening or closing of the setting. Hope you understand what I mean. With these fourteen clicks, how to set this adjustment stick

    Jaroslaw Tylutka -

    First turn the ring clockwise so that the grindstones sit tightly on each other. Then open it by turning the ring counterclockwise for fourteen clicks. This is a medium setting. You can do a fine adjusting later. Watch the grinder in action using the toilet-paper-roll method. Good luck!

    VauWeh -

    Ok. Thank you very much.

    Jaroslaw Tylutka -

    I am looking to do the same replacement. The instructions looks great but I cannot find anywhere where to buy the two pieces grinder compatible for a ena micro 1. Any suggestions where I could buy that?

    thomas herby -

    This is indeed difficult. The grinder of the ENA Micro 1 is special. So far I have unfortunately only found the complete grinder, very expensive. (~ 150€). A reason not to buy this model, but that's no use to you anymore.

    VauWeh -

    or a cheaper used one (~70€): https://www.jura-ersatzteile-shop.de/mah...

    VauWeh -

    you can get that on eBay and aliexpress/alibaba. if you like take out the burrs and and measure them and I can tell you if they are the common ones being sold everywhere.

    jimmylasvegas -

    If you mark and line up all the rings as well as the spot on the “coarse -fine” adjuster and return them to the exact position at the end, do you have to bother about turning the clicks counterclockwise at the end.

    Ken Tuerk -

    Well, try it. Normally, everything should work fine and you can check the result on the grind. But the method with the 14 clicks is really simple.

    VauWeh -

  11. QvyTZDHNsviViSAM
    QvyTZDHNsviViSAM
    PMxUd3j1JI1gVRwZ
    • Die beiden Bilder sind absolut echt: der Kaffee vor dem Tausch ist dünn und durchsichtig. Danach schwarz und kräftig, er hat mehr Crema. Weitere Einstellungen wurden nicht geändert! Die Reparatur hat sich sehr gelohnt.

    This is very helpful. My question is that when disassembling the unit, a very small ball came loose (not one of the balls under the grinder cone that you flagged). Now my grinder does not adjust for a fine grind so i think the ball was somewhere in the grinder adjustment assembly?

    Thanks

    Jared Rocco -

    Yes. This must be the ball in the grinder adjustment. Have a look to the steps 5 - 7 in the guide for saeco: https://de.ifixit.com/Anleitung/Saeco+Vi..., the grinder is nearly the same. The big black gearwheel can be lifted upwards using a little force and you can see all those little holes - and the ball was sitting under one of them thus keeping the adjuster in position. Hope it helps and you can fix it!

    VauWeh -

    You lost your balls? there’s 2 ball bearings that make the clicking sound as you adjust the grind. I lost both of mine, never found them again. Anyone know what size they are? you can buy new balls at a local bearing store or on alibaba/ebay.

    jimmylasvegas -

    Hello VauWeh,

    I’ve cleaned my grinder and assembled it back. One thing I can’t restore is that grinder adjuster doesn’t click anymore. Could you please advise something that might affect it? The coffee is perfect but the grinder setting doesn’t stay in place. When it grinds, vibration makes it move towards a more coarse setting.

    Poogle Gixel -

    Hello, as I mentioned in my answer dated 18.11.2019, I suppose you lost the ball, which makes the clicking sound and holds the position of the big wheel. Sorry, I don't know a solution for that.

    VauWeh -

    Perhaps the spring and ball for DeLonghi will fit. They are available here.

    VauWeh -

    Another possibility: buy a used grinder, like this one

    VauWeh -

    At least I found it here, indeed the same as DeLonghi. Diameter is 3.2 mm.

    VauWeh -

Abschluss

Arbeite die Schritte in umgekehrter Reihenfolge ab, um dein Gerät wieder zusammenzubauen.

VauWeh

Mitglied seit: 19/10/15

148149 Reputation

0 Kommentare