Einleitung

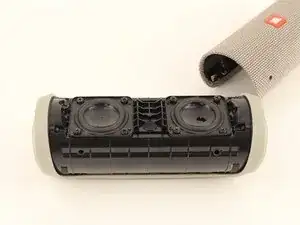
In dieser Anleitung wird beschrieben, wie du die äußere Hülle und die Gummirückseite der Box entfernen kannst. Es werden auch die ersten Schritte beschrieben, um auf Batterie, Lautsprecher, Platinen usw. des JBL Flip 4 zuzugreifen.

  1. TPdTjBXgaNNyAUQE
    TPdTjBXgaNNyAUQE
    uyxjyBvlQ5EvE4JM
    SXsnMdYGMSiQt6TY
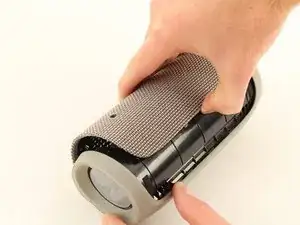
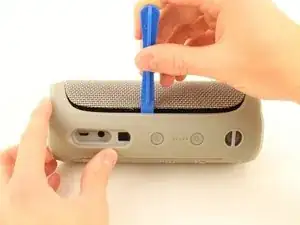
    • Führe das Öffnungswerkzeug in den Spalt zwischen der Abdeckung und dem Gummiboden ein. Achte darauf das die Box so steht, das die Akku-LED's links neben dem An/Aus Knopf sind (wie auf dem Bild).

    • Heble die Abdeckung ab. Beginne an der Seite, wo nicht die Lautstärkeregler sind.

    • Beim Abnehmen der Abdeckung erzeugen die sechs Clips (drei entlang jeder Seite des Gummirückens), mit denen die Abdeckung am Lautsprecher befestigt ist, Schnappgeräusche.

    • Heble sehr vorsichtig, damit die Clips nicht beschädigt werden.

    • Ziehe die Abdeckung mit den Daumen ab.

    Important suggested edit to these instructions - make sure to pry off clips/ridges from BOTH sides before attempting removal of the cover.

    I interpreted these instructions as saying you only needed to pry clips from one side - then peel off cover. Doing this broke a clip from the other side. Bummer. I'd like others to avoid that.

    kevmuldoon13 -

    If you do break a clip - save it. They are relatively easy to glue back into the cover.

    kevmuldoon13 -

    My Flip4 had a single long clip on the non-button side that ran the entire length of the rubber spine. The other side (with play/ vol buttons) had three seperate clips (middle and both sides) as mentioned above.

    takentrashout -

    What if my speaker battery dies very fast and makes weird crackling noise, is it counted as faulty battery?

    Jayden Koh -

    Yes. I first thought one of the drivers was defective.

    Paul Sommer -

  2. MqSuoCcPNBeHtZpb
    MqSuoCcPNBeHtZpb
    bRHK1IRZthrIHwUj
    YFp1hjI2RBYUSP5B
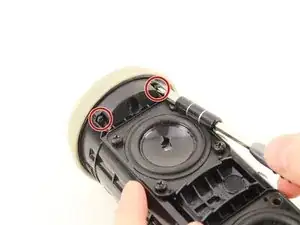
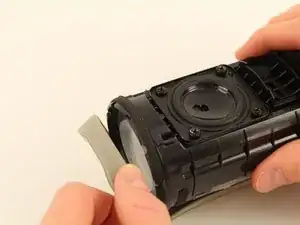
    • Entferne die vier 13mm JIS #0 Schrauben, mit denen die Gummiränder an den beiden Seiten befestigt sind.

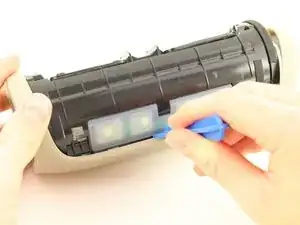
    • Löse mit dem Öffnungswerkzeug die Clips, die den mittleren Teil des Gummirückens halten.

    • Heble einen Gummirand mit den Daumen weg, bis er sich löst. (Wie auf dem Bild).

    • Das Abnehmen der Rückseite kann etwas Fingerspitzengefühl erfordern.

    • Die Lautsprecher sind starke Magnete. Halte sie von anderen empfindlichen Elektronikgeräten fern.

    Suggested Edit : Be careful when removing the screws that they don't get attracted to the speaker (magnet). They can scratch the speaker.

    kevmuldoon13 -

    Note : screws don't need to be removed from their “channel” (it’s quite difficult). Just unscrew fully and leave in channel.

    kevmuldoon13 -

    Note or precaution: Place a piece of cardboard over the speaker or use a plastic/rubber/nonmetalic handled screwdriver when loosening/removing the 13 mm screws. The speaker magnets are so powerful that the end of my metal jewelers phillips screwdriver was pulled into the speaker, tearing the plastic/rubber cone. I destroyed two speakers in the process of replacing the battery. Had to buy the speakers from JBL ($16 each).

    Clark Brown -

    The rubber spine was fixed with glue strips.

    Jaider -

    I have 2 Flip 4's bought approx. a year apart. The older speaker was exactly as described here. The newer speaker does not have the 5 end screws, instead it has a twist to lock end plate. Make sure the top screws that secured the rubber end are removed, as these will prevent end cap twisting. I used rubber gloves to get a grip and twist end cap counter-clockwise to unlock. I found that if you grip end cap too tight it makes it even harder to twist off. Someone may find a better solution, like prising the tags around circumference, but be warned these look flimsy.

    Phil -

Abschluss

Folge den Anweisungen in umgekehrter Reihenfolge, um die Box wieder zusammenzubauen.

Philip Pang

Mitglied seit: 08/10/18

1056 Reputation

0 Kommentare