Einleitung

Die Passivstrahler verbessern die Bassqualität und machen den Charge 3 wasserfest. Der Ausbau der Passivstrahler ist einer der ersten Schritte, im den Charge 3 zu öffnen. Du kannst das Innere der der Lautsprecher durch die seitlichen Öffnungen erreichen.

  1. jU4akwFNVFfexeKv
    jU4akwFNVFfexeKv
    VRIS3vIlbtVuxyHY
    ZKOUcRQY2HZm1gwd
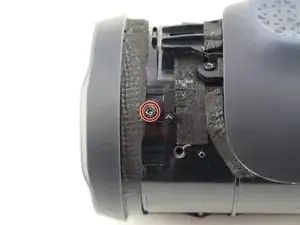
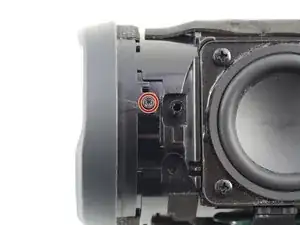
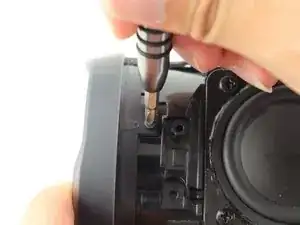
    • Entferne die beiden 8 mm Kreuzschlitzschrauben #1 von den Laschen.

    • Möglicherweise ist auch nur eine Schraube vorhanden.

    If your Charge 3 doesn’t look like the above. Do not do this step YET. Go directly to Step 7 removal of the battery. By doing the battery first it will tell you which radiator to remove and thus no need to remove both.

    NOTE:

    On a newer version of the Charge 3 this image will be very different. you will not find a screw. You will also notice that there are two tabs that if slightly lifted while rotating the radiator counter clockwise the radiator is easily removed. There is also no foam or breakable seal on the newer Charge 3.

    john Ramirez -

  2. IygopFpYvBhxQHIn
    IygopFpYvBhxQHIn
    DZNJtUTQnsbFymex
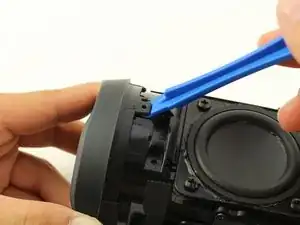
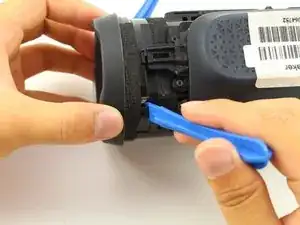
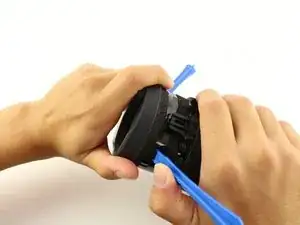
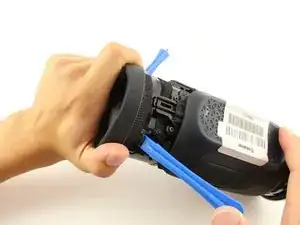
    • Setze unter beide Laschen ein Plastiköffnungswerkzeug ein.

    Beim Modell 2016 geht es noch einfacher: Da ist es ein Bajonett-Verschluss (und nur 1 Schraube im vorigen Schritt). Man muss die Abdeckung nur ein paar Grad gegen den Uhrzeigersinn drehen und kann sie dann einfach abziehen. Schritt 5 und 6 entfallen.

    Franz -

    I believe this is unnecessary, just turn the passive radiator counter clockwise and pull outward. I tried to use the pry tool and broke a plastic tab.

    Frank Krantz -

    Tip— when you get to this part lightly tap the edge of the speaker on a hard surface— like you’re tapping a jar before opening it.

    maxthibodeaux -

    Muchas gracias a todos, me dieron cada uno la guía perfecta.

    Rafael de la Torre Perez -

    My charge 3 had less screws but the process was the same. Thanks for the instructions!

    Ryan Parker -

  3. InOcYxyNPntKkHeX
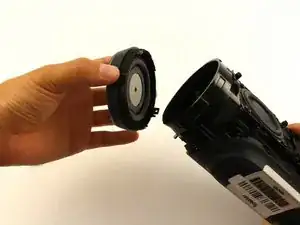
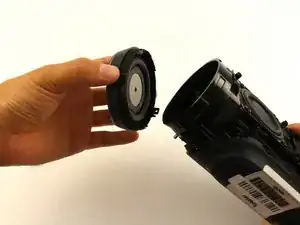
    • Verdrehe den Passivstrahler und ziehe ihn zum Öffnen heraus. Den linken Strahler musst du im Uhrzeigersinn drehen, den rechten gegen den Uhrzeigersinn.

    attention assez dur a enlever, le mien dur à tourner

    Walter Rousseau -

  4. fdH5VDJu1p2DFQvx
    fdH5VDJu1p2DFQvx
    jn2wRKTPARa5OCFJ
    • Wiederhole alle Schritte für den Passivstrahler auf der anderen Seite.

    • Zum Ersetzen des Akkus muss nur der rechte Strahler entfernt werden.

    right or left…. depends on how you view the Charge 3 i guess. No need to remove both radiators for a newer Charge 3. You can remove the battery cover first…find out what side the battery wires exit the battery compartment and then remove the radiator associated with that same side.

    john Ramirez -

    Anybody else have major problems trying to twist the radiator back into position after replacing the battery? I’m having trouble getting the screw holes to line up again on the right radiator.

    Chapman Steamer 1 -

    To twist back I used saliva so it will slide easier against the rubber

    Jaakob Wolff -

Abschluss

Um dein Gerät wieder zusammenzusetzen, folge den Schritten in umgekehrter Reihenfolge m

Jack Ng

Mitglied seit: 08/10/18

1472 Reputation

3 Kommentare

i have a different model of the charge 3 it doesnt have screws but its hard to take out

Water Bass Tester (Water BT) -

mine has screws and was also hard to pull with one hand

Carbon cookie -

Ich finde den Passivenstrahler nicht als Ersatzteil im Internet. Kann wer da helfen?

Sebastix01 _ -