
Einleitung
Musst du weitere Reparaturen durchführen, oder willst du nur die Frontabdeckung austauschen? Diese Anleitung zeigt dir, wie das geht.
Werkzeuge

-
-
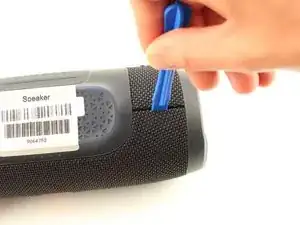
Lege dein Gerät mit der Unterseite nach oben und setze ein Plastiköffnungswerkzeug vertikal in den Schlitz in der Frontabdeckung ein.
-
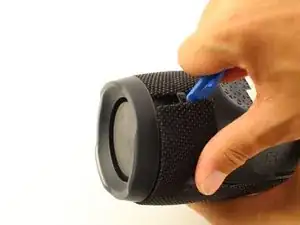
Ziehe das Werkzeug langsam nach außen und löse die Rasten, mit denen die Abdeckung befestigt ist.
-
Wiederhole dieses Verfahren an allen vier Kanten der Frontabdeckung.
-
-
-
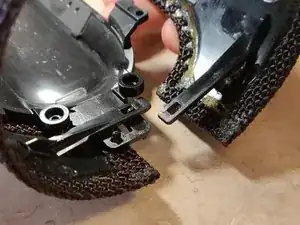
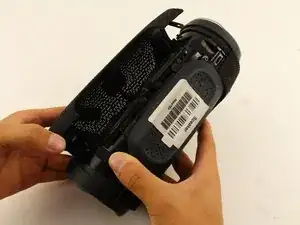
Ziehe die Abdeckung auf beiden Seiten vorsichtig auseinander und entferne sie vom Gehäuse.
-
Abschluss
Um dein Gerät wieder zusammenzusetzen, folge den Schritten in umgekehrter Reihenfolge.

Ein Kommentar
where can i buy a new front cover for mine? mine has got cracked
Sometimes disassemblers forget that the first time they disassembled the item it didn’t want to give up easily: I didn’t like the forces I was having to apply at all, so I switched to two plastic prying tools per “corner” and one in-between them (total 5, you could use plectrums…) before I was happy the the forces were low enough not to break anything.
Frank Puranik -
the front grill is supposed to be first not the back the back has longer while the front has shorter clip
Water Bass Tester (Water BT) -
There are two Phillips head screws to remove before prying the cover off
jason -
Where in south Africa can I buy jbl charge3 port bay replacement
Donovan Fransman -
There appears to be different versions of the Charge 3. If you find it difficult to pry open a second side the two small screws mentioned by Jason will need to be removed but it also indicates that there will be some additional changes to this tear down that I will try to convey in the comments as well.
john Ramirez -
Sadly I damaged the latches on my charge 3. There was more to it than just prying the front cover up. First, there is a small latch on both sides that you need to push down before pulling the front cover towards you that release the clips holding the front cover in place. Pull only slightly forward because… Second, in the front cover there are 6 circular notches connected to the front cover in tue four corners including the middle corners, you need to squeeze the front cover a little bit gently removing the notches so they dont break (like mine did).
ralphkeneth_gomz -
Definitely had to watch about 10 videos and still couldn’t get it to pop out easily.. Took a look at the first picture in the next step and really took note of where the little hole that lets you through to push down the tab is. Once I took a look at that and combined the techniques I’d seen in some of the videos it finally popped off easily. https://www.youtube.com/watch?v=u7i0_nD9... I only watched the first minute of this video but it helped a good bit if anyone else is having trouble.
Rowan Darko -