Einleitung
Wenn du Schwierigkeiten mit dem SSD (Solid State Drive, Halbleiterlaufwerk) Speicher hast, musst du ihn vielleicht austauschen. Dies wird hier gezeigt. Der Austausch ist relativ einfach, sei aber vorsichtig, da du an den inneren Bauteilen des Computerts arbeiten musst.
Werkzeuge


-
-
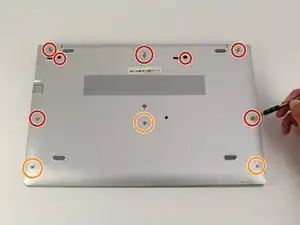
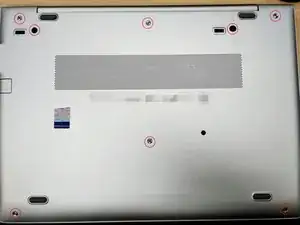
Entferne die fünf Kreuzschlitzschrauben #1. Die drei oberen sind 10 mm lang, die beiden seitlichen 7 mm.
-
Löse die drei unteren Kreuzschlitzschrauben #1.
-
-
-
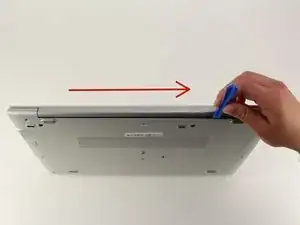
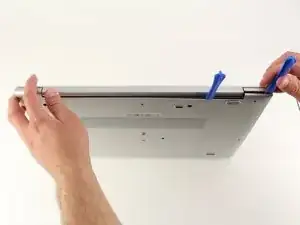
Stelle den Computer so, dass die Kante mit den Scharnieren nach oben zeigt.
-
Heble die Bodenabdeckung mit einem Plastiköffnungswerkzeug auf.
-
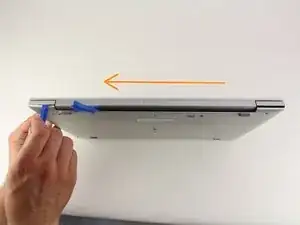
Schiebe das Werkzeug an der Kante von links nach rechts und benutze ein zweites Plastiköffnungswerkzeug um die rechte obere Ecke aufzuhebeln.
-
Wiederhole diesen Schritt für die andere Seite.
-
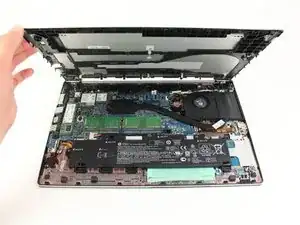
Wiederhole den Schritt auf der linken und rechten Geräteseite. Es gibt zwei Punkte in der Mitte (auf der linken und rechten Seite der mittleren Schraube), die sich durch einen leichten hebenden Druck lösen.
-
-
-
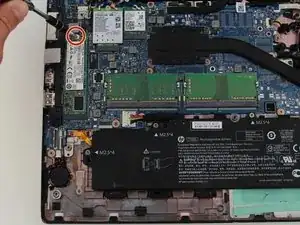
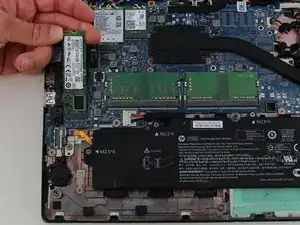
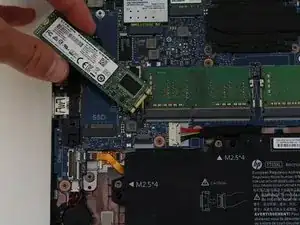
Das SSD sollte ein wenig herausspringen.
-
Ziehe das SSD vorsichtig aus seinem Anschluss heraus.
-
Um dein Gerät wieder zusammenzusetzen, folge den Schritten in umgekehrter Reihenfolge.

2 Kommentare
This guide was very useful.
I have only one to-add: take care of the little SSD screw (at step 4), don’t let it fall to the motherboard. For me it gave a bit of spark and smell.
Very useful guide indeed. To avoid issues issues similar to the above mentioned, it would be better to disconnect battery first.
Another question: can SSD drives with heat sink like WD SN750 Black be installed in this laptop?
Thanks
On my HP EliteBook 840 G5, the “two side screws” (black) are found inside the two holes seen next to the left top screw, and between the center and right top screw.
Ruedi Port -
Mine had the same, and these black screws also need to be released in order to remove the bottom panel.
Josh -
Correct. Some other models have 2 black screws at the back, near the corners.
The models with the 2 black screws, are missing the 2 silver screws at the left side and the right side in the middle.
Note: You need to release the 2 black screws as well, if your type of model has them.
koppie007 -
Thank you this was very helpful. I was able to remove the cover and the SSD.
Stupid question but is this board considered the hard drive? my laptop failed (no power) and I did get an identical replacement. In the past I have been able to remove the hard drive in the failed laptop and connect it to the new one via a data transfer cable (removed hard drive to usb in new laptop. I could then browse files off of the old hard drive and transfer them over to the new. This SSD board has vastly different connectors. Do you know if they make a transfer cable that connects to this board with a usb on the other end?
dgtuk1 -
I removed the back cover and installed a new SSD. When I went to put the back cover, the center screw would not go back in. It turns but does not catch. Any advice?
Erik -