Einleitung
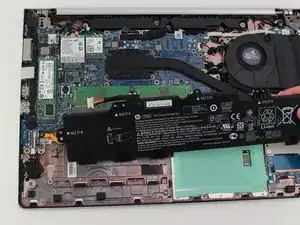
- Warnung:*** Es können mehrere Varianten dieses Notebooks vorkommen mit jeweils einem anderen Akkumodell. Vor dem Kauf eines Ersatzakkus, vergewissere dich nach dem für dich richtigen Akkumodell durch das Öffnen der unteren Notebookbodenplatte.
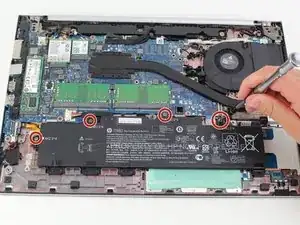
Der Akku in einem Notebook ist die wichtigste Komponente für ein funktionierendes Notebook. Sollte dein HP Elitebook 840 G5 eine schlechte Akkulaufzeit aufweisen, dann folge bitte der nachfolgenden Schritt-für-Schritt Anleitung für den Akkuaustausch. Sei vorsichtig bei diesem Vorgang , denn bei der Entfernung der Bodenplatte werden die darunter liegenden elektrischen Komponenten deines Notebooks freigelegt. Achte auch darauf, die Anschlussdrähte an den Köpfen vorsichtig zu entfernen und nicht den Drähten selbst. Dadurch wird verhindert, dass Drähte während des Austauschs brechen.


Ersatzteile
-
-
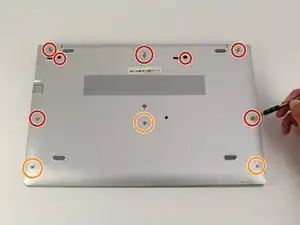
Entferne die fünf Kreuzschlitzschrauben #1. Die drei oberen sind 10 mm lang, die beiden seitlichen 7 mm.
-
Löse die drei unteren Kreuzschlitzschrauben #1.
-
-
-
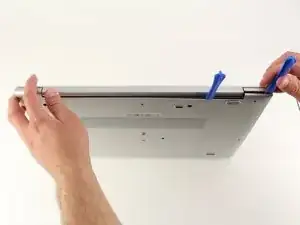
Stelle den Computer so, dass die Kante mit den Scharnieren nach oben zeigt.
-
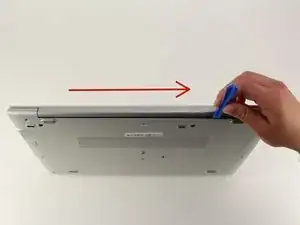
Heble die Bodenabdeckung mit einem Plastiköffnungswerkzeug auf.
-
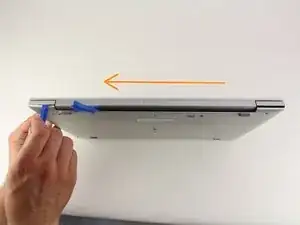
Schiebe das Werkzeug an der Kante von links nach rechts und benutze ein zweites Plastiköffnungswerkzeug um die rechte obere Ecke aufzuhebeln.
-
Wiederhole diesen Schritt für die andere Seite.
-
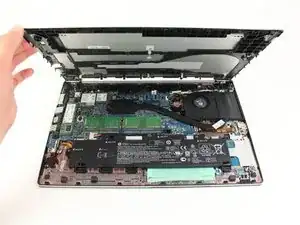
Wiederhole den Schritt auf der linken und rechten Geräteseite. Es gibt zwei Punkte in der Mitte (auf der linken und rechten Seite der mittleren Schraube), die sich durch einen leichten hebenden Druck lösen.
-
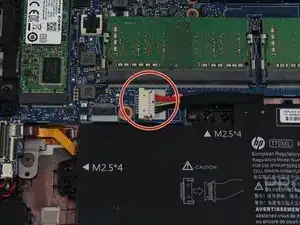
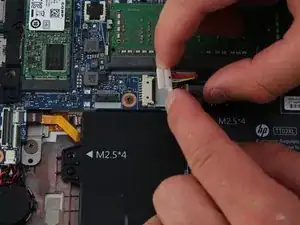
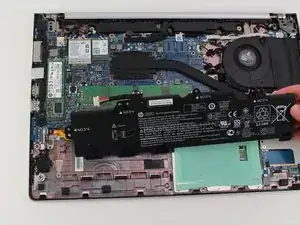
Um dein Gerät wieder zusammenzusetzen, folge den Schritten in umgekehrter Reihenfolge.

5 Kommentare
The battery shown in the photo is a TT03XL. My HP Elitebook 840 G5 laptop has a SS03XL battery. Before you order your replacement battery, take off the laptop’s bottom cover and confirm the battery model you need.
manuelw -
Unfortunately, the TR9 Torx Security Screwdriver did not work on my Elitebook 840 G5. It is unclear if this is due to the battery model. Mine is a SS03XL battery.
Same problem, i ordered battery based on this, but this model have SS03XL battery un TT03XL battery is for Hp EliteBook 850 G5 G6, ZBook 15U G5 G6 Series
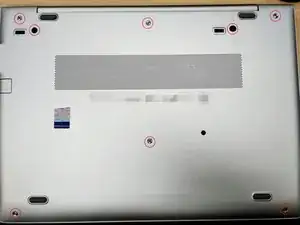
On my HP EliteBook 840 G5, the “two side screws” (black) are found inside the two holes seen next to the left top screw, and between the center and right top screw.
Ruedi Port -
Mine had the same, and these black screws also need to be released in order to remove the bottom panel.
Josh -
Correct. Some other models have 2 black screws at the back, near the corners.
The models with the 2 black screws, are missing the 2 silver screws at the left side and the right side in the middle.
Note: You need to release the 2 black screws as well, if your type of model has them.
koppie007 -
Thank you this was very helpful. I was able to remove the cover and the SSD.
Stupid question but is this board considered the hard drive? my laptop failed (no power) and I did get an identical replacement. In the past I have been able to remove the hard drive in the failed laptop and connect it to the new one via a data transfer cable (removed hard drive to usb in new laptop. I could then browse files off of the old hard drive and transfer them over to the new. This SSD board has vastly different connectors. Do you know if they make a transfer cable that connects to this board with a usb on the other end?
dgtuk1 -
I removed the back cover and installed a new SSD. When I went to put the back cover, the center screw would not go back in. It turns but does not catch. Any advice?
Erik -