Einleitung

Diese Anleitung wurde von iFixit-Mitarbeitern erstellt und nicht von Google unterstützt. Erfahre hier mehr zu unseren Reparaturanleitungen.

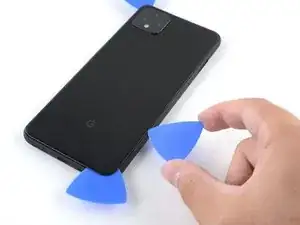
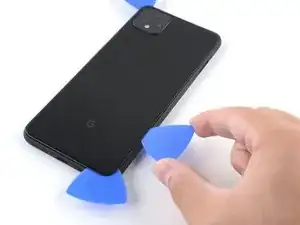
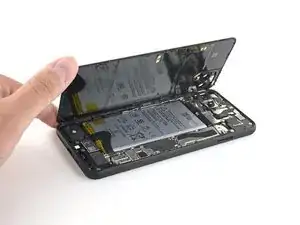
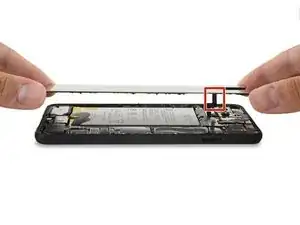
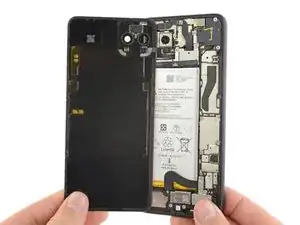
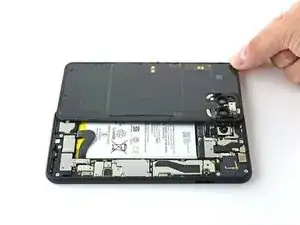
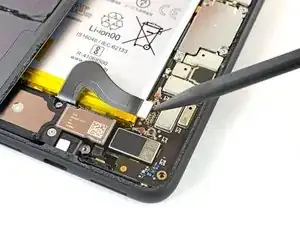
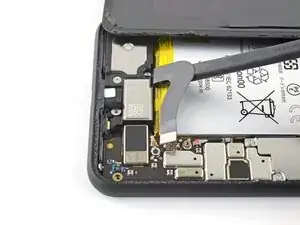
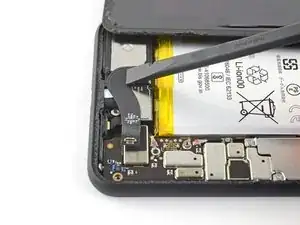
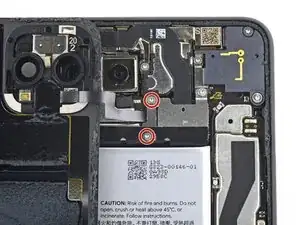
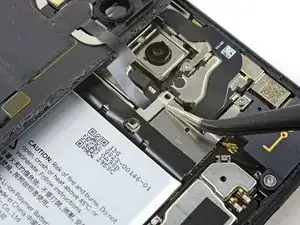
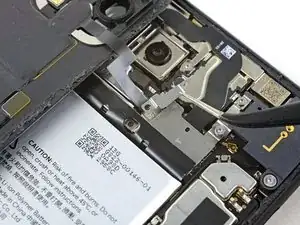
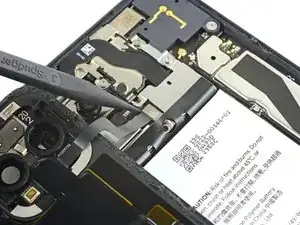
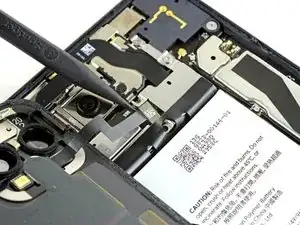
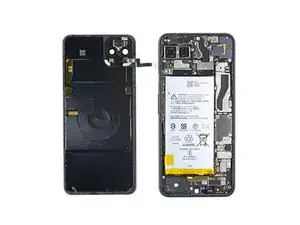
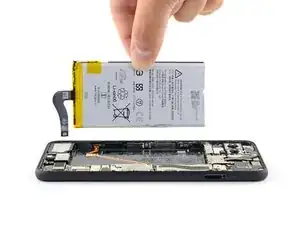
Diese Anleitung zeigt, wie ein altersschwacher Akku im Google Pixel 4 XL ausgetauscht werden kann. Wenn der Akku aufgebläht ist, dann triff geeignete Sicherheitsmaßnahmen.

Entlade aus Sicherheitsgründen vor Reparaturbeginn den Akku auf unter 25%. Du reduzierst dadurch das Risiko, dass er sich entzündet oder explodiert, falls er während der Reparatur versehentlich angestochen wird.

Hinweis: Bei einigen Bildern ist der SIM-Karteneinschub entnommen. Für diese Reparatur kann er aber im Gerät verbleiben

Vorsicht: Es gibt eine Warnung von Google, dass das Zerlegen der Front-Lasereinheit zu einer gefährlichen Exposition von unsichtbaren Infrarot - Laserstrahlen führen kann. Beachte die Sicherheitshinweise.
  1. Hvp1kuHwJo1AClCp
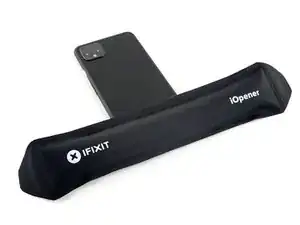
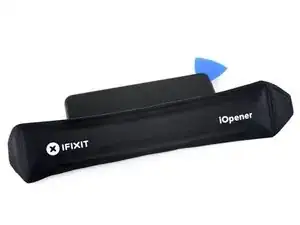
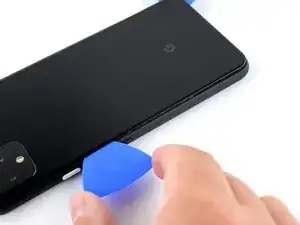
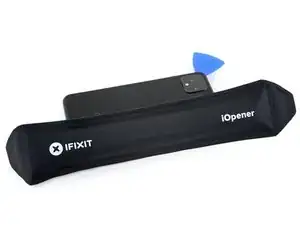
    • Erwärme einen iOpener und lege ihn eine Minute lang auf die Unterkante der Rückseite.

    • Du kannst auch einen Haartrockner, eine Heizplatte oder ein Heißluftgebläse benutzen. Überhitze das Smartphone aber nicht - das Display und der eingebaute Akku sind beide sehr wärmeempfindlich.
    I found 2 minutes works best per side. Great Guide btw, thank you for being a strong leader in the fight for right to repair.

    Dennis -

  2. VK4rWKHPMxSBgjeI
    VK4rWKHPMxSBgjeI
    GS4NhjEZM3SCXJcR
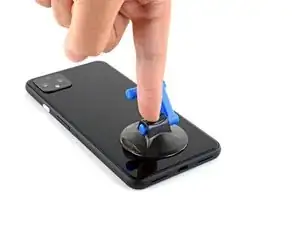
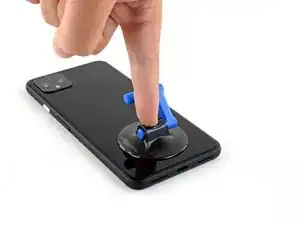
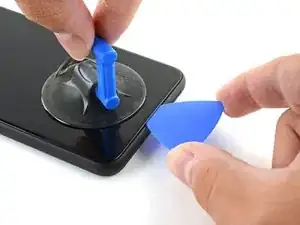
    • Bringe einen Saugheber am erwärmten unteren Rand der Rückseite des Smartphones an. Drücke ihn dazu so nah wie möglich an der Kante fest an.

    • Wenn die Rückseite stark zerbrochen ist, dann beklebe es mit einer Lage von durchsichtigem Paketband, sodass der Saugheber besser anhaften kann. Du kannst auch sehr starkes Klebeband verwenden. Wenn alles nicht hilft, dann klebe den Saugheber mit Sekundenkleber fest.

  3. mkgNQMFVCGsIjSWI
    mkgNQMFVCGsIjSWI
    ZcuoIwCBSbZQv1Jp
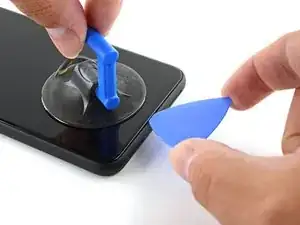
    • Ziehe fest und gleichmäßig am Saugheber, bis sich ein Spalt zwischen Rückseite und Rahmen öffnet.

    • Je nach Alter des Smartphones kann dies schwer gehen. Erwärme es gegebenenfalls nochmals und versuche es erneut.

    • Setze die Spitze eines Plektrums in den Spalt ein.

  4. JPn1p4UL3KeHgTlm
    JPn1p4UL3KeHgTlm
    rerDsh5OJUS5DXft
    pq3vfvBe5v5htEJY
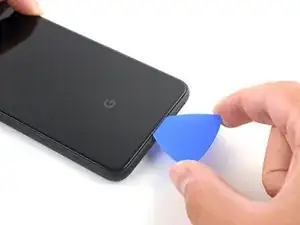
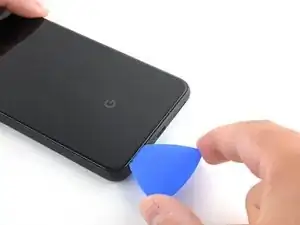
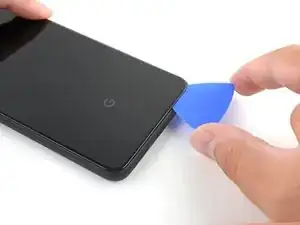
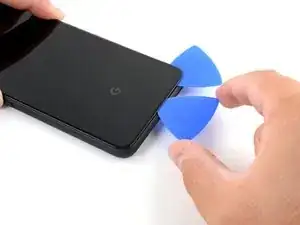
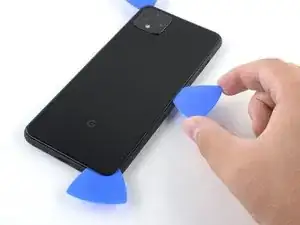
    • Schiebe das Plektrum zum Auftrennen des Klebers an der Unterkante entlang zur linken Ecke hin.

    • Lasse das Plektrum weiter eingesetzt und schiebe es von der linken unteren Ecke zur rechten unteren Ecke hin, so dass der Kleber an der Unterkante komplett aufgetrennt ist.

    • Lasse das Plektrum in der unteren rechten Ecke stecken, damit sich der Kleber nicht wieder verbinden kann.

  5. bmjILIENBtpPcpxn
    • Lege einen erwärmten iOpener eine Minute lang auf die linke Kante des Smartphones.

  6. GQ32GFimDFPnCaIN
    GQ32GFimDFPnCaIN
    KwMHik5nQYlWV3HD
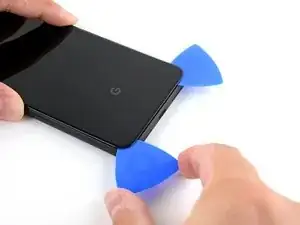
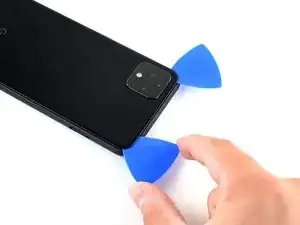
    • Setze ein zweites Plektrum direkt über der Ladebuchse unter die Rückseite ein.

    • Schiebe das Plektrum zur linken unteren Ecke des Smartphones hin.

  7. 3wRXCsDVIiReHwDt
    3wRXCsDVIiReHwDt
    TsAtoOUWx5OUtfJw
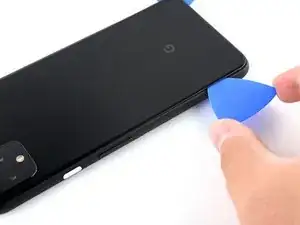
    • Schiebe das Plektrum um die untere linke Ecke und an der linken Seite nach oben, und trenne dabei den Kleber auf.

    • Der Kleber kann zäh sein. Drücke das Plektrum beim Schneiden in einer sägenden Bewegung hinein und heraus.

    • Halte an, wenn du die obere linke Ecke nahe an der Kamera erreicht hast und lasse das Plektrum stecken.

  8. qPt1cI1qIYhrYhrk
    • Lege einen erwärmten iOpener eine Minute lang auf die rechte Kante des Smartphones.

  9. 3MaLYKdcXwMGfmHm
    3MaLYKdcXwMGfmHm
    nNHbQECIIHKXCkeA
    dgKAYchvRQfbG4ZJ
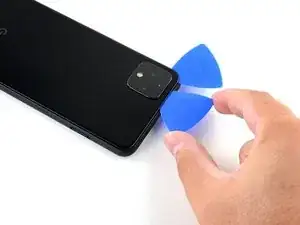
    • Lasse die ersten beiden Plektren immer noch stecken. Setze ein drittes Plektrum unten an der rechten Seite ein.

    • Schiebe das Plektrum an der rechten Seite nach oben und trenne dabei den Kleber auf.

    • Halte an, wenn du die obere rechte Ecke erreicht hast und lasse das Plektrum stecken.

  10. pdXuWBOPnOHID4vo
    pdXuWBOPnOHID4vo
    I1Y2GTUYJV4tftII
    • Schiebe das dritte Plektrum um die obere rechte Ecke herum und dann an der Oberkante entlang, wobei du den Kleber komplett auftrennst.

  11. OMcDBjHL2YjtAAYG
    OMcDBjHL2YjtAAYG
    R6ddvSVjuedNBCHd
    ILBFbo2bfDKEJJGy
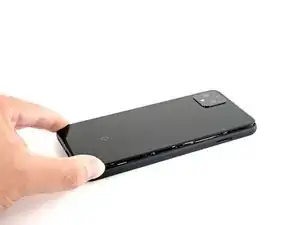
    • Jetzt sollte der Kleber ringsum aufgeschnitten sein. Du kannst nun die Rückseite an der rechten Kante anheben und wie ein Buch öffnen.

    • Entferne die Rückseite noch nicht ganz, sie ist immer noch am Smartphone angeschlossen.

  12. NijixQFNhSKKTdcI
    NijixQFNhSKKTdcI
    UxwAwwrw1KYD2pTe
    • Klappe die Rückseite weiter auf, bis du sie auf der linken Kante des Smartphones aufsetzen kannst. Achte dabei darauf, dass das noch angeschlossene Flachbandkabel nicht zu stark belastet wird.

    • Beim Zusammenbau ist jetzt eine gute Gelegenheit, um alle Funktionen des Smartphones zu testen, bevor du es wieder zuklebst. Denke dran, es auch wieder auszuschalten, bevor du weiterarbeitest.

    “and test all functions before sealing it up.”

    Pretty sure I wont be sealing this up for a few hours, might be worth removing this part of the sentence as it’s confusing…

    Geoff B -

    Geoff B: These are good instructions. Any technician worth his or her salt will test the device for functionality before sealing it up. That’s why it reads, “During reassembly…and test all functions before sealing it up.” Not confusing if you read and comprehend the full pin.

    Jeana Morales -

  13. CbLvKfMPLSOIPeZj
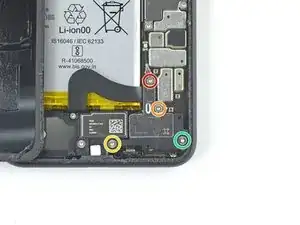
    • Entferne die vier Torx T3 Schrauben, mit denen die Abschirmung des Akkusteckers befestigt ist:

    • Eine ,1,8 mm Schraube

    • Eine 4,1 mm Schraube

    • Eine 4,4 mm Schulterschraube

    • Eine 4 mm Schulterschraube

    • Halte während der ganzen Reparatur die Schrauben gut geordnet und achte darauf, dass sie wieder an genau die gleiche Stelle zurück kommen.

  14. hMmMYeCZjYcTckiS
    hMmMYeCZjYcTckiS
    TbLkCgwKGB3CkFsh
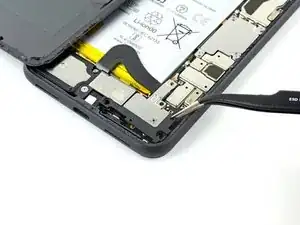
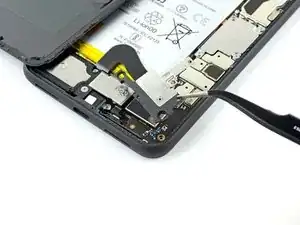
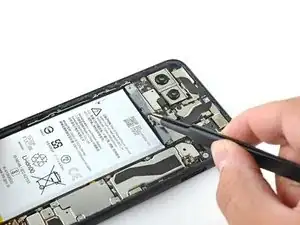
    • Entferne die Abschirmung des Akkusteckers mit einer Pinzette.

  15. vjiUuPc6ra4hSELD
    vjiUuPc6ra4hSELD
    1FGTf5VCS2ELOc6N
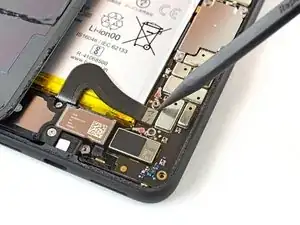
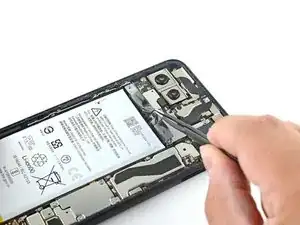
    • Wenn du mit dem Spudger nahe am Akku arbeitest, musst du aufpassen, dass der Akku nicht angestochen wird.

    • Heble den Akkustecker mit der Spudgerspitze gerade nach oben und trenne den Akku von der Hauptplatine ab.

    • Um Press-Fit Verbinder, wie diesen hier, wieder anzuschließen, musst du ihn erst sorgfältig ausrichten. Drücke ihn erst an einer Seite nach unten, bis er einrastet, anschließend auf der anderen Seite. Drücke nicht in der Mitte. Wenn der Stecker schlecht ausgerichtet ist, können die Kontakte verbogen und dauerhaft beschädigt werden.

    I had the piece from the cable break off inside the connector. How would I go about getting it out

    Dylan DVP -

    What are the 5 copper dots under the battery connector for.

    Brian Davis -

  16. jPpHHrKTJhDOLRAB
    jPpHHrKTJhDOLRAB
    35eGEb6Yerdr1akU
    • Biege das Akkukabel behutsam mit dem flachen Ende des Spudgers weg, so dass es sich nicht während der Reparatur versehentlich wieder verbinden kann.

  17. pW6WYwrosLkYWaER
    • Entferne die beiden 4,1 mm Torx T3 Schrauben, mit denen die Abdeckung des Steckers der Rückseite befestigt ist.

    Wouldn’t it make more sense to use the same (orange) color circles as the other 4.1mm screw?

    Mark Kanzler -

    Maybe Google did it to avoid exchange in the models where they differ

    Daniele Carminati -

  18. XYAjcLAoBQJMddZM
    XYAjcLAoBQJMddZM
    LhAReXLOg44Cb1wP
    • Entferne die Abdeckung des Steckers der Rückabdeckung mit einer Pinzette.

  19. laE2TsjjIUOFpHUR
    laE2TsjjIUOFpHUR
    6GAPsQ54pk1QgKgK
    • Heble den Stecker der Rückabdeckung mit der Spudgerspitze hoch und löse ihn ab.

  20. CafjDv5LWBPJIgAZ
    • Entferne die Rückseite.

    • Bevor du eine neue Rückseite einbaust, musst du erst alle Kleberreste vom Rahmen beseitigen. Benutze ein Öffnungswerkzeug und hochkonzentrierten Isopropylalkohol, um die Oberfläche abzuschaben und zu reinigen.

    • Wenn du die alte Rückseite weiterverwenden willst, musst du auch hier alle Klebstoffreste beseitigen und neue Klebestreifen anbringen.

    • Vergleiche vor dem Einbau einer neuen Rückseite, ob sie genauso wie das Originalteil aussieht.

  21. RUKtbVcDJKDJ4vyf
    RUKtbVcDJKDJ4vyf
    2RjKl1PhERlca45d
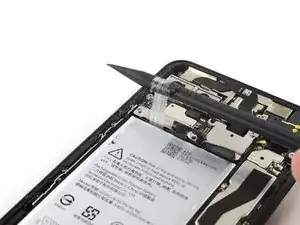
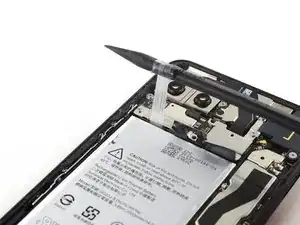
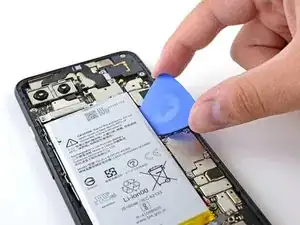
    • Hebe die Zuglaschen an den elastischen Akkuklebestreifen mit einer Pinzette etwas an, so dass du sie leichter mit den Fingern greifen kannst.

    • Der Akku ist mit drei getrennten elastischen Klebestreifen befestigt, die gemeinsam durch eine einzige schwarze Zuglasche verbunden sind. Du kannst versuchen, alle drei auf ein Mal gemeinsam herauszuziehen, aber es ist einfacher, die Zuglasche an den Einkerbungen aufzuschneiden und jeden Streifen einzeln herauszuziehen.

    Yellow tab instead of black in my oh so orange Pixel 4XL

    Geoff B -

  22. gyvHQRuRPmvIYwU5
    gyvHQRuRPmvIYwU5
    vNX3QG5sNNajeA51
    • Ziehe gleichmäßig in einem flachen Winkel an der schwarzen Zuglasche. Wenn der elastische Klebestreifen zu lang wird, dann rolle ihn um einen Spudger und fahre fort.

    • Ziehe den Streifen weiter fest und gleichmäßig heraus. Wickle immer so viel auf den Spudger, dass nur ein kurzes Stück des Streifens frei ist.

    • Du brauchst wahrscheinlich ziemlich viel Kraft dafür.

    • Diese elastischen Streifen reißen leicht in zwei Teile. Ziehe so langsam wie möglich.

    • Wenn sich die elastischen Streifen nicht herausziehen lassen, dann fülle etwas hochkonzentrierten Isopropylalkohol in eine Pipette oder eine Spritze und lasse ein paar Tropfen davon unter die linke Kante des Akkus laufen. Gib dem Alkohol eine Minute lang Zeit, um den Kleber aufzuweichen.

    • Setze diesen Vorgang für jede der drei Zuglaschen fort, bis alle entweder heraus sind oder in zwei Teile gerissen sind.

  23. abLR2s31SrdIrv4a
    abLR2s31SrdIrv4a
    EQ3AijgERgpSRHZr
    6QChvAyEewmetqtH
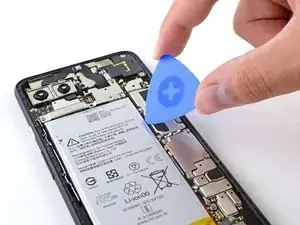
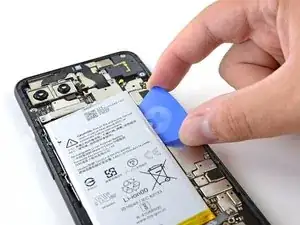
    • Wenn einer oder mehrere der elastischen Streifen während des Entfernens gerissen sind, dann setze ein Plektrum in der oberen rechten Kante des Akkus ein und schneide den Kleber darunter auf.

    • Selbst wenn du mit Erfolg alle drei Streifen herausgezogen hast, kann es doch helfen, zum Ausbau des Akkus ein Plektrum zu verwenden.

    • Setze das Plektrum nicht auf oder unter das Kabel zum Gripsensor, dadurch könnte das Flachbandkabel zur Ladebuchse unter dem Akku beschädigt werden.

    Strip of glue is only on the top part, only 3 stripes. Becareful passing the gold strip

    Jairon Lopez -

  24. ap4VF3pgdfg1m2OS
    ap4VF3pgdfg1m2OS
    MgqEJbJx3PEN6rIo
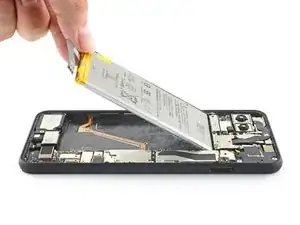
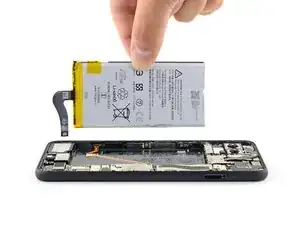
    • Hebe den Akku hoch und entferne ihn vom Gerät.

    • Einen einmal ausgebauten Akku darfst du nicht wieder verwenden, dies wäre ein Sicherheitsrisiko. Ersetze ihn durch einen neuen.

    • So wird der neue Akku eingebaut:

    • Entferne alle Kleberreste aus der Vertiefung für den Akku.

    • Wenn du elastische Klebestreifen verwendest, dann bringe sie jetzt am Akku an. Wenn nicht, dann befestige doppelseitiges Klebeband oder vorgestanzte Klebestreifen in der Vertiefung für den Akku. Achte dabei darauf, dass du das Flachbandkabel zum Ladeanschluss nicht überklebst. Ziehe alle Schutzfolien ab, damit die Klebeflächen freigelegt werden.

    • Schließe den Akkustecker vorläufig am Anschluss auf der Hauptplatine an. Dadurch wird sichergestellt, dass der Akku in der richtigen Position eingebaut ist.

    • Lege den Akku passend in seine Vertiefung und drücke ihn fest.

    • Trenne den Akku wieder von der Hauptplatine ab und baue das Gerät wieder zusammen.

    The kit comes with a replacement glue strip for the back cover. I would like to have seen some guidance on putting that on. I’m not exactly a beginner at repairing things in general, but this is the first time I’ve worked on a phone. Figuring it out wasn’t too bad, but getting the old glue off enough to make it work added 15-30 minutes to the process.

    Jason Ridenour -

    This is what I’m sitting at now. probably 90% of the original glue off. did you put the replacement strip on the cover first or the body of the phone?

    david janzen -

    For this, I peeled off the white strip and placed the new adhesive (with blue template still on) onto the inside of the back cover, making sure it aligned. I then peeled off the blue sheet and applied pressure and a mostly-cooled iOpener to help it adhere. Worked very well for me.

    Zaeda June -

    You can follow this adhesive guide for installing new battery adhesive!

    Carsten Frauenheim -

    I decided to give up on getting all of the original adhesive stuff. I removed maybe 30% of it and then placed the replacement strip. It seems to be okay, and the back closed all the way.

    Chem -

Abschluss

Damit der Akku nach dem Austausch gut funktioniert, solltest du ihn neu kalibrieren.

Vergleiche das Ersatzteil mit dem Originalteil. Möglicherweise musst du fehlende Bauteile übertragen oder Schutzfolien vom Neuteil abziehen.

Um dein Gerät wieder zusammenzubauen, folge den Schritten dieser Anleitung in umgekehrter Reihenfolge.

Entsorge deinen Elektromüll fachgerecht.

Lief die Reparatur nicht wie geplant? Probiere zunächst einige grundsätzliche Lösungen oder frage in unserem Forum nach Hilfe bei der Fehlersuche.

Carsten Frauenheim

Mitglied seit: 10/03/20

68531 Reputation

23 Kommentare

Worked great, was tough pulling up the battery but other than that went super smoothly. thanks!!

Kader Belbina -

Really comprehensive, helpful and well-written guide. I prefer to learn to fix things on my own, so this was immensely helpful and just what I needed. Thank you so much!

Zaeda June -

the adhesive pull tabs? there was no way to get them out as the hardware prevents you from pulling at the right angle. i went with softening the glue with a couple drops of alcohol and prying the battery up enough to get a guitar pick in and cut the rest.

Camilo Santana -

Just finished changing the battery to my Pixel 4XL. Battery was slightly bloated (about 1mm) but still running great, at 104% after one year and a half. However, it suddenly stopped charging wirelessly, even from the original Pixel charger.

The kit was great, everything happened according to the instructions. Carefully cleaning the old adhesive took most of the time. I used lint-free wipes and a small syringe filled with Isopropyl alcohol 99.9% to drop the liquid over the adhesive strips in small sections, with the phone positioned vertically, so the alcohol didn’t get inside. Same for the rear cover [Regular rubbing alcohol does not work at all for this purpose] The alcohol really helped removing the old stretch release strips really fast. The connector of the new battery was slightly out of alignment, so I had to plug it first, with the battery leaning at a small angle, then seat the battery on the glue strips. Thank you, that was fun! :)

Radu Oprea -

Great tutorial. I followed all the steps. And, even with the new battery, it's still stuck in 50%.

My phone took a dive in the pool. I love in Brazil, do I don't have Google technical support available, and due to battery mailing restrictions it took 6 months until I managed to receive a spare one.

Do you guys know what could I do?

Thanks

r.duarte -

it is stuck both while turned on and while off? does the battery life is decreased? or is it only a broken report of battery %age? while you tore down the phone, did you see any corrosion aroud?

Daniele Carminati -

Wow. I’ve fixed about 10 phones now and I’ve always had issues getting new adhesive tape delivered without being mangled into an unusable crumpled ball. They packaged it between two thin pieces of plastic and it arrived in perfect condition. They also don’t use plastic bubble wrap as their insulating material which is a refreshing change.

Thanks for the informative guide, competitive price and quality service!

Jake Graveldinger -

Thank you so much, @carsten and the entire iFixit team! <3

Chem -

Hi, I'm having issues with my Pixel's battery and I wanted to buy the kit for battery replacement, but I'm from Mexico.

Do you know if there's a place with international shipping? I would like to buy that kit.

Juan Carlos Garibay -

Sorry to hear about the trouble! Please contact iFixit Customer Support and they would be happy to assist you.

Carsten Frauenheim -

Great guide. I only wish there was a bit more details in the application of the adhesive in the re-assembly.

That said, my 17-year old son was able to follow the instructions and resurrect his Pixel 4XL that had been destined for the trash bin.

Thank you!

Byron Todd -

We have a couple of adhesive installation guides, here and here. You can reference those the next time you tackle a repair!

Carsten Frauenheim -

I ordered a new battery kit from iFixIt for my Pixel 4 XL (Google Pixel 4 XL Battery) with the intent to use this guide.

From what I've seen elsewhere on the internet, I expected the battery to say either "Huizhou Desay Battery Co., Ltd" or "Sunwoda Electronic Co., Ltd". However, that portion of the label is blank -- there is no company name listed.

It also has 3700 mAh on the front label but the rear has a QR code and some text printed including "3740 mAh".

I'm concerned about the legitimacy of this battery.

nukem2k5 -

Changed the battery to the second Pixel 4XL. Obviously, it went faster. Having some highly concentrated isopropyl alcohol (>99% by volume) makes your life a lot easier when clearing the gunk and dislodging the battery.

What I want to mention is: please DO NOT RUSH. Take your time, do it elegantly. For the first time changing a battery, 30 minutes estimated time is a little too optimistic. Scrapping off the old gunk from the phone and the back cover took more than I thought, but it’s a cheap price to pay for a job done well. It was fun!

IFixit rocks!

Radu Oprea -

Overall this is a really well made guide, instructions for disassembly are clear and the pictures are definitely helpful. I do wish the guide actually showed the best ways to apply new adhesive though. It’s not hard to figure out but just taking out the battery and doing the steps backwards again isn’t really a complete reflection of the job.

Tom Vieira -

We have a couple of adhesive installation guides, here and here. You can reference those the next time you tackle a repair!

Carsten Frauenheim -

Thanks @carsten this repair guide mostly worked for me. My only issue is that my phone now doesn’t display the battery % and has a warning message “Problem reading your battery meter”. Does anyone have any ideas?

Adam -

I was getting this warning from my Pixel 4XL “problem reading your battery meter”. Ordered the battery and repair kit. Works great now, error message is gone. The glue ring around the back plate is definitely the most annoying thing. I doubt the phone is water resistant now, but I’m still very happy with this repair.

Marc Gagnon -

This is totally my fault that this happened, because I didn’t read both guides thoroughly before starting, but there needs to be a big red “STOP” symbol at the top of this guide that says “Stop! If you intend to replace your screen, start there first. Do not replace the battery and replace the rear cover prior to replacing the screen.” I am out 2 hours of my life and have to wait for another back adhesive piece. But the bright side is the battery works great and combined with a fresh factory reset the phone is running like new.

Cabel Gray -

Just did it. It was tough to get passed the glue thing on both the back cover and the battery, but I did it successfully. Now I have the phone as new, apart from the fact that the phone is not water resistent. I would add new steps to describe how to reseal with new glue and where to buy it. However, I just used the iOpener to reheat the glue so that it attaches again. Taking into account that I use the pixel cover, that shouldnt be a problem.

Iñaki Paz -

After replacing the battery my phone charged to 88% then stopped. The charging icon flickers when a charger is plugged in but it hasn't gone further.any idea what could cause this?

Kelley -

Help me battery

Baljinder Singh -

Thank you for this very GREAT GUIDE. My Pixel 4XL stopped wireless charging due to the internal battery being "bloated". It was of great help also because you have mentioned the tools needed; i.e. T3 driver, removing the battery adhesive was a pain though as all three of them broke at the very moment it was pulled. Nonetheless the entire replacement process took about 40 minutes following this guide, now it is sleek and thin and wireless charging is back.

Raymond Tan -