Einleitung

Der Lautsprecher sorgen dafür, dass dein Smartphone Töne erzeugen kann. Diese Anleitung zeigt dir, wie du ihn austauschen kannst, ohne andere Bauteile zu beschädigen. Besorge dir vor der Reparatur die unten aufgelisteten Werkzeuge und Teile, die du zum effektiven Arbeiten benötigst. Wir raten zur besonderen Vorsicht beim Öffnen des Smartphones mit Saugheber und Öffnungswerkzeug.

  1. epxPktIQcjAcGIXb
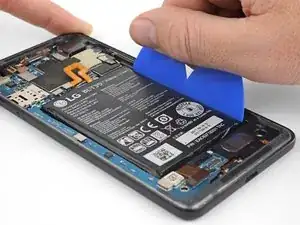
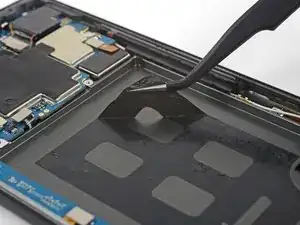
    • Tropfe, falls verfügbar, etwas Isopropylalkohol unter jede Ecke des Akkus und lasse ihn einige Minuten lang einwirken, damit der Kleber geschwächt wird.

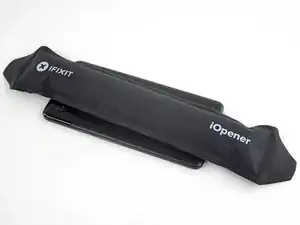
    • Du kannst auch einen erwärmten iOpener mindestens zwei Minuten lang auf den Akku auflegen. Erwärme ihn erneut, wenn nötig, und lege ihn auf, bis der Kleber am Akku hinreichend weich geworden ist.

    NEVER use a pointed metal tool as shown in the picture in this guide. You can damage the battery, which can cause fire and further damage the device. It is also very easy to damage the mainboard.

    JaL -

  2. oYXaUodH6DZtVbKP
    oYXaUodH6DZtVbKP
    ci3s44FKnYilyDM2
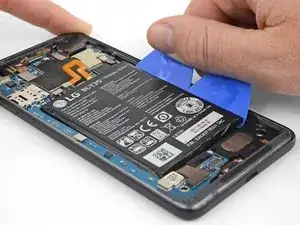
    • Setze ein paar Plektren oder Plastikkarten an der rechten Seite unter den Akku ein.

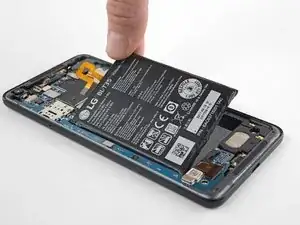
    • Drücke gleichmäßig und beständig. Heble den Akku langsam hoch und entferne ihn aus dem Smartphone.

    • Versuche, den Akku dabei möglichst nicht zu verformen. Aus weichen Lithium-Ionen Akkus können gefährliche Substanzen austreten, sie können Feuer fangen oder gar explodieren. Heble nicht zu stark und verwende keine Hebelwerkzeuge aus Metall.

  3. L2VtREgxSkJLn5EM
    L2VtREgxSkJLn5EM
    Y1AKZTavRAgyshh5
    • Entferne den Akku.

    • Benutze einen ausgebauten Akku nicht noch einmal, das ist ein potenzielles Sicherheitsrisiko. Ersetze ihn durch einen neuen Akku.

    • Wenn noch Alkohol im Smartphone verblieben ist, dann wische es mit einem fusselfreien Tuch aus oder lasse es gut trocknen, bevor du den neuen Akku einbaust.

    • So wird der neue Akku eingebaut:

    • Entferne alle Klebstoffreste mit einer Pinzette vom Smartphone und reinige die Klebeflächen mit Isopropylalkohol und einem fusselfreien Tuch.

    • Befestige den neuen Akku mit vorgestanzten Klebestreifen oder doppelseitigem Klebeband. Damit es gut sitzt, ist es besser, das Klebeband erst im Smartphone, nicht am Akku zu befestigen. Das Klebeband darf keines der Kabel unter dem Akku berühren.

    • Drücke den Akku 20 - 30 Sekunden lang fest.

    Wie versiegelt man das Gerät wider?

    aponteignacio -

  4. gUc4exKiDVWwTrrm
    gUc4exKiDVWwTrrm
    nHIZZSFlCsZFyVvo
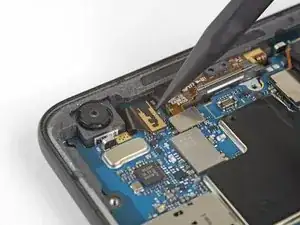
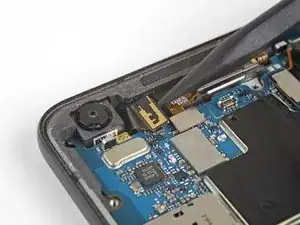
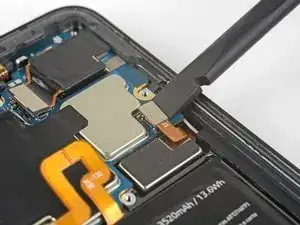
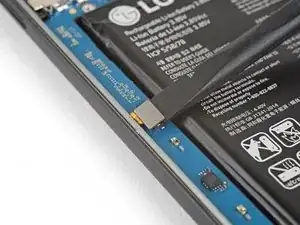
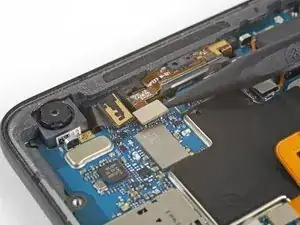
    • Löse den Stecker der Frontkamera mit der Spudgerspitze ab.

    Please add picture to disconnect the top speaker and microphone connector next to the front facing camera. I missed this one during re-assembly twice and could not get it to work properly.

    Don Orin -

  5. xolAP6V5ZwrQFMSe
    xolAP6V5ZwrQFMSe
    OCKVpoMROqMAksGt
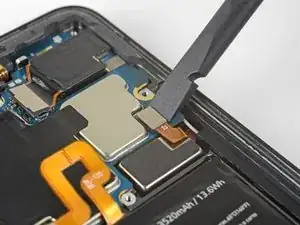
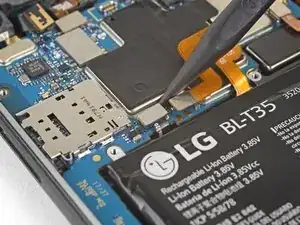
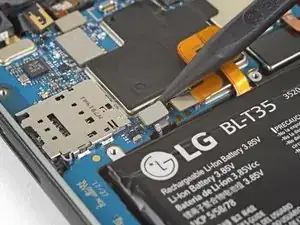
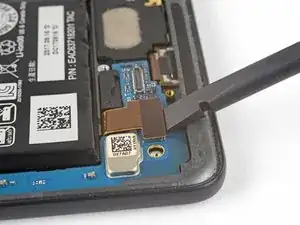
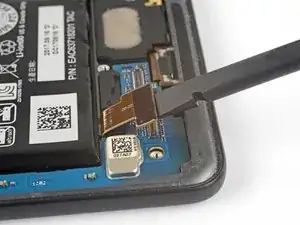
    • Löse den Stecker am rechten Active Edge Sensor mit dem flachen Ende des Spudgers ab.

    Also disconnect the antenna cable just to the right of the right Active Edge sensor connector

    Mark Clear -

    How do I disconnect the antenna cable? it doesn’t come out as easily as the other press fit connectors

    Evan G -

  6. ASdvBaPNMYCujAxK
    ASdvBaPNMYCujAxK
    KY1ywPUfSvQCZ5Bh
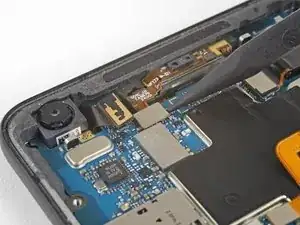
    • Löse den Stecker des Fingerabdrucksensors mit der Spudgerspitze ab.

  7. dlIpYPXLOOnv2Osc
    dlIpYPXLOOnv2Osc
    kkrYrsRdteqGucUP
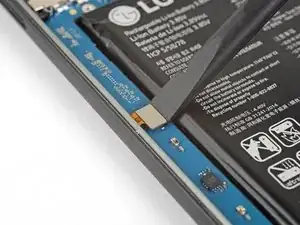
    • Löse den Stecker am linken Active Edge Sensor mit dem flachen Ende des Spudgers ab.

  8. 5346KsMD2cGXQZTr
    5346KsMD2cGXQZTr
    ihpd3ThcnRoJ1n1h
    • Löse den Stecker der Ladeeinheit mit dem flachen Ende des Spudgers ab.

  9. rRGSAJtCKxv1Y14h
    rRGSAJtCKxv1Y14h
    xfjIjAHljRs4S43M
    • Löse den Stecker der Frontsensoreinheit mit der Spudgerspitze ab.

  10. IGxsfftTRWMXomVv
    IGxsfftTRWMXomVv
    Al4xdfXLGD5rYQeO
    FLtBgVHAO26qy1YE
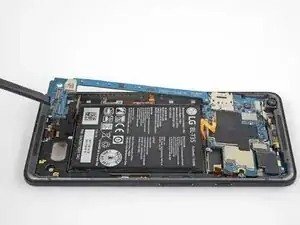
    • Überprüfe nochmal, ob alle Stecker und Kabel von der Hauptplatine getrennt sind. Hebe dann die Hauptplatine unten vorsichtig mit dem flachen Ende des Spudgers an.

    • Der schmale Teil der Hauptplatine ist sehr empfindlich. Wenn sie sich beim Hochheben verbiegt, dann halte an und schauen nochmals nach, ob sie noch irgendwo festgehalten wird. Die Platine sollte sich ohne Widerstand hochheben lassen.

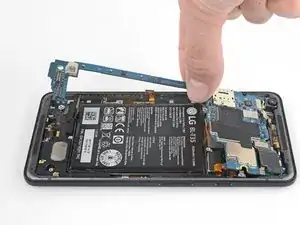
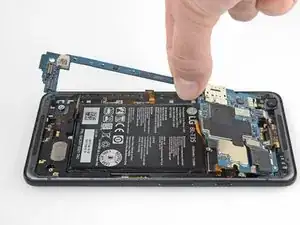
    • Halte den breiten Teil der Hauptplatine in der Nähe des SIM Einschubs fest und schiebe die Platine zur Unterkante des Smartphones, während du es gleichzeitig aus dem Smartphone heraushebst.

    • Entferne die Hauptplatine.

    • Achte beim Einbau der Hauptplatine darauf, dass alle Kabel und Stecker aus dem Weg sind, und dass alle Stecker genau auf ihre Anschlüsse passen.

    Need to take antenna connector off first, picture shows cable disconnected

    michael -

    Agreed. No mention of the antenna cable.

    Michael Weiss -

  11. ZXeJBnWvxslm3yQL
    ZXeJBnWvxslm3yQL
    LAMYEt5nvggVeZhM
    cQcOvQYFFDX4Rqy1
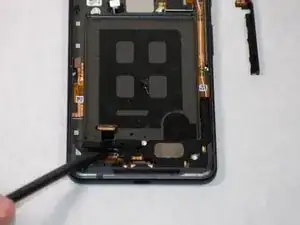
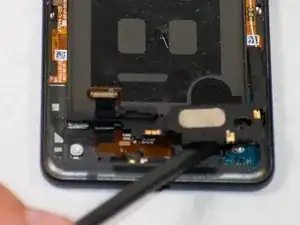
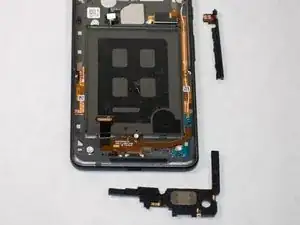
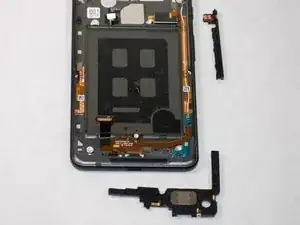
    • Löse den Lautsprecher mit dem Spudger und entferne ihn vom Gerät.

    This step was very difficult, I believe I just snapped the loudspeaker to the left of silver oval piece

    C Grzymala -

    I was just able to remove the loud speaker using the directions provided. The piece sprung out of the phone. The bottom of the piece is flat with pieces of metal and it appears to be slightly bent from my prying. We will see if it still works.

    C Grzymala -

    I ended up using my metal silver spudger. It goes in farther without prying on the fragile plastic. I’m replacing the charging circuit anyway, so not too worried about minor damage

    Matthew Hilbert -

    This is a difficult step. Pictures indicating other safe pry points would be helpful.

    Matthew Riechman-Bennett -

    Most stubborn component to remove.

    Michael Weiss -

    I was able to remove this without great stress on the part by inserting my right thumbnail (thumbprint facing the battery / top of the phone) in between the loudspeaker and the phone body above the silver oval, while at the same time using my left index fingernail to gently lift the long left side protrusion of the loudspeaker. Note that the plastic opening picks were too thick for this. Took twenty minutes or more to figure this out, but about two minutes or less to do it. The fundamental problem seems to be that this part is friction-fit into place, and you won’t get it out all in one motion without risk of breaking it, you have to work at it alternately from every angle. I also added a few drops of everclear (95% ethanol, isopropyl was hard to come by because of COVID), which may or may not have mattered (I have no control for this experiment). I believe there was no damage to the part.

    Jeremy Viehland -

Abschluss

Um dein Gerät wieder zusammenzusetzen, folge den Schritten in umgekehrter Reihenfolge.

Lucas Rasmussen

Mitglied seit: 24/04/18

2062 Reputation

2 Kommentare

Does this method work with the earpiece one as well?

KENGKAN EUNGUMPORN -

We don’t have official instructions out for the earpiece speaker, but it’s only accessible underneath the glass panel and antenna assembly on the back of the phone so removing it is a bit different. After removing the motherboard you would have to lift this flex cable from the back of the phone, just enough to separate it from the adhesive holding it down. Then you can carefully pry up the glass panel, and remove antenna assembly and the earpiece speaker underneath. You’ll probably need an iOpener, suction cup, and opening picks to remove the panel and everything underneath—they’re all glued down pretty solidly.

Adam O'Camb -