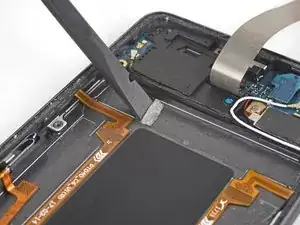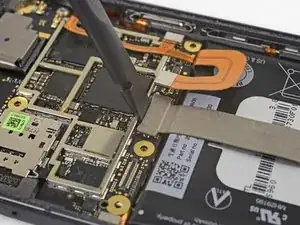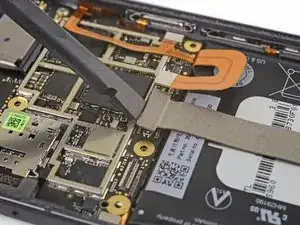
Einleitung

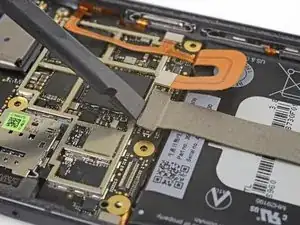
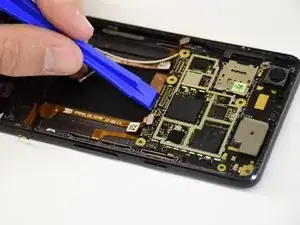
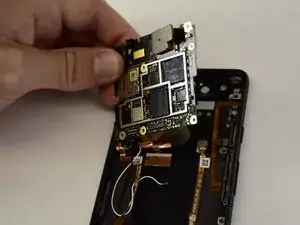
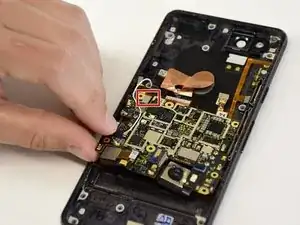
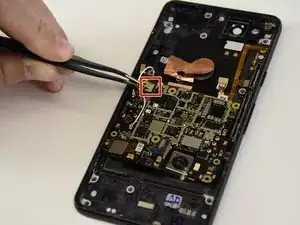
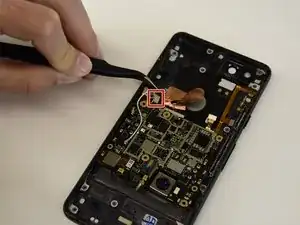
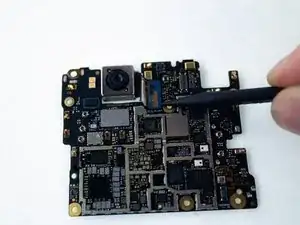
Diese Anleitung zeigt dir, wie du die Rückkamera austauschen kannst. Diese Reparatur ist umfangreich und erfordert den kompletten Ausbau der Hauptplatine.

  1. IqnjxPkUZpfKRIZt
    IqnjxPkUZpfKRIZt
    ZViI262FF1N4t6RN
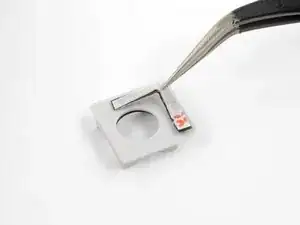
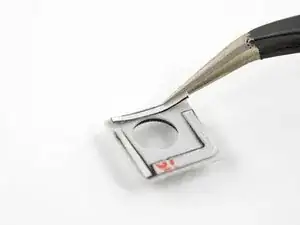
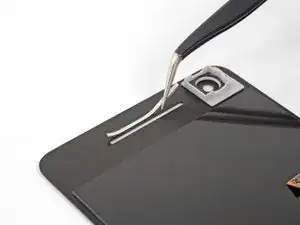
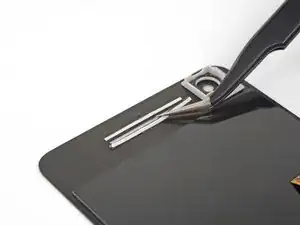
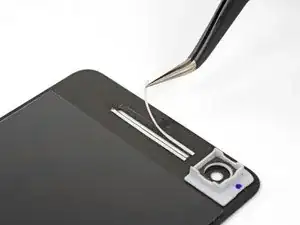
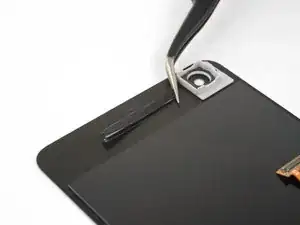
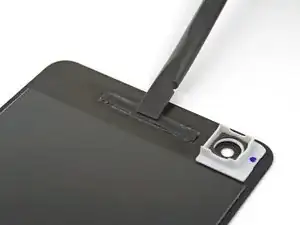
    • Möglicherweise wurde dein Ersatzdisplay nicht mit vorinstalliertem Lautsprechergittern oder der Frontkameradichtung ausgeliefert. In diesem Fall musst du diese Teile sorgfältig vom alten Display ablösen und mit Hilfe der nachfolgenden Anleitung auf das neue Display übertragen.

    • Zum Entfernen der Kamerahalterung musst du sie erst erwärmen und dann mit einer dünnen Metallklinge vom alten Display abhebeln.

    • Das Lautsprechergitter besteht aus zwei Schichten — ein Gitter aus Metallgewebe und dahinter eine dünne Lage aus Stoffgewebe. Ziehe mit einer Pinzette beide Schichten gemeinsam vom alten Display ab. Trenne sie dabei auf keinen Fall voneinander.

    • Achte darauf, dass du die Gewebe und die Dichtung vor dem Anbringen des Klebers befestigst.

    • Schneide zwei Ecken eines vorgestanzten Klebebogens so ab, dass keine Seite länger als 12 mm ist, oder schneide vier 12 mm lange Stücke von doppelseitigem Klebeband ab.

    • Die Klebestreifen dürfen nicht breiter als 1 mm sein.

    • Bringe die Klebestreifen an Kanten der flachen Seite der Frontkamerahalterung an. Wenn du fertig bist, sollten an allen vier Kanten der Kameraöffnung Klebestreifen sein.

    • Drücke den Kleber vorsichtig mit einem Finger oder einem Spudger fest.

  2. 4VymQDCpFCGlhslL
    4VymQDCpFCGlhslL
    EdeG4gPKiQ5JiYsY
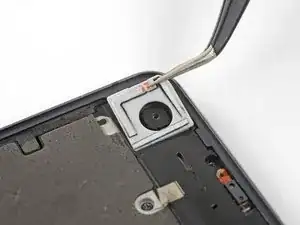
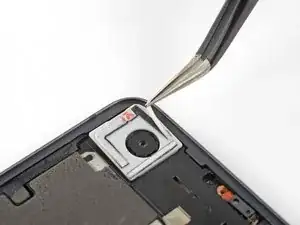
    • Setze die Kamerahalterung in ihren Schlitz um die Frontkamera ein.

    • Achte darauf, dass die abgerundete Ecke der Halterung zur oberen linken Ecke des Smartphones zeigt. Wenn die Halterung nicht dicht an der Kamera sitzt, ist sie nicht richtig eingepasst.

    • Ziehe die weiße Schutzfolie von den Klebestreifen ab.

  3. 1YKieaJ2DokwQ6OO
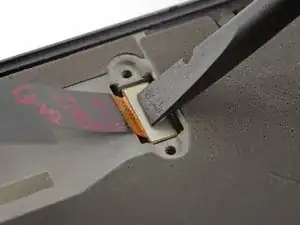
    • Verbinde den Displaykabelstecker des neuen Displays mit dem flachen Ende des Spudgers oder einem Finger.

    • Um Press-fit Verbinder wie diesen hier einzustecken, musst du erst eine Seite sorgfältig ausrichten und nach unten drücken, bis er einrastet. Wiederhole das Ganze für die andere Seite. Drücke nicht in der Mitte nach unten. Wenn die Kontakte nicht gut aufgesetzt sind, können sie sich verbiegen und dauerhaft beschädigt werden.

  4. IN514G6DbxFqMXIl
    IN514G6DbxFqMXIl
    mOA3NCgaiN3uqYfU
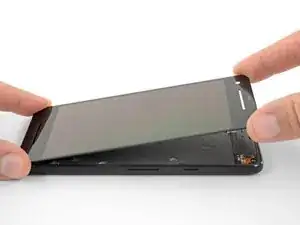
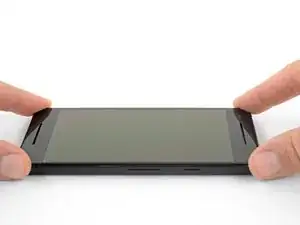
    • In diesem Schritt wirst du das neue Display zeitweilig einbauen, damit es mit der Halterung der Frontkamera korrekt ausgerichtet wird, wenn du die Halterung am Display anbringst.

    • Achte darauf, dass keinerlei Kleberreste am Display sind, bevor du mit diesem Schritt beginnst. Du darfst das Smartphone jetzt noch nicht zukleben.

    • Richte die Unterkante des neuen Displays sorgfältig an der Unterkante des Smartphonegehäuses aus.

    • Setze zuerst das Display mit der Unterkante in das Gehäuse ab und klappe es langsam nach unten, wobei du auf die richtige Passung achten musst.

    • Setze das Display in das Gehäuse hinein und drücke an der Öffnung für die Frontkamera nach unten, so dass du sicher bist, dass die Halterung am Display festklebt.

    • Hebe das Display wieder vom Smartphone weg und überprüfe, ob die Kamerahalterung wirklich am Display festklebt.

    • Trenne das Displaykabel ab.

  5. dnF5tfYXpbQBC4T2
    dnF5tfYXpbQBC4T2
    LMpWKB4sPjnMsfOc
    e3OJgsh2Oy2NLUIX
    • Schneide ein etwa 3 cm langes Stück von 1 mm breitem doppelseitigen Klebeband ab.

    • Lege den Klebestreifen an der oberen Kante des Ohrhörer-Lautsprechers in deinem neuen Display entlang, so dass er mittig über dem Schlitz ist und die Oberkante berührt.

    • Der Klebestreifen muss so nahe wie möglich ohne hineinzuragen an der Kante des Schlitzes sein.

    • Drücke den Klebestreifen sorgsam mit dem Finger oder einem Spudger fest.

    • Befestige mit der gleichen Methode den zweiten gleichartigen Klebestreifen an der Unterkante der schlitzförmigen Lautsprecheröffnung.

    • Ziehe die weiße Schutzfolie von den beiden Klebestreifen ab.

  6. SgMqRqhpiCwYKECb
    • Setze das Lautsprechergitter lose in seinen Schlitz ein, so dass die abgerundete Seite im Schlitz sitzt und die flache Seite vom Display weg zeigt.

    • Achte darauf, dass das Gitter mittig und richtig ausgerichtet im Schlitz drin sitzt, bevor du es nach unten gegen den Kleber andrückst.

  7. GiBgINAdqqUrFnKf
    • Drücke die Kanten des Lautsprechergitters mit dem flachen Ende eines Spudgers oder deinem Finger gegen die Klebestreifen herunter.

    • Wiederhole die vorigen Schritte für das untere Lautsprechergitter.

  8. EZUdI4BmuOMhSJui
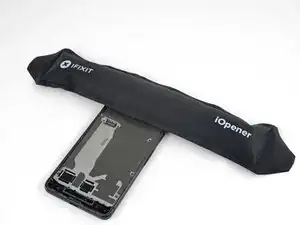
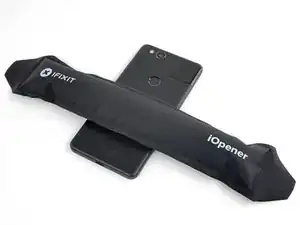
    • Lege zwei Minuten lang einen erwärmten iOpener auf den Näherungssensor an der Oberkante des Mittelrahmens, so dass seine Klebeverbindung aufgeweicht wird.

    Isopropyl alcohol worked quickly for this

    Raquel Smith -

  9. HbJNOR1kLALZjcTd
    HbJNOR1kLALZjcTd
    SrRrbyQwXyPacWk4
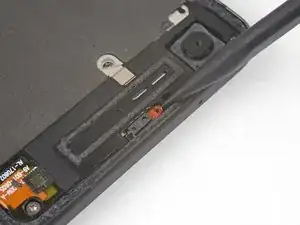
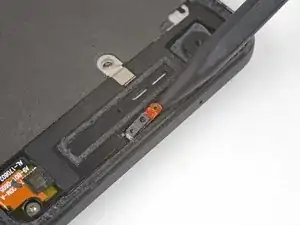
    • Schiebe die Spudgerspitze unter das Kabel des Näherungssensors, fange damit an der Seite in der Nähe der Frontkamera an.

    • Hebe das Sensorkabel vorsichtig an der Kante an, bis der Sensor rechtwinklig zum Mittelrahmen steht.

    This piece is actually glued down - heat and rubbing alcohol really helped as at first I couldn’t figure out why I couldn’t get it to move.

    Dave Watts -

  10. DF6iCcXDep2Shj2C
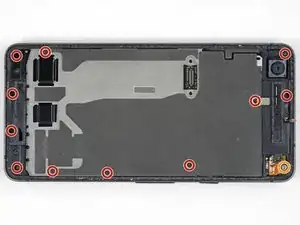
    • Ziehe das kleine Stückchen Klebeband zurück, welches die Schraube unter dem Ohrhörer-Lautsprecher verdeckt. Wenn andere Schrauben auch beklebt sind, dann ziehe auch hier das Klebeband zurück.

    • Entferne folgende Schrauben, mit denen der Mittelrahmen befestigt ist:

    • Elf 3,7 mm Kreuzschlitzschrauben

    • Eine 4 mm Torx T5 Schraube

    • Halte während der gesamten Reparatur die Schrauben gut geordnet und achte darauf, dass jede wieder an ihren ursprünglichen Platz zurück kommt.

    On my Pixel 2, I also had to peel back a small strip of conductive tape that was directly above (and the same kind as) the “screw below the earpiece speaker” mentioned above. It appears to be a ground strap to the assembly underneath.

    Jonathan Dubovsky -

    Me too! Please change the photo?

    Andrew Hoeveler -

    If you don't peel the mesh tape up, it will year. I'm not sure if it plays into the screen potentially not working, but it seems to be a ground for the midframe and the display ribbon has a ground contact to the

    Wesley Krueger -

    Many of the screws would not come out due to the original threadlocker on the threads. I found that if I just kept moving them around with a toothpick, I could get the out. I also had one of those telescoping magnetic bolt grabbers that pulled the screws out.

    John Reagan -

  11. HEw3eLh2pEVebIL6
    HEw3eLh2pEVebIL6
    LCQWWIipK2OVjkmP
    • Setze ein Öffnungswerkzeug in die Einkerbung im Mittelrahmen in der Nähe der Halte-Taste ein.

    • Heble den Mittelrahmen so hoch, dass ein Spalt zwischen ihm und dem Gehäuse des Smartphones entsteht. Der Mittelrahmen kann noch nicht ganz ausgebaut werden.

    This is to pop a securing tab out it's place

    Wesley Krueger -

    On re-assembly make sure the securing tab, near the notch you use to open it, is inserted back under the frame again - this caused me to have to re-open my phone as my screen didn’t sit back down properly after I had put everything back together.

    Dave Watts -

    It is more effort than I anticipated. I really thought I was going to break it, but it was fine.

    John Reagan -

  12. OS6IR34P416u1kUn
    OS6IR34P416u1kUn
    bZXWgUSBDVDpCf1y
    qvUYTFk3VKDRNlOb
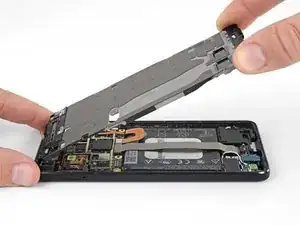
    • Beginne an der Unterkante den Mittelrahmen hochzuheben.

    • Wenn der Mittelrahmen zum restlichen Smartphone einen Winkel von 45° erreicht hat, dann hebe ihn gerade nach oben weg.

    • Führe beim Hochheben des Mittelrahmens den Näherungssensor durch den kleinen Schlitz im Mittelrahmen.

    While not shown here in the photo, there is a short braided cable between the midframe and the motherboard near the front facing camera that prevents separating the midframe completely (ground?). Be careful not to damage this cable when completing the remaining steps or carefully remove before trying to separate the midframe completely.

    ericdowens -

    As ericdowens says above, there’s a small silver sliver of a connector (next to the front-facing camera). The guides on youtube said it was a grounding wire. This guide doesn’t mention it. Mine broke when I removed the midframe. No big deal. I stuck it back down with some tape when I put it all back together. Phone works fine.

    Alex Lawson -

    I had a heck of a time levering up the midframe. I had popped the side with the opening tool, but the other side was really stuck. I used some alcohol along the edge thinking there was some adhesive. Not sure. I eventually used a dental pick to pop it loose.

    And when reinstalling, don’t forget to move the short braided cable back out of the way so you don’t trap it inside.

    John Reagan -

    STOP! Before you lift the midframe, the ground strap mentioned by ericdowens and Alex Lawson definitely will break if you don’t remove it from the midframe before lifting. I didn’t quite know what they were talking about, so thought I’d look for it as I was lifting the midframe, as I was sure if I was careful I’d spot it before it would break. I was very gentle, and I still broke it before realising what they were talking about. Look for some silver mesh tape on the midframe, near the forward-facing camera, same kind of tape as over the screw shown in Step 14. I’m going to try and carefully tape mine back together as Alex Lawson did, but it will be very fiddly, wish I hadn’t broken it in the first place!

    Jamie Lamb -

  13. ARK3wcDKuwSV4Y4b
    ARK3wcDKuwSV4Y4b
    tV1ItBGOoAQhwkQH
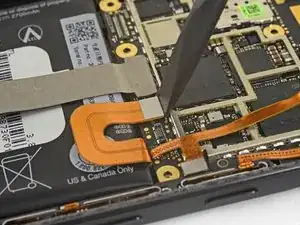
    • Löse den Akkustecker mit dem flachen Ende des Spudgers ab.

    This photo and tutorial doesn't show the shielding on the chips of the motherboard. And the glue…My pixel 2 had the volume button ribbon cable glued to the shielding. Carefully pry the cable off. Very carefully slide under it. Maybe use a little heat to soften the glue. You cannot just remove the motherboard with removing the ribbon cable for the volume buttons.

    A and S Frostad -

  14. lCHiZglBVMJdyGm4
    lCHiZglBVMJdyGm4
    yroCcFmsEvYpRIKk
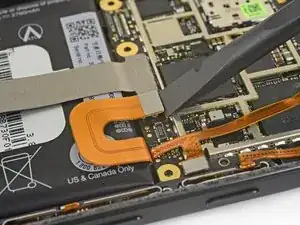
    • Löse den Stecker der Tochterplatine mit dem flachen Ende des Spudgers ab.

    Removing the battery is not necessary to replace the motherboard, steps 19-21 can be omitted

    Robert -

    Hi Robert,

    Thanks for the input! I’ve re-ordered the guide to remove the unnecessary steps.

    Arthur Shi -

    Thank you Robert

    shady mohamed -

  15. Cd5QwSu2MWDVLCUH
    • Fülle etwas hochkonzentrierten Isopropylalkohol in eine Kunststoffpipette oder eine Spritze und träufle ein wenig davon in jede Ecke des Akkus. Lasse ihn eine Minuten lang einwirken, um den Kleber zu schwächen.

    • Alternativ kannst du auch einen erwärmten iOpener mindestens zwei Minuten lang auf die Rückseite des Smartphones über den Akku legen. Erwärme und lege den iOpener so oft wie nötig auf, bis sich der Kleber lösen lässt.

  16. er1Zlj4aJ3ClDrcc
    er1Zlj4aJ3ClDrcc
    wZLTlZujDSbOjnhe
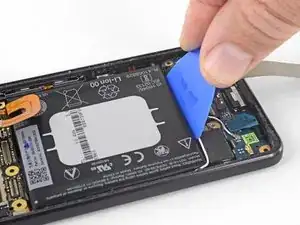
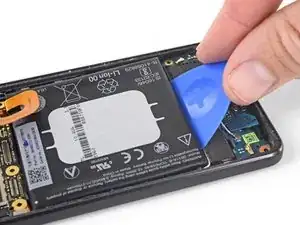
    • Halte das Kabel zur Tochterplatine aus dem Weg und setze ein Plektrum an der Unterkante des Akkus ein.

    • Drücke gleichmäßig und beständig, bis sich der Akku langsam aus dem Smartphone hebt.

    • Heble nur in der Mitte des Akkus, so vermeidest du Beschädigungen an den empfindlichen Flachbandkabeln unter jeder Seite des Akkus.

    • Achte darauf, den Akku dabei nicht zu verformen. Aus weichen Lithium-Ionen Akkus können gefährliche Substanzen austreten, sie können Feuer fangen oder gar explodieren, wenn sie beschädigt werden. Versuche möglichst wenig Kraft aufzuwenden und benutze keine Metallwerkzeuge, um den Akku zu entfernen.

    • Wenn es schwer geht, dann gib noch etwas Alkohol unter den Akku und versuche es nochmals.

    This is another place where the amount of adhesive they’d used in the factory seemed understated - it took ages and plenty of heat and rubbing alcohol to get the battery out. Again, patience was needed - and I thought I might have messed it all up as I must have missed the “only pry from the centre” comment in the guide and went under the right and left bottom corners with a cotton bud and rubbing alcohol - I was lucky I think.

    Dave Watts -

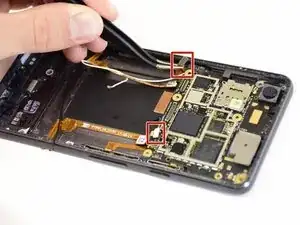
    With the bottom of the phone resting against the iOpener, I used leverage with one of the plastic picks from the top and bottom of the batter and blue opening tool from the left side (below the volume rocker). It gripped it perfectly where I could pull it up a bit and slide the pick further underneath. Be careful of the volume ribbon cable (thin copper color at the top right of the battery) and what I assume to be an antenna cable. - a single thin black wire leading around the bottom left of the battery itself.
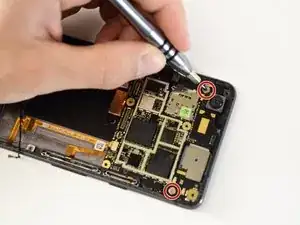
    Avi Baron -
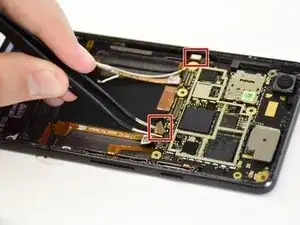
    I think those cables to the left and right are for the “squeeze” sensors on the case.

    I used lots of alcohol as other suggested. I got it out.

    John Reagan -
  17. mtEElpLgm634aUcG
    mtEElpLgm634aUcG
    OfQ24YYJUlTcfmOm
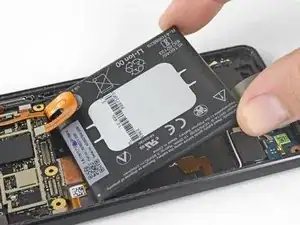
    • Entferne den Akku.

    • Benutze einen gebrauchten Akku nicht mehr, da er ein potentielles Sicherheitsrisiko darstellt. Verwende einen neuen und entsorge den alten Akku.

    • Um den neuen Akku einzubauen, gehe folgendermaßen vor:

    • Entferne alle Kleberreste vom Handy und reinige diese Bereiche mit Isopropylalkohol und einem fusselfreien Tuch.

    • Befestige den neuen Akku mit vorgestanzten Klebestreifen oder doppelseitigem Klebeband. Um ihn richtig zu positionieren, befestige den neuen Klebestreifen erst im Handy, nicht direkt auf den Akku. Der Kleber sollte keinen Kontakt mit einem der Kabel unter dem Akku haben.

    • Drücke den neuen Akku für 20-30 Sekunden fest.

    Why I have to replace the battery if it doing well??!!

    And is it necessary to remove the battery to reinstall the rear camera?

    shady mohamed -

    Lithium-ion batteries are susceptible to damage when they are bent or creased—the thin layers inside the battery may short, resulting in swelling and potential fire hazard.

    You should be able to replace the rear camera without removing the battery. I will adjust the rear camera guide to reflect this.

    Arthur Shi -

    Re-assembly note -

    Getting the battery to connect to the charging cable was a challenge for me. However, once it’s connected, if there’s any juice in the battery or if you want to be brave and plug it in, you can test to see if the phone is receiving power by trying to start it up and seeing if it vibrates. The combination of gently adjusting the charging cable, testing power, testing power with the phone plugged in got me to identify when the cable was attached properly.

    Using my squishy finger worked better for re-attaching that cable than using the spudger.

    This is a much better place to test for power than continuing reassembly and finding out it doesn’t work. If the phone cables are connected correctly and the battery has power (mine shipped with some charge in it), the phone will vibrate when you hold power.

    Thomas -

    Like Thomas, getting the battery cable back was a pain as my positioning of the new battery made the u-shaped cable slightly askew. I finally got it. I was afraid I was going to bend a pin but all good. And I also did the “press power and check for vibrate” trick. The battery (as I would later see) was 52% out of the box.

    John Reagan -

    Once you remove the battery, you may notice parallel lines of adhesives on both sides of the surface, where the battery was. No need to scrape away these lines. They should be still sticky and usable. Removing these would be a hassle. Just add a strip or two of the double sided adhesives in the middle where the battery was, before putting in your new battery.

    Hasan Akhter -

    after adding the battery, the turn on a vibrate trick does work, it vibrates, but then it never does again, and the display does not turn on:/ charging it for 10 min did nothing

    Martin The Orange -

    Thanks to Thomas, I did the turning on to know if it vibrated or not trick, and in my case, it did not. I had to plug out the battery connection and plug it in again with a finger and it was then when I heard a little “click” sound, and then the phone vibrated. You have to ensure that the battery side connector, sits right over the battery connection, before pressing it firmly.

    A Sid -

    Pro tip, plug in the battery before laying it down. Once the battery is in, you only have so much room to bend before it damages the cable or puts too much tension on the board.

    Lance Garcia -

  18. NgdQt3tN66QiiXfb
    NgdQt3tN66QiiXfb
    ENo3DwSJWFPSL3VZ
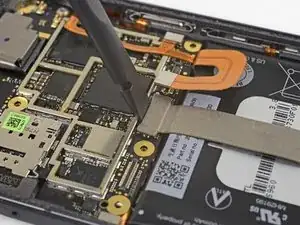
    • Trenne den Stecker der Ladeeinheit mit dem flachen Ende des Spudgers von der Hauptplatine ab.

  19. 5RiqdWFJynIS1M66
    5RiqdWFJynIS1M66
    FUJsB226AXt3dDPA
    vUirQFZMbb4ON5JW
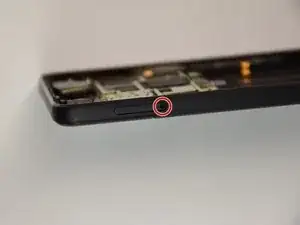
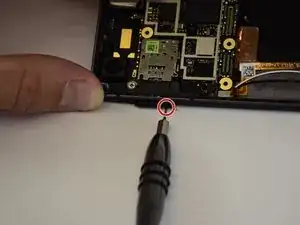
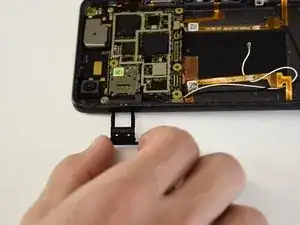
    • Setze ein geeignetes Werkzeug (z.B. eine aufgebogene Büroklammer oder das SIM Auswurfwerkzeug) in das kleine Loch im SIM Einschub auf der linken Seite ein und drücke darauf, bis der SIM Einschub herausspringt.

    • Entferne den SIM Einschub.

  20. 2IOMbCOwbpgyKEGx
    • Entferne die beiden 2,5 mm Kreuzschlitzschrauben #00.

  21. SVI6dPl4iqJNkhbQ
    SVI6dPl4iqJNkhbQ
    oXQtSGsTSAJdauMw
    hAFKVqxHmkGmRHGQ
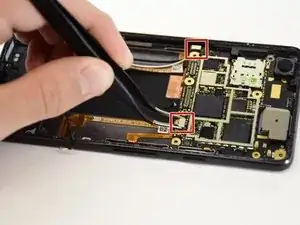
    • Trenne die beiden Stecker an der Unterkante der Hauptplatine ab.

  22. 6QI66KgTwYvpRyX6
    6QI66KgTwYvpRyX6
    nrSyadRTjBVyyabH
    • Heble die Hauptplatine mit einem Plastiköffnungswerkzeug hoch.

    • Entferne die Hauptplatine.

  23. mQrChCWVsBJBx3M1
    mQrChCWVsBJBx3M1
    3YHyBnLj3QhdpWB6
    1XNUOn2nQAWdLmJg
    • Drehe die Hauptplatine herum.

    • Trenne den Stecker des Kabels zu Fingerabdrucksensor ab.

    • Nun sind alle Anschlüsse von der Hauptplatine getrennt.

  24. hiM2yjmwkPFwqV2H
    hiM2yjmwkPFwqV2H
    ks2RBovcMcOxIIHf
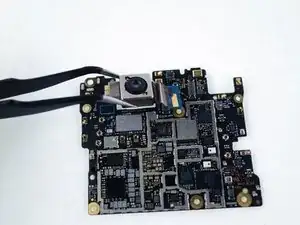
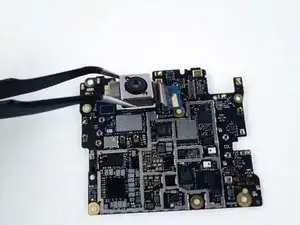
    • Hebe den Press-fit Verbinder der Rückkamera mit der Spudgerspitze hoch und löse ihn ab.

    • Entferne die Rückkamera von der Hauptplatine.

    My pixel 2 device camera isn't working. By using magnet I have to tap around the rear camera after few then back camera will open. Again If i close the camera it's not reopen normally. May I know the reason why this issue common for pixel phones?

    chbhargavsarma -

Abschluss

Vergleiche dein Ersatzteil mit dem Originalteil. Du musst vielleicht fehlende Teile vom alten auf das neue Teil übertragen oder Schutzfolien vom Neuteil abziehen, bevor du es einbauen kannst.

Um dein Gerät wieder zusammenzusetzen, folge den Schritten in umgekehrterReihenfolge.

Entsorge deinen Elektromüll fachgerecht.

Die Reparatur hat nicht den gewünschten Erfolg gebracht? Unser Antwortenforum kann dir weiterhelfen.

Blake Klein

Mitglied seit: 30/01/17

64631 Reputation

17 Kommentare

Does anyone know if replacing the camera unit fixes the problem with the camera’s ‘fatal error’ issue? I’m trying to figure out if it’s just the camera unit that’s bad, or if there are other parts involved.

Sean McCay -

I just replaced my rear camera on pixel 2 and I can confirm YES it does fix it!

John Feng -

Well, I completed the repair on the camera but cannot confirm that it worked because I messed up my display which costs too much to replace :( That thing is super delicate I guess. I’m thoroughly upset.

Sean McCay -

Yes. This fixed my Pixel 2 camera crashing issue. My original symptom was that the autofocus stopped working properly. Then a month or so later the rear camera would crash 49 out of 50 times I opened it (completely unusable). Many people online swear this is a software issue caused by an android update but because I had that focus issue crop up first I suspected my issue was physical damage. I’m generally pretty careful with my phone, it lives in an official case. The only potentially damaging behaviour my phone is exposed to is my placing it in a windscreen mounted phone holder. Perhaps the repeated vibration can break something. Now my camera is fixed I will continue to place it in the phone holder and report back if it breaks again. For science. BE VERY CAREFUL REMOVING THE SCREEN. The guide is not being overly cautious about the screen removal. I broke my screen removing it and turned my $50 camera job into a $200 job with a new screen. Still worth it but I wish I’d heeded the warnings and cautions.

Alex Lawson -

Alex, you may be onto something! There have been many reports of motorcycle riders breaking their smartphone cameras after they’ve mounted their smartphones for prolonged periods. The optical stabilization hardware on these camera modules is pretty fragile. I suspect repeated vibration can definitely result in breaking some very delicate wires in the OIS or flex cables.

Arthur Shi -

NO...Did not work for me :( I am a semi experienced with smartphone repair, and I was able to put my pixel 2 all back together (tested the camera replacement several times before so) with all features working sans camera. Appears to be a motherboard issue. Or maybe it's the front camera…. Either way it's a software issue, because the Google Camera app should tell you what's wrong, and let you use that camera that does work. This repair, if you do attempt, is made easier with a heat gun (a 20 dollar one will do) of course and several picks (guitar picks are handy) to keep the screen from reattaching. Just heat until it's sorta hot to touch…not too much! Also note the instructions on how far to put the picks in to not damage the screen(don't go past the bezels).

I am going to phone into a debugger and figure out the error code next… but also might just buy a samsung (this is my second google phone to have motherboard problems).

A and S Frostad -

Is the battery removal really necessary to get the motherboard out? I’m not seeing any reason it should be.

jkenny23 -

If you get any answer for this please inform

shady mohamed -

You’re correct! I’ve updated the guide to reflect this.

Arthur Shi -

Definitely not needed. And considering how tough the adhesive is under the battery, I’d say it’s best not to remove it.

Alex Lawson -

Can you comment more on why a new battery is needed? My battery is working fine, I'd rather not b a new one.

Erin Beck Acain -

Hi Erin! I updated the guide to skip over the battery replacement section, as it is not needed for the rear camera.

Arthur Shi -

Yeah, I skipped the battery removal/replacement.

Alex Lawson -

I successfully (all previously working parts of phone still working) reinstalled a new camera- except the camera doesn't work still. So I am in the software camp on this plague of pixel cameras. And even if the rear camera doesn't work… why wouldn't the front!!! It's a motherboard issue… or software. Google please just print the error to the screen causing the camera not to work!!!! I had a Nexus 5x before (its motherboard went bad just like the rest)… so I am not going with Google for the next phone. Samsung's seem to hold up better statistically.

A and S Frostad -

This fix did not work for me. For those that it did: did your front camera still work though? Both my front a rear cameras weren't working. I went ahead and replaced the rear, but no change. Maybe I got a DOA camera, but why doesn't my front camera work… what was the status of both your cameras before and after repair?

A and S Frostad -

Since the battery removal is not necessary, the Tesa 61395 Tape can be removed from the parts list - correct?

auldgregg -

I agree it can be removed. As long as people have the “Google Pixel 2 Display Adhesive”. If you didn’t have a replacement Display Adhesive pack you’d need to cut and use Tesa tape as the original adhesive is very unlikely to be re-usable.

Alex Lawson -