Einleitung

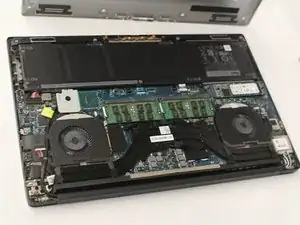
Wenn sich dein Dell XPS 15 9550 nur noch mit angeschlossenem Netzteil anschalten lässt, oder der Akku seine Ladung nicht mehr lange hält, musst du wahrscheinlich den Akku austauschen.

  1. JhVaoLMhBEGlcqFG
    • Lege den Laptop mit der Unterseite nach oben hin.

    • Stelle bitte sicher, dass der Laptop tatsächlich ausgeschaltet ist.

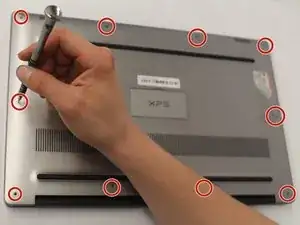
    • Entferne die zehn 3 mm langen Torx T5 Schrauben vom Rand des Laptops.

  2. OgImtWUkApWrFIPl
    OgImtWUkApWrFIPl
    aHrQx4bGJZwh6IF4
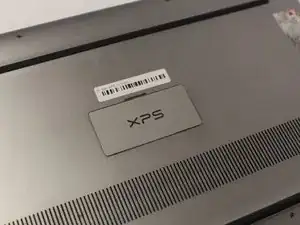
    • Öffne die Klappe mit den Informationen (Mittig auf der Rückseite).

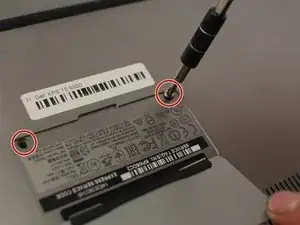
    • Halte die Klappe offen und löse die beiden 10 mm langen Schrauben mit Hilfe eines Kreuzschlitzschraubendrehers #00.

    use a J1, fits a lot better. no risk of rounding

    noah.mooresmith -

    Size is Philips #0 not #00

    Brandon McKee -

  3. KbpdJc6ueEstOgy3
    KbpdJc6ueEstOgy3
    F3ks3LQeHceJUAMf
    QDHjYStVkNUGOSLA
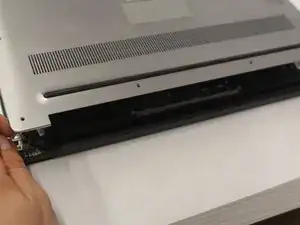
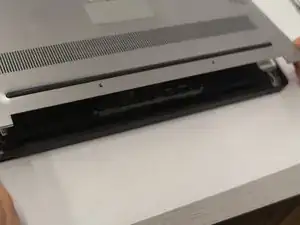
    • Hebe die beiden Ecken der Gehäuseunterseite behutsam nahe an den Scharnieren hoch, so dass sich die Rückseite ganz löst.

    • Hebe die Gehäuseunterseite nicht mit Gewalt hoch. Wenn sie sich nicht leicht lösen lässt, dann benutze einen Spudger an der Stelle, wo sie klemmt.

    Dégouté d'avoir suivi cette étape à la lettre ?

    N'ouvrez SURTOUT PAS le panneau par les deux coins arrières du côté de la charnière !!!

    Et N'utiliser SURTOUT PAS une spatule en plastique pour l'ouvrir si le panneau ne se détache pas facilement !!!

    Le panneau est fait pour s'ouvrir par les coins avant!!! A l'arrière des picots servent justement à l'empêcher de s'ouvrir !!!

    Le résultat si vous utiliser uns spatule à l'arrière… c'est que ces picots cassent… ?

    IL FAUT DONC OUVRIR LE PANNEAU PAR L'AVANT !! Et il est juste posé donc inutile d'utiliser une spatule…

    Voilà voilà je suis dégoûté d'avoir fait cette connerie alors qu'en cliquant sur un autre tuto (lien juste en dessous sur Google) ils le disent…

    J'espère qu'après mon commentaire l'auteur de ce tuto fera la modif…

    Sur ce… merci pour le tuto…

    Tanguy de Guenyveau -

    Bonjour Tanguy ! Désolée de votre mésaventure :( Et merci de ce retour fort précieux à qui voudra effectuer la réparation ! Votre commentaire est visible par tous, donc les utilisateurs seront avertis. iFixit est un wiki ; si vous le souhaitez, vous pouvez également adapter le tutoriel d’origine pour inclure votre retour d’expérience.

    Claire Miesch -

  4. LOotfKueBLS1jHnU
    LOotfKueBLS1jHnU
    nCHFbrUXNPF2nUrQ
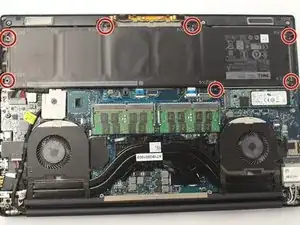
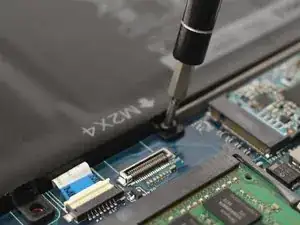
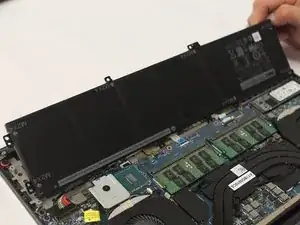
    • Entferne die sieben 3 mm langen Kreuzschlitzschrauben #00 am Rand des Akkus.

    • Jede der Schrauben ist durch "M2X4" und einen Pfeil markiert.

    Everything went great to this point … but the #00 Philips screws securing the battery will not move! The seven screws holding the battery are torqued down so crazy tight the #00 Phillips screwdriver is stripping the heads of the screws. I stopped trying before damaging the screw heads any further. A quick Google search indicates this is not an uncommon problem, but there are no clear solutions (other than sending the computer to Dell). Does anyone know how to get these screws to move without heavily damaging them?

    Taber Bucknell -

    iFixit has a guide with several tips on removing stripped screws here. Just make sure to take care as you work through the guide and stop and move on to the next method immediately once you notice the current one isn’t working so you don’t further strip the screws. One last tip: instead of using a rotary tool with a cutting wheel like in the last few steps of the guide, you can use a flat head that is oversized for the stripped screw as a small chisel to slowly and carefully carve out a notch in the screw head. This works just like the cutting wheel (albeit slowly) to create a notch you can use to remove the screws. Damaging the screws isn’t ideal, but replacement screws are fairly inexpensive and widely available. Good Luck!

    Tarun Thiruma -

  5. 3fSGjDyHv51dJItD
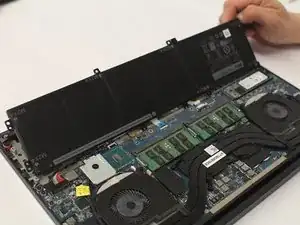
    • Hebe den Akku vorsichtig an der Rückseite hoch.

  6. HGVIGBcdOF1YSXPq
    HGVIGBcdOF1YSXPq
    SCoBxmUxVqD5n12i
    FdW1YDPCVJVTE2UU
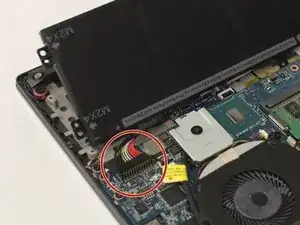
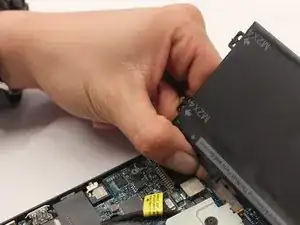
    • Fasse den schwarzen Stecker an den beiden Seiten fest an.

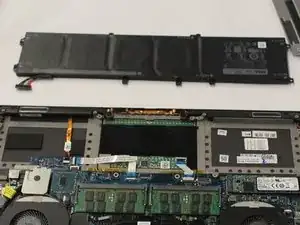
    • Ziehe den Stecker vorsichtig in Richtung Akku und trenne den Akku vom Laptop ab.

Abschluss

Um dein Gerät wieder zusammenbauen, folge den Schritten in umgekehrter Reihenfolge.

Brandon Schmidt

Mitglied seit: 04/10/18

1747 Reputation

4 Kommentare

… Mais avec un prix imbattable, la batterie made in RPC arrive avec un connecteur très très épais !

Finalement il m’a fallu me résigner à forcer très durement l’intromission avec deux paires de pinces !!!

Barbare mais efficace ! C’est le contraire de out ce que j’ai enseigné pendant des années : “le connecteur approprié doit toujours s’insérer en douceur” Ben là … NON !

Jp Chainais -

English translation:

… But with an unbeatable price, the battery made in RPC comes with a very very thick connector!

Finally, I had to resign myself to forcing the intromission very hard with two pairs of pliers !!!

Barbarian but effective! It’s the opposite of what I’ve taught for years: “the right connector should always fit smoothly” Well there… NO!

Richard Persen -

Hallo, ich habe alles nach Anleitung durchgeführt, allerdings kommt eine Fehlermeldung, dass der Akku nicht akzeptiert wird, da kein Original Ersatzteil.

Den Haken im Bios bei Adapter Warnings habe ich bereits entfernt. Hat jemand eine Idee?

Thomas Haupenthal -

Hallo Thomas, wo kommt denn die Fehlermeldung? Im BIOS? In deinem Betriebssystem? In einem bestimmten Programm? Was läuft denn auf deinem Dell?

Fabian Neidhardt -