Einleitung

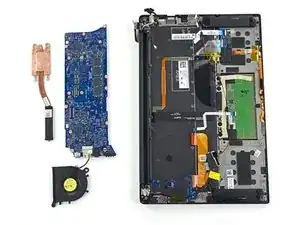
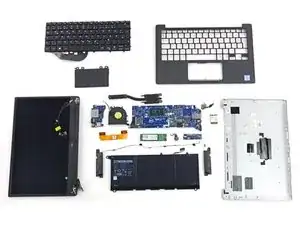
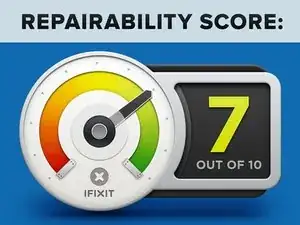
Das riesige Display ist in ein zierliches Gehäuse verbaut, wir hatten deshalb zunächst nur wenig Hoffnung auf ein gutes Ergebnis. Wir waren aber angenehm überrascht vom fehlenden Kleber, den Standardschrauben und der frei verfügbarer Reparaturdokumentation. All das brachte dem XPS 13 eine 7 von 10 Bewertung.

  1. 4JAR2C3uGuDaNk5n
    4JAR2C3uGuDaNk5n
    wgiNiTXrIBJW1fQp
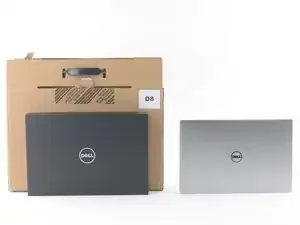
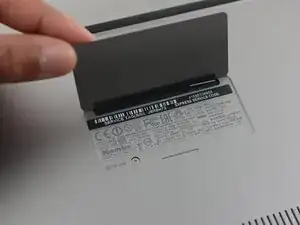
    • Bilder der Verpackung und vom geöffneten Gerät.

  2. ujRu11NiaPuQoZTe
    ujRu11NiaPuQoZTe
    mwnaPAlONnMu5IpO
    fQUJALeU2vNOFLUA
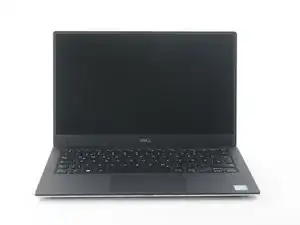
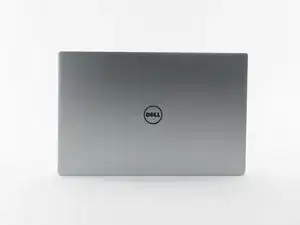
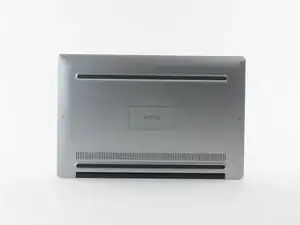
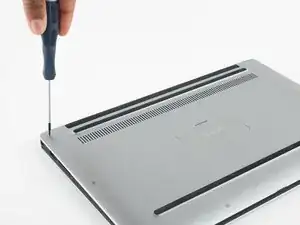
    • Vorder- und Rückansicht.

  3. E3Ip52sdy52pCxqV
    E3Ip52sdy52pCxqV
    1QrQGyvg3dwc5f6o
    1AEXqo6XbGn2qjFP
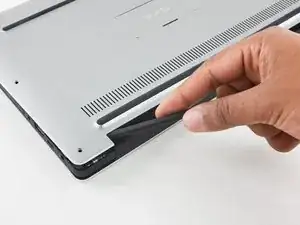
    • Die Bodenabdeckung abzunehmen ist einfach. Entferne die acht T6 Schrauben und die einzelne Kreuzschlitzschraube, heble dann die Rückabbdeckung ab.

    iFixit mentioned that there are adhesive and tabs holding down the back cover.

    Does it have adhesive, or there are tabs?

    Because ideally, a laptop that is easy to repair shouldn’t have one-way tabs. (because how you can damage them when opening them up)

    Xavier Jiang -

    I have this computer and a T6 doesn’t fit. I’ve seen other battery removal guides that say to use a T5.

    Ottilie Young -

    True. It is a T5.

    Which is why I think I added the T5 screwdriver under the tools required.

    T6 is easy. You can find T6 bits for $1 on a street side shop. Even some power tools (craftsman) had it. T5 is much more rarer.

    For mine I replaced the T5 screws with my own T6 ones because T5 strips more often.

    And for the history, it has always been a T5. It’s a T5 on 2012 and 2016/7/8 so I don’t know why he got it mixed

    Xavier Jiang -

  4. yEVMvFXVqISct624
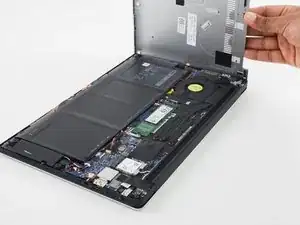
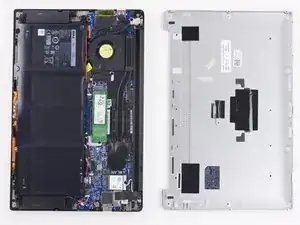
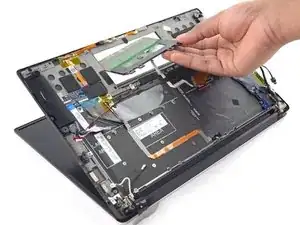
    • Innenansicht

    • Lautsprecher, Akku CMOS Batterie, SSD, Wi-Fi Karte, Stromanschluss und Tochterplatine scheinen leicht zugänglich zu sein.

  5. IU14KJ64f3AADAZk
    IU14KJ64f3AADAZk
    MsZQFBj1eSQqyRLK
    fSsvQFMwsZ1wiqKc
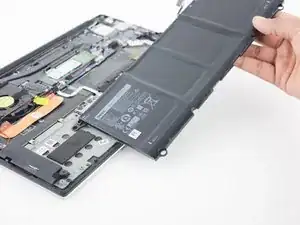
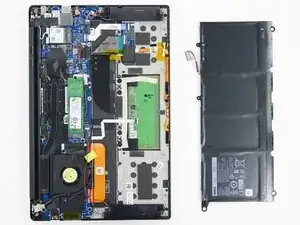
    • Auf dem Akku befindet sich etwas Klebeband. Wir lösen es ab und können dann die vier Schrauben entfernen, die den Akku am Gehäuseunterteil befestigen.

  6. KOAXohCepPTVuOeh
    KOAXohCepPTVuOeh
    trAlthemuHVONK4D
    MlkQcMFEYL6DssZ3
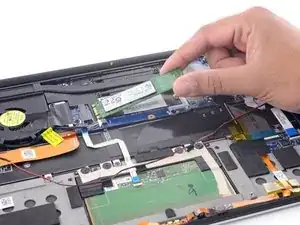
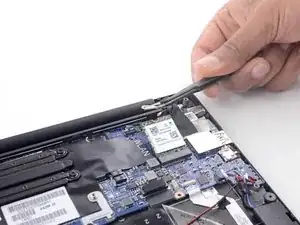
    • Als nächstes kommen die SSD und die Wi-Fi Karte heraus.

    • Alle Kabel, die wir bisher gesehen haben, sind mit Klebeband befestigt. Nicht furchtbar viel, es müssen aber doch ein paar davon ersetzt werden, es sei denn du bist ganz besonders vorsichtig beim Zerlegen.

    That’s a interesting notion. Back in my Dell XPS L321X there are few tapes. Wires run through the gaps between components.

    Xavier Jiang -

  7. tO3y1RGefwGvFfo5
    tO3y1RGefwGvFfo5
    5uEiRP2Lf4pqBPWD
    4MmsIEaTTFViCufh
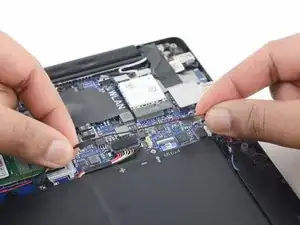
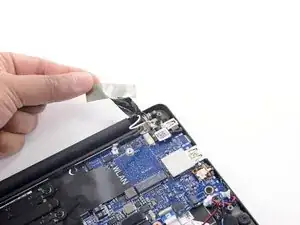
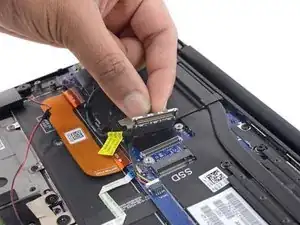
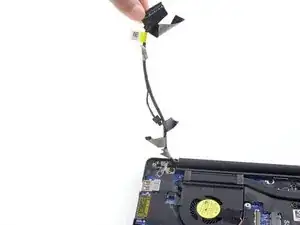
    • Der Displaystecker ist ein wenig knifflig. Er ist mit einer Halterung und fünf Stücken Klebeband gesichert. Wenigstens zerstreute aber eine praktische Zuglasche Bedenken über eine Beschädigung des Steckers.

  8. ZJQCP6RDxdp4QmsQ
    ZJQCP6RDxdp4QmsQ
    1dbt3wLIGyBeqIHH
    HBxZxtwdmVJcxqLD
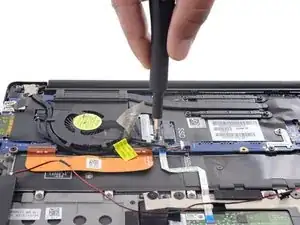
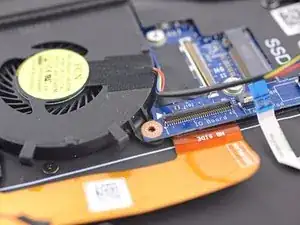
    • Wir wollten den Lüfter vor der Hauptplatine herausholen, aber sein Fuß hängt fest.

    • Also haben wir sechs Schrauben an der Hauptplatine entfernt und das Kühlsystem kommt gleich danach heraus.

    The reason for the board to layer on top of the fan is because the fan is plastic and sometimes that housing will be crushed by the screw (because uneven pressure distribution). This is observed in Dell XPS L321/L322/9333 series.

    Xavier Jiang -

  9. QlXouSTPFu3cqguG
    QlXouSTPFu3cqguG
    C4rUCoRHqegsn6hD
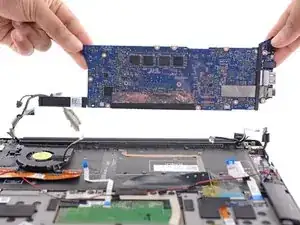
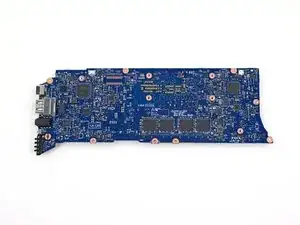
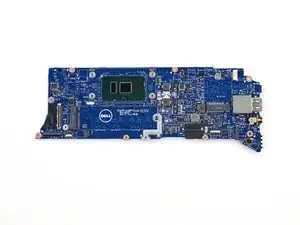
    • Das Motherboard.

    Can anyone confirm the uses of all those extra connector spacing? Seems like there is something more ambitious going on

    Xavier Jiang -

  10. tmnru4bdoYYtFnEJ
    tmnru4bdoYYtFnEJ
    lwJUlgjn5tQsnT4L
    XiylvYtO3G3QpfJ1
    • Das Trackpad lässt sich recht leicht ausbauen. Du musst nur vier Schrauben und leider auch etwas Klebeband entfernen.

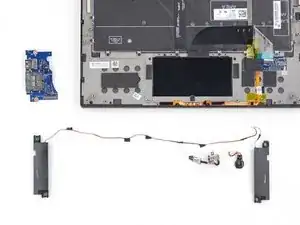
    • Dann kommen die Teile nur so herausgeflogen. Nachdem wir ein paar Kreuzschlitzschrauben entfernt haben, können wir die Tochterplatine (mit USB Anschluss und SD Kartenleser), die Lautsprecher, den RTC Akku (er ist nur verklebt) und den Stromanschluss herausholen.

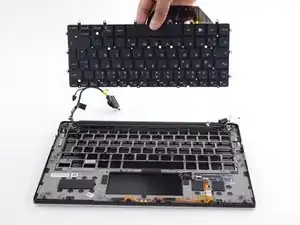
    • Und nachdem wir noch ein paar Dutzend weitere Schrauben entfernt haben, kommt auch noch die Tastatur ohne großes Theater (und ohne Klebeband!) heraus.

    There is a option that comes with a finger print sensor (that I upgraded from some spare parts). The fingerprint sensor will be seated at the location of the palmrest stickers and have a short ribbon cable going into a connector sitting in the free space below the SD card reader, the screw, and the DB/MB cable.

    Xavier Jiang -

    For reparability reference, the fingerprint sensor is secured with a metal bracket (of its own) and a Philips #00 screw.

    Xavier Jiang -

  11. NxSLHgsUnUjClvba
    NxSLHgsUnUjClvba
    sHXZZELgrbcVacAS
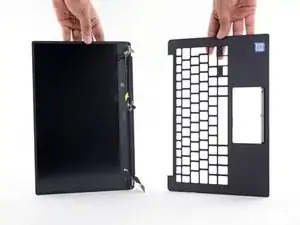
    • Die Displayeinheit ist mit vier Kreuzschlitzschrauben befestigt und kann leicht entfernt werden.

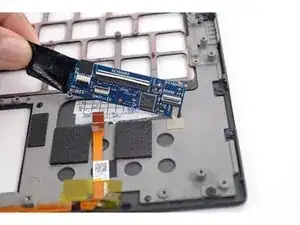
    • Bevor wir die Handauflage ausbauen, ziehen wir dieses kleine Breakout Board heraus, das die Tastatur steuert.

    • Dieses spezielle Board ist sehr stark verklebt, aber wahrscheinlich musst du es nie ausbauen.

    I think the screws to the display assembly can be accessed before removing the keyboard.

    The wires is another case, but since the WLAN card is pretty close to the hinge it shouldn’t be difficult.

    Xavier Jiang -

  12. SVOQPV1DIuHq2k5L
    SVOQPV1DIuHq2k5L
    UHxLCRXekAALWAwH
    • Die Reparierbarkeitsbewertung des Dell XPS 13 : 7 von 10 (10 ist am leichtesten zu reparieren).

    • Es gibt online kostenlose Servicehandbücher. Danke Dell!

    • Wenn du es geschafft hast die Bodenabdeckung zu entfernen, lassen sich alle Bauteile recht problemlos ersetzen.

    • Schrauben und Stecker sind beschriftet, das hilft beim Zusammenbau.

    • Klebstoff wird sparsam verwendet - außer an der Displayeinheit ist Wärme zum Zerlegen nicht notwendig.

    • Der Schichtaufbau könnte verbessert werden, um den Ausbau bestimmter Komponenten zu erleichtern, aber generell macht die modulare Bauweise Reparaturen kostengünstiger.

    • Verlötete RAMs bedeuten, dass du niemals aufrüsten kann, wenn es mal langsamer wird.

    I had the trouble with cracked plastic brackets, so I am pretty convinced that the “new” layout is better.

    The motherboard is made of silicon and had solder to "even” the compression force between the screw and the frame. The plastic crack because the topmost brackets are “squeezed” when you tighten the screw, so this time Dell put the fan “below” the motherboard.

    The battery fasteners are also different in the way that there is little “squeezing” force on the plastic tab as the screw mount is very slightly higher.

    Which means that all the parts will be fine even if it was overtightened for a bit. Now it’s only the configuration that decided how long it “lives” …

    Xavier Jiang -

Evan Noronha

Mitglied seit: 06/02/15

213827 Reputation

4 Kommentare

What version of the XPS 13 9333 did you use for your demonstration? The one I have just looked at had a significantly different layout and assortment of connections. For example, the flat copper-colored U-shaped connector is flipped 180 from your image.

Actually, the images show a layout that is about 180 out from what I viewed.

tom

Tom W -

I can confirm that the layout in 9343 / 9350 / 9360 is IDENTICAL. They shares the chassis.

The 9543 / 9550 /9560 and the precision shares the chassis (confirmed). Internals should be similar but varies wildly from configuration to configuration (e.g. a smaller battery and a 2.5 inch HDD OR a big battery with no 2.5 inch), discrete soldered or socket GPUs and the like.

The two looks very similar, so be rather sure. The 15 inch tend to get “better” stuff.

For the L321X, 9333, the 9q23 and the “older” models the layout IS different (but they should share the chassis)

Xavier Jiang -

Are there multiple SSD slots?

Sam Greenwood -

No. The 9360 don’t have enough internal space.

The 9560 had two options: A big (96 WH I think) battery, or a small battery (I think it’s a 65WH but different shape), but you have a 2.5 inch slot.

The (even) newer XPS 15 don’t have a 2.5 inch but give you two slots of PCIe/SATA SSD slots.

And, supposedly the mounting point for the SSD is replaceable (for the different length), but I can’t find one and/or the plentiful 2280 rendered other sizes obsolete.

___

Note that these slots should support both NVMe/PCIe and SATA protocols and also feature Intel RST (rapid storage technology). See BIOS.

Xavier Jiang -