Einleitung
Wenn du die Rückabdeckung deines Dell XPS 13 9380 entfernen möchtest, bist du hier richtig.
Die Rückabdeckung muss für die meisten Reparaturschritte entfernt werden.


-
-
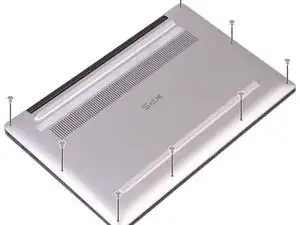
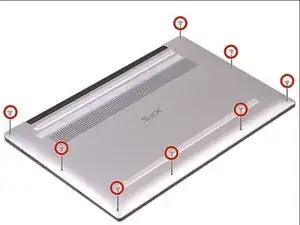
Löse die acht Schrauben (Torx M2x3) mit denen die Rückabdeckung befestigt ist.
-
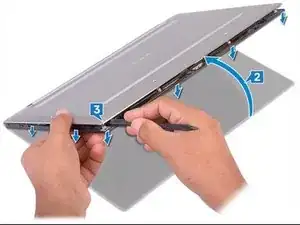
Drehe den Computer um und öffne ihn, indem du ihn kippst.
-
Verwende einen Spudger, um die Bodenplatte aufzuhebeln und zu lösen.
-
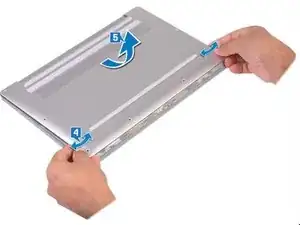
Ziehe die Bodenplattte von der den Scharnieren gegenüberliegenden Seite ab und rüttle sie leicht hin und her, um die Clips zu lösen.
-
Wenn die Clips der Bodenplatte frei sind, kannst du sie abnehmen.
-
Um dein Gerät wieder zusammenzubauen, folge den Schritten dieser Anleitung in umgekehrter Reihenfolge.

Ein Kommentar
The torx bit used is a T5, the screw is an m2x3 — if you’re buying a kit you want the T5 torx bit
swosse -
You should be careful when removing the back panel as there also two clips on its back where the air ducts lie. If you are quick to remove it you may tear the air ducts which are quite (unreasonably) fragile given the fact they are plastic. I was unfortunate and I broke two of them so I had to use some duct tape as a minor gap would be visible between the back panel and the plastically covered air ducts. Other than that, it’s a pain to remove the back panel but not as difficult as it sounds.
Iraklis -