Einleitung

Hier wird der Austausch des Trackpads gezeigt.

  1. d4dlLhKy4BBopKMR
    d4dlLhKy4BBopKMR
    k2WqKJVEtDes4Ca2
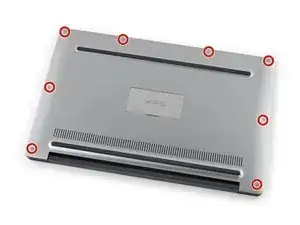
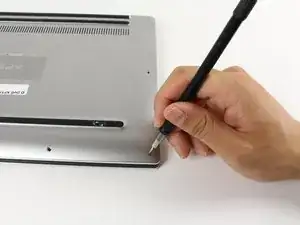
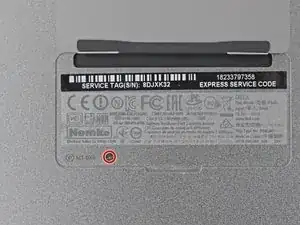
    • Entferne acht 4 mm Torx T5 Schrauben von der Rückabdeckung.

    Missing a step about removing the tiny Phillips head screw under the XPS flip up cover in the middle. Also, there are hooks all the way around the cover so it doesn’t simply lift off.

    curtis_p_brown -

    What about step 3???

    Peter Hecht -

    Please dont hurry , take your Time to follow this procedure. It takes 20 min (not 5) and step 4 requires half of this Time. Good luck.

    Peter Hecht -

    +1 Peter Hecht is right - getting the little clips the back is snapped on with is time consuming and a bit fiddly for people not used to “spudging” off covers. Starting from the back is the key those come loose much easier and help with the rest

    Doug Steinschneider -

  2. 2TNJ3aF1OiC3dQrY
    2TNJ3aF1OiC3dQrY
    RKMGHiGBGvwUs2b6
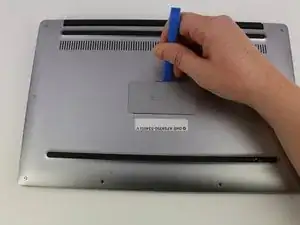
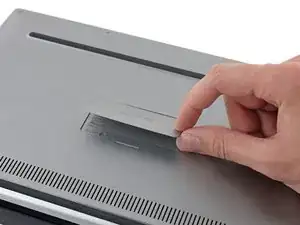
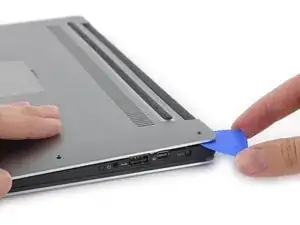
    • Heble mit einem Plastiköffnungswerkzeug die mit "XPS" markierte Klappe in der Mitte auf.

    No flap or screw on the XPS 9370, just a press-fit latch at the centre of the cover. This can be gently prised off.

    Alan Thomas -

  3. TtZb5DNBruSpJQiH
    • Entferne die einzelne Kreuzschlitzschraube unter der Klappe.

  4. SV3vQLxNPuaLAJc2
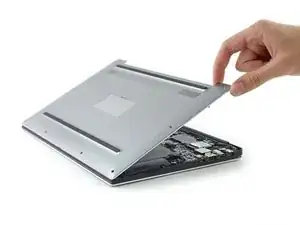
    • Heble mit Plektren oder einem Plastikwerkzeug die Gehäuseklammern auf. Beginne dabei an der hinteren Kante.

    It’s not that easy to lift actually, cause there are latches. Had t release them gently all around beforehand.

    Davit Barbakadze -

    Also there’s one additional screw under that plate on the bottom!

    Davit Barbakadze -

    Maybe the later models are different, since it should be from the front: https://www.youtube.com/watch?v=xFIE2SKs...

    shigmas -

    Very difficult step, Proceed very carefull

    Peter Hecht -

    If you are replacing the battery of a 9360 or latter (2016 onward) make sure to do the FRONT first. There are latches on the back that you may break if you try to force it open that way. After prying up the front and the sides, just lift up the front like you would open a hinged box. You shouldn’t feel that much resistance as the back hinges off towards you after you’ve lifted it around 30-40 degrees.

    Giacomo P -

  5. SclHTlmfKvgauUBi
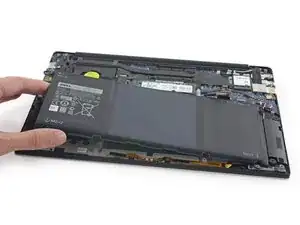
    • Entferne die untere Abdeckung.

  6. xOVtCEsgTbREfTYL
    xOVtCEsgTbREfTYL
    qFNPUbfQsBdlUaty
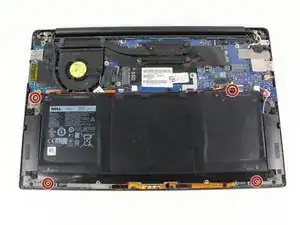
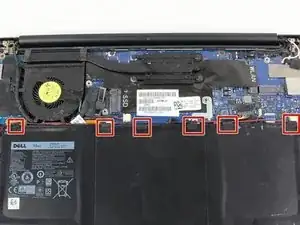
    • Entferne die vier 3 mm Kreuzschlitzschrauben #0 von jeder Ecke des Akkus.

    There are two additional screws holding sound speakers.

    Davit Barbakadze -

    And there is a another small screw holding the battery right above the “M1 6x4” print.

    curtis_p_brown -

    You also do not need to remove any speaker screws or the speaker, you just have to remove the tape holding the speaker wire to the battery.

    curtis_p_brown -

  7. HhDh3XGhuQo3WcrU
    HhDh3XGhuQo3WcrU
    LgMA5uGJwVaBDh5g
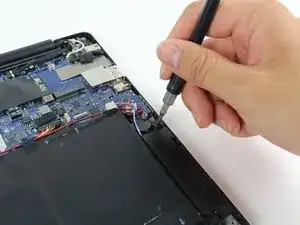
    • Das Batteriekabel mit dem Anschluss zum Akku ziehen, um es vom Anschluss zu trennen.

    • Nicht nach oben ziehen.

  8. XK14WEDKdKGuVOZe
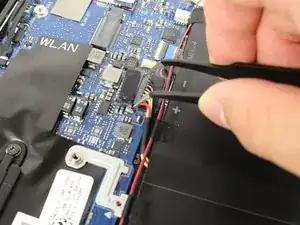
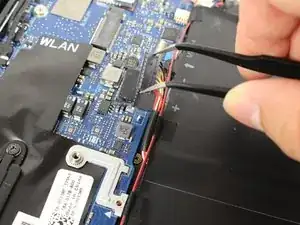
    • Die Klebebänder lösen, die die Lautsprecherkabel am Akku befestigen.

    • Die Lautsprecher müssen nicht entfernt werden, nur das Klebeband, damit der Akku unter den Kabeln entfernt werden kann.

  9. pbfpsDnER5fqy4uy
    • Den Akku entfernen.

  10. 1ZlYfdIehEZtGRtZ
    1ZlYfdIehEZtGRtZ
    SPc5OFmUKq1CBSOO
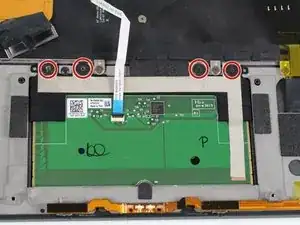
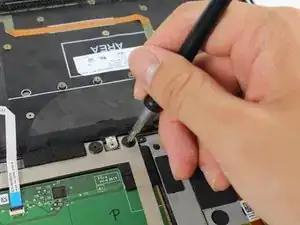
    • Entferne die vier 3 mm Kreuzschlitzschrauben #1 am Trackpad.

  11. JS1YOKEcslwOij6L
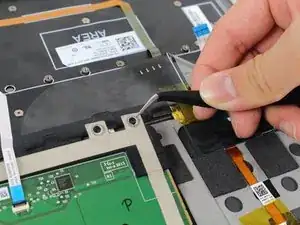
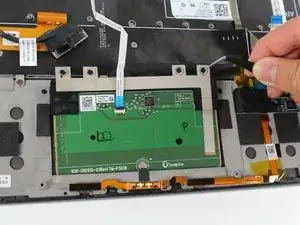
    • Hebe die obere rechte Ecke des Trackpads vorsichtig mit einer Pinzette hoch.

    • Ziehe das Trackpad langsam hoch und von dir weg.

    The author does not say what to do next as the trackpad is connected to the motherboard by a rather odd connector. What do I do now?

    He really ought to say how to remove the trackpad and replace it with another and then repeat the steps to go back.

    Hugh Davie -

    You lift up the little black tab on the keypad to release the connector ribbon OR you pivot up the little white tab on the connector ribbon on the mother board to release the connector cable and so free the trackpad. Now you can replace it with a new one and reverse the steps.

    Hugh Davie -

Abschluss

Um dein Gerät wieder zusammenzusetzen, folge den Schritten in umgekehrter Reihenfolge.

Arvind Krish

Mitglied seit: 26/04/17

179 Reputation

0 Kommentare