Einleitung
Werkzeuge


-
-
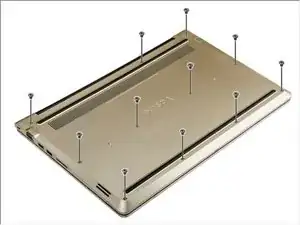
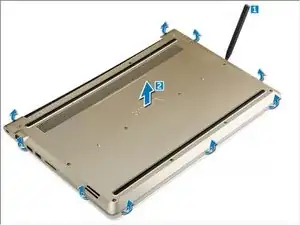
Using a scribe, pry the edges of the back cover from all sides [1].
-
Lift the back cover from the computer [2].
-
-
-
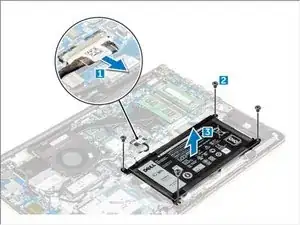
Disconnect the battery cable from the connector on the system board [1].
-
Remove the screws that secure the battery to the computer [2].
-
Lift and remove the battery from the computer [3].
-
-
-
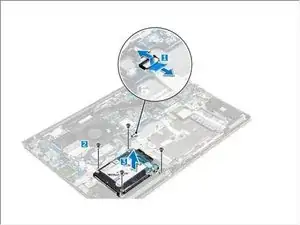
Lift the tab to disconnect the hard drive cable from the connector on the system board [1] .
-
Remove the screws that secure the hard drive to the computer [2].
-
Lift the hard drive from the computer [3].
-
To reassemble your device, follow these instructions in reverse order.

2 Kommentare
Did work for me, many thanks. Only two small remarks.
a) Why remove the battery? I was installing a SSD in addition to the built in one (the hdd place was still empty). Attaching the hdd cable is possible without battery removal.
b) Disonnecting the battery showed to be a bit tricky. Pulling the cable is out of question, and pulling at the label part looked also not advisable. One-sided prying…not so good. Pushing the connector in the plane of the battery - need to be very careful, slipping may mean impulse force to the cable. I used careful two sided prying into the small spaces left and right of the connector.
Wolfgang -
Cuál es el tamaño de los tornillos de la cubierta posterior?