Einleitung

Diese Anleitung zeigt wie man das GPS Modul der Drohne austauscht. Dafür musst du zuerst einige andere Schritte durchführen. Wenn du das GPS löst, hörst du ein markantes Geräusch -> dies ist normal.

  1. iglomPjvSlr2YjP1
    iglomPjvSlr2YjP1
    1kaA6J2Lm4djM4Ub
    BLIRyZG4dBEMYYCL
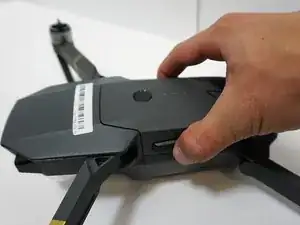
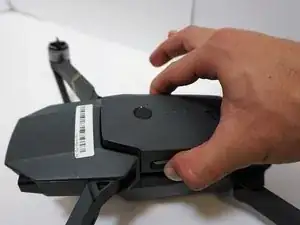
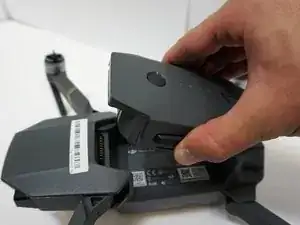
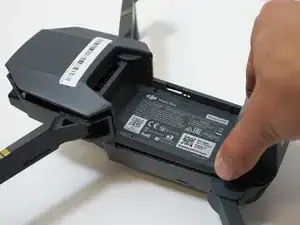
    • Greife den Akku von beiden Seiten.

    • Drücke die beiden Halteklammern des Akkus.

    • Hebe den Akku nun heraus.

  2. BQtVoJHFb5ZYkr2c
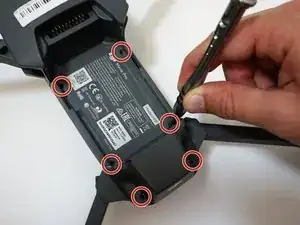
    • Entferne die sechs 1,5mm Inbus Schrauben.

  3. yP4S2iHV5O3Wwbgh
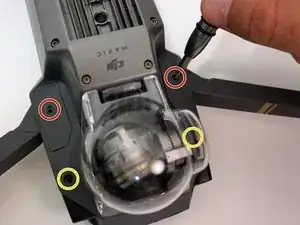
    • Drehe die Drohne nun um, so dass das Gimbal nach oben zeigt.

    • Entferne die beiden 4 mm langen 1,5 mm Inbusbusschrauben nahe am Gimbal-Gehäuse.

    • Entferne die beiden 5 mm langen 1,5 mm Inbusbusschrauben nahe am Gimbal-Gehäuse.

    the author forgot to mention to remove also the two screws right next to the gimbal. in this picture, they are already removed. without removing these, you cannot open the drone!!

    Joris Ott -

    also, the screws above in the red circles are not the same as the ones in step 2 and 5! They are shorter! I don’t know how long but not 5mm!

    Joris Ott -

    Yes, please add those screws - almost broke the top case ;-(

    xyz40 -

    Screws thinner too.

    Lee Day -

  4. IcQgUAppFEOKpEXZ
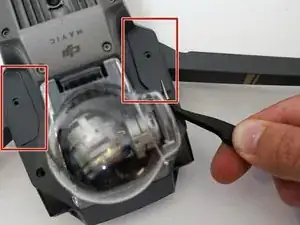
    • Entferne die beiden kleinen Abdeckungen mit einer Pinzette.

    BEWARE! The two screws under the covers are not mentioned in step four to be removed, but they show that they have been removed in step five.

    Patrick Madden -

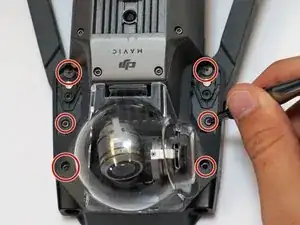
    Step five should read- Remove the SIX 5mm 1.5 Hex screws that are under the panel pieces by turning the screwdriver counterclockwise.

    Patrick Madden -

  5. aAvoS1QA3XTKPWvN
    • Entferne die sechs 1,5mm Inbus Schrauben, die sich unter den Abdeckungen befinden.

    You need to remove the 2 screws (as the picture shows) that are adjacent to each side of the gimbal (below the screws circled in the picture. This also connect to the top shell and could cause an issue!

    ellfa1 -

    What he said!! ^^^

    shaun.cunningham -

  6. 2xtqpAGXNIm25G1T
    • Drehe die Drohne nun wieder um.

    • Nutze nun einen Plastiköffner um die Oberseite von der Unterseite zu trennen.

    • Sei Vorsichtig beim Lösen, um eine Beschädigung der Plastiknasen zu vermeiden.

    using pry tool is not necessary - once all top shell screws are removed you should be able to take the top shell off with your hand.

    KopaZ Maymay -

    Sorry “KopaZ Maymay”, aber der Plastiköffner ist “sowas von erforderlich”, weil man sonst leider die beiden Plastiknasen in der Front riskiert.

    Orbiter -

    Zudem fehlt hier die Angabe der genauen Lage von beiden vorderen Nasen:

    Sie befinden sich von der Mitte aus gemessen jeweils 9mm nach links und rechts. Der obere Gehäuseteil wird von zwei 5mm breiten Bügeln gehalten, die unter die horizontal nach innen zeigenden Nasen vom unteren Gehäuseteil greifen.

    Orbiter -

    Sorry “KopaZ Maymay”, but the plastic opener is “so necessary” because otherwise you unfortunately risk the two plastic noses in the front.

    In addition, the exact position of both front noses is missing in the description:

    They are measured 9mm from the center to the left and right. The upper part of the housing is held by two 5mm wide brackets that grip under the noses pointing horizontally inwards from the lower part of the housing.

    Orbiter -

    Hi, is it a simple replacement. Ie you do not have to reprogram? Thanks

    farkin joker -

  7. ltHXcJpNl4XjYMcN
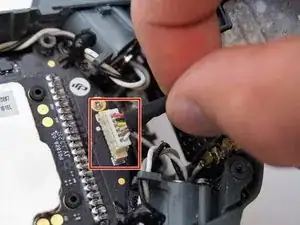
    • Fasse den Stecker am Ende des Controllers ganz unten und ziehe ihn vorsichtig heraus.

    Hello there, can anyone tell me, please, what type of connector is this? I ruined mine and i like to fixit.

    Ene Alexandru -

  8. wDDTGHgVOWCLLCmF
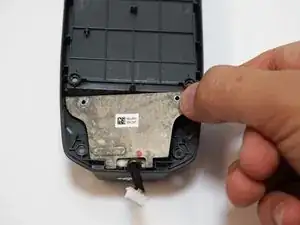
    • Drehe das obere Gehäuse einmal um

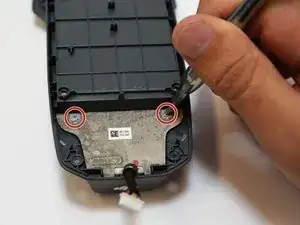
    • entferne die beiden 5mm JIS #00 Schrauben von der Metallplatte

    • Wenn der #00 Schraubendreher zu klein sein sollte, nimm einen #0 Schraubendreher

    make sure to use non-magnetic screws when screwing GPS cover. otherwise there’s a chance you’ll get navigation system error.

    KopaZ Maymay -

  9. XcRPSX4MKSGbQdU3
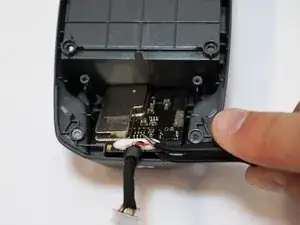
    • Nimm einen Spudger um die Metallplatte zu lösen

    • Hebe die Metallplatte nun ab

    • Beim lösen wirst du ein markantes Geräusch hören - dies ist normal und zieht keine Beschädigung nach sich.

  10. gE2NE1cdT2KHbtjX
    • Nimm nun eine Pinzette um das GPS Modul zu entfernen.

Abschluss

Um dein Gerät wieder zusammen zu setzen, befolge die Anleitung in umgekehrter Reihenfolge.

Kyle Kelser

Mitglied seit: 08/10/18

507 Reputation

0 Kommentare