Einleitung

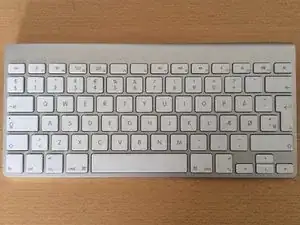
Diese Anleitung wird dich durch die grundlegende Zerlegung des Apple Wireless Keyboard A1314 führen: Austausch der Logic Board Baugruppe und von feststeckenden Batterien.

  1. qrsEc5RS5rYYgn4Z
    qrsEc5RS5rYYgn4Z
    fQseYgh1sNkiQRhG
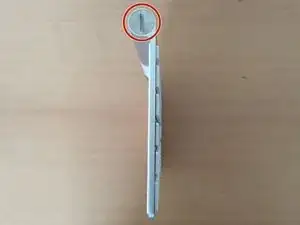
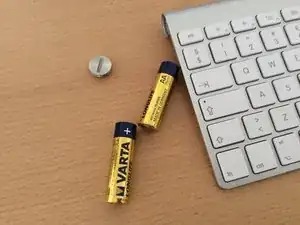
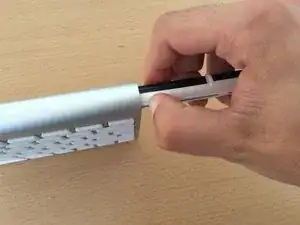
    • Drehe es entgegen des Uhrzeigersinnes auf.

    • Wenn es noch neuwertig ist, solltest du in der Lage sein, es einfach mit dem Daumennagel zu tun. Wenn nicht, versuche es mit einer Münze oder einem großen Schlitzschraubendreher.

    • Die Batterien sollten einfach herausgleiten. Falls deine Batterien stecken bleiben, kannst du sie zunächst dort lassen. Du wirst später in der Lage sein, dich um sie zu kümmern.

    And if its completely STUCK, because of oxides from the battery inside....??

    Erik M -

  2. DUVnP3xGvVYMlQtq
    DUVnP3xGvVYMlQtq
    kERPSrxW1PVRxJUe
    H2kkVMUCXHhfD2qo
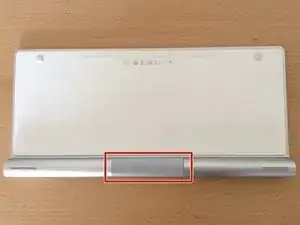
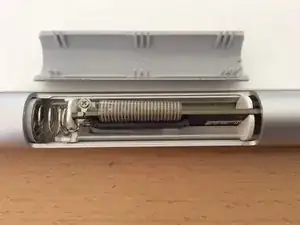
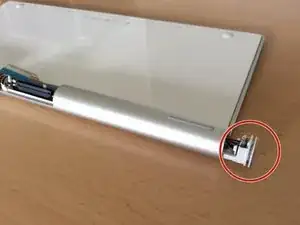
    • Drehe jetzt die Tastatur herum, um an die Plastikabdeckung an der Unterseite zu gelangen.

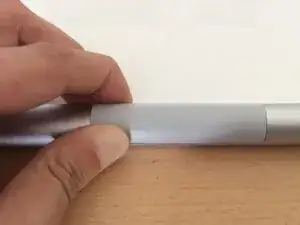
    • Drücke mit zwei Fingern die eine Seite der Plastikabdeckung zusammen und hebe sie dabei hoch.

    • Sei vorsichtig, dabei nicht zu viel Kraft aufzuwenden, sonst könntest du die Abdeckung oder die Hauptplatine, auch Logicboard genannt, beschädigen.

  3. Bhwi1KlAOSbUQbAL
    Bhwi1KlAOSbUQbAL
    1lblXPHCYMpfNVbE
    Wrbo2dCokA6iFVQX
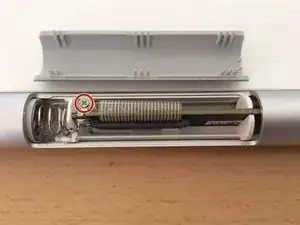
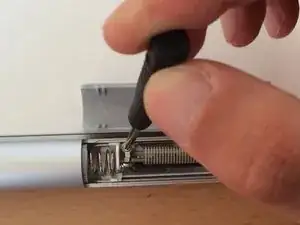
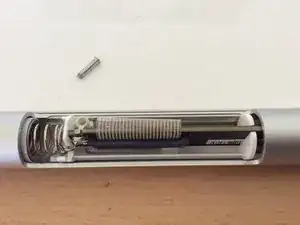
    • Entferne nun diese eine kleine Kreuzschlitzschraube, mit der die Platinenbaugruppe befestigt ist.

    whats the screw driver i need?

    leopoldo alvarenga leonidas -

    Very small Phillips screwdriver. You can see the screw head in the red circle. It’s a very unusual screw, dont lose it….

    Eric Andersen -

  4. olfvHTAwZaQQLjAF
    olfvHTAwZaQQLjAF
    JDWjaFLK4UpNKoQs
    6GnQaui4TkVUHPhB
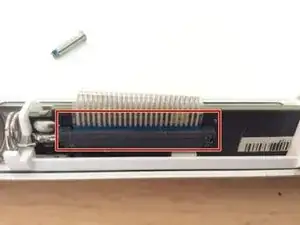
    • Hebe die kleine Klemmleiste am Anschluss für das Flachbandkabel hoch und ziehe das empfindliche Flachbandkabel behutsam heraus.

    • Sei mit diesem Flachbandkabel besonders vorsichtig, es ist sehr dünn und kann mit zuviel Kraft leicht beschädigt werden.

    The two keyboards I’ve done this to, the ribbon cable also has some sort of adhesive on it to keep it stuck to the logic board. Be careful!

    June Owatari -

  5. EAoPRqL5ECd41FTv
    EAoPRqL5ECd41FTv
    qeZCrIXfUMaiKrTC
    ea2FSlUWD1lALHZa
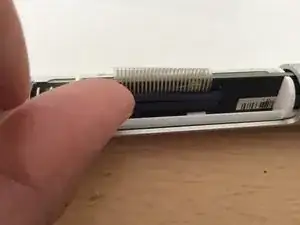
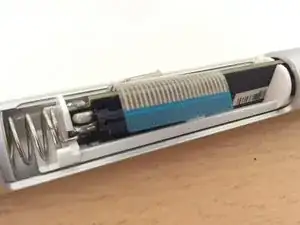
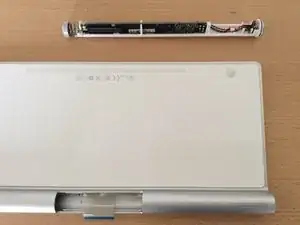
    • Denke immer an das empfindliche Flachbandkabel, wenn du nun die ganze Baugruppe - mit der rot markierten Einschalttaste voran - herausholst.

    • Wenn sie etwas weiter draußen ist, wirst du einen kleinen Widerstand spüren. Um ihn zu überwinden, musst du das weiße Plastikteil auf der Unterseite ein wenig eindrücken.

    • Wenn sich die Batterien verklemmt haben, kannst du sie jetzt herausnehmen. Mit einem geeigneten Werkzeug, z.B. einem Schraubendreher lassen sie sich herausdrücken- denke immer an das Flachbandkabel.

    • Das war's schon!

Abschluss

Um dein Gerät wieder zusammenzubauen, folge dieser Anleitung in umgekehrter Reihenfolge.

mrMillet

Mitglied seit: 08/08/15

1512 Reputation

24 Kommentare

My keyboard has the same model number as the unit described here, but the plastic cover is at the end near the power button. Although I could remove the cover and small screw inside, I was unable to remove the ribbon cable.

I tried banging the stuck battery out of the keyboard until I was sure it would be ruined. With only 1cm of progress, I decided to take the battery out by setting a screw and pulling it out like a fish on a hook. Here's what I did:

1. Poke a hole in the bottom of the stuck battery with an ice pick

2. Create a 'fish hook and line' by wrapping a coat hanger around the end of a big gnarly wood screw.

3. Carefully screw into the battery until it is most of the way in.

4. fit the coat hanger through a narrow gap (drill a hole in a board) and pull with all your might to drag the battery out of the keyboard.

5. Clean out the hole to get rid of the rotten battery debris

6. Pop in some new batteries, and Hey-Presto! it works.

I have a great picture of this if there is a way to upload one.

John Taylor -

To remove the ribbon cable you have to first release the cable. The gray piece is actually a clip (of sorts) I you look closely you can see a seam in the grey piece. It slides up (in the direction of the cable) and will allow the cable to be removed easily.

I know this is old but maybe someone else has the same question.

Mo Ali -

My plastic cover is in the middle and I can't get at it any suggestions? Thanks

Patricia colonese -

Use a pry tool like the ones used to remove screens. I thin flat screwdriver might work. It’s better to use a plastic pry tool (if you have one) they look like guitar picks and generally won’t scratch the surfaces.. Place it in the seem between the metal and plastic. I just squeezed it together really hard and then I saw a seam. I put a fingernail in the seam to open it up all the way.

Mo Ali -

The Apple wireless keyboard that has the plastic cover located on the end is not the A1314 (which requires two AA Batteries);but, is the A1255 (which uses three AA batteries).

Ludwig -

THANK YOU SO MUCH!! I had the inner battery corrode and seal itself inside the keyboard battery panel, and I tried everything from freezing it and then exposing it to high heat to loosen the battery, to glueing the end of the batt to some wood to try to pull it out. Your method SAVED ME from buying a new one and I’m genuinely thankful for this instruction manual. Thanks again man!!!

Roman Yang -

Followed instructions as described and, apart from the small screw being stubborn to remove , it all went very well. thanks for your contribution. You are assured of a place in heaven when the time comes!!!

Roger -

Thank you! I am typing this on a freshly-restored A1314 that the antenna failed on ages ago. I ended up with a spare keyboard and this one sat disused and forgotten. Then my iMac was stolen last Thanksgiving, complete with keyboard, trackpad, and the MagicWand that bound them together.

Insurance bought me a new 2015 27” iMac, but I absolutely hate the new keyboard and trackpad. I recently came across the spare keyboard, but the sadly cheapass battery had exploded, welding the battery door shut. I followed these instructions, transplanted the circuit board, and resurrected the old keyboard! HAPPY HAPPY, JOY JOY!

For those having problems removing the plastic cover, I couldn’t squeeze one end and get it loose. I ended up squeezing from the long side against the other, and then it came loose easily. That might help you out. And it helps to have a needle nose tweezers, such as comes in iFixit’s tool kit, for dealing with the Philips screw in step 3, also good for dealing with the ribbon cable.

Wayne West -

Hi

i have same keyboard but some keys don’t want to work any more?

Whut should i do?

Richard Vana -

Thanks for a great guide that was really easy and I was able to make the repair on the first try.

Pete Newcomb -

my problem here is .. all of the letters are not responding, BUT numbers do work all the way to delete button.. caps lock works and enter button (if you hit it hard enough) ! and arrow keys work.. but not letters of A-Z does not work, any tips? please?

Thomas Jefferson -

My right shift isn't working fine. How can i solve the issue?

Eugenio Aievoli -

Bonjour j’aimerais avoir une info svp, on peut on acheter la pièce en plastique, étape 4 photo 2, le serre nappe ? d’avance merci

DJ Ronan S. DJ Le Tsar -

thank you. this helped me very much A+

riker -

THANK YOU SO MUCH!! I had the inner battery corrode and seal itself inside the keyboard battery panel. Your method SAVED ME from buying a new one and I’m genuinely thankful for this instruction manual. Thanks again!!!

Mar Martinez -

I’ve still got something in the way (probably residual battery acid) that requires I perform this process every time I replace my batteries. Is there a good method to smooth the bore of the battery compartment?

macwizzard -

Yes, hold the keyboard vertical, battery cover down and wipe with vinegar on a small cloth wrapped and taped around a stick (chopstick) . wait for awhile (10-15 mins) to neutralize the corrosion then “wash” well with water then dry. Wrap very fine sandpaper around chopstick/whatever tape on and sand and rub till smooth. Sanding can be done first, doesn’t matter.

Philjj61 -

Thank you!! This helped fix my keyboard.

Jessica Miller -

My Keyboard does not turn on and off and I want to inspect and clean the switch. I think a battery leaked and perhaps corrosion causes the round assembly to be stuck in the housing. Batteries come out easily - it is the circuit board assembly that is stuck. Does that assembly have to be rotated to remove it? I read that it was necessary to rotate the assembly 90deg to get it out? My assembly does not move in any direction….

Eric Andersen -

Persistence pays off. Lots of WD40 (over several days!) and several minutes of hard push/pull action (not rotation) freed the bind. The assembly does require a 90 deg twist but not until the assembly is about 1” out of the barrel. Brown goop dissolved in water followed by a desiccating IPA rinse, and I’ve got a keyboard again!

Eric Andersen -

Hey, I’m really sorry to say this but I think I may have permanently damaged the logic board screw (the screw you need to remove at Step 3). I frantically tried all the different screws in my Dad’s toolbox but none of them could get it to turn properly. It wasn’t until later I saw the specific type of screw recommended in this guide, so I bought it on Amazon and tested it… but I think the screw’s head is so worn and weathered I cannot get it to turn at all!

It really bothers me that I cannot unscrew that one screw–is there ANYTHING I can do to solve this problem?

bencrstevens -

I have same keyboard model and my problem is that the screw cap is badly stuck due to battery leak and getting stuck, underside of the screw cap itself. I can slide out the circuit board from the other end. However, I cant open the battery or open the screw cap. Any ideas please?

Sridhar S Rao -

uhmm how to remove the batteries when they are stuck?

enrique bengaura -

Still wishing i could purchase the logic board. The keys work fine. But nooo!! "Right to Repair isn't quite there" - rhyme intended.

Nathan Z Solomon -