Einleitung
Das interne Netzteil ist für das Einschalten des Gerätes wichtig. Befolge die Fehlerbehebungsseite, um herauszufinden, ob es sich bei deinem Problem um das interne Netzteil oder das Netzkabel handelt. Das Stromkabel zu tauschen ist um einiges einfacher.


-
-
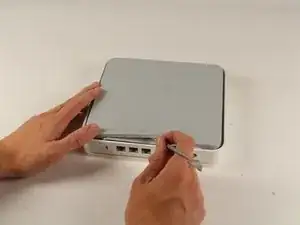
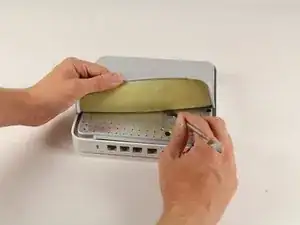
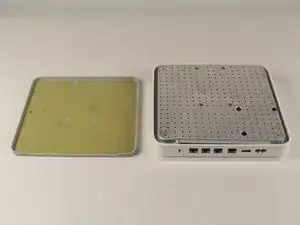
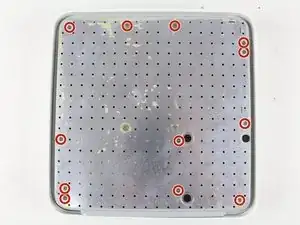
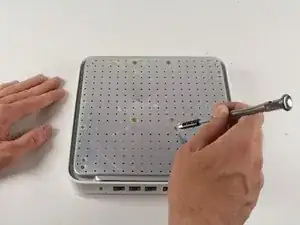
Drehe das Gerät um, um an die Gummiabdeckung der Rückplatte zu gelangen. Schiebe vorsichtig die stumpfe Spitze des Metall-Spudgers in den Spalt zwischen Aluminium-Rückplatte und Gummiabdeckung, um die beiden Teile voneinander zu lösen.
-
-
-
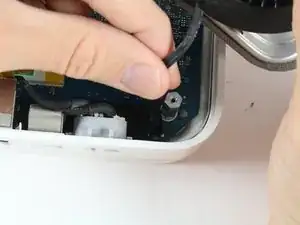
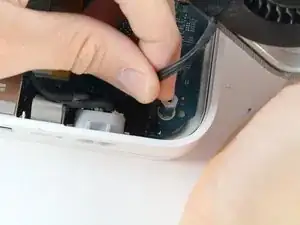
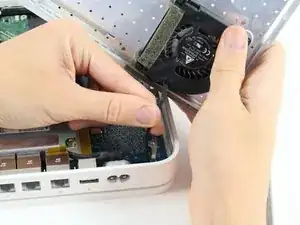
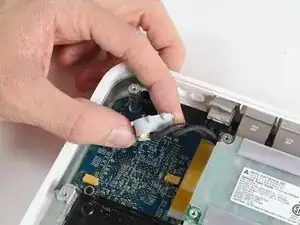
Der Lüfter ist auf der Rückplatte befestigt und mit dem Logic Board verbunden. Hier muss ein kleines Kabel entfernt werden, um die Rückplatte komplett zu entfernen.
-
Ziehe das Kabel vorsichtig in Richtung Logic Board, um den Stecker zu lösen.
-
-
-
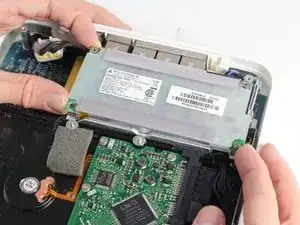
Entferne den externen Stecker aus seinem Gehäuse, indem du ihn zuerst anhebst und dann herausziehst.
-
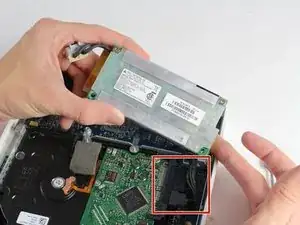
Nimm das interne Netzteil aus dem Gerät heraus.
-
-
-
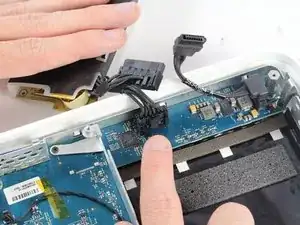
Entferne den SATA Stecker von der Festplatte. Das Kabel hat keinen Verschlussmechanismus und lässt sich einfach herausziehen.
-
Um dein Gerät wieder zusammenzusetzen, befolge diese Anleitung in umgekehrter Reihenfolge.

3 Kommentare
My time capsule stopped working. I tried everything but it was completely dead so I bought a new power supply on eBay but now the amber light is solid and won't turn green. I've tested the hard drive and it's fine. I've got another new power supply today and still a solid amber light. Any ideas please?
Andrew -
After the Apple Reseller said the device was not covered by service anymore and data rescue would cost 70 bucks I decided to go for it myself. Went very well. Except the grey rubber backplate was ripping apart on removal. Must be because of the device getting so hot. Will fix it with some self-adhesive rubber mat from the crafts store.
Thanks for the guide!
Hello is HOT I took the rubber mat off and rise it with rubber foot for better circulation of air, it helps alot.
The epoxy cementing the rubber pad to the aluminum base is a lot stronger than the rubber itself. The rubber is likely to tear as you remove it; I had to use a putty knife to clear the screws. It's worth hanging onto the branding near the Ethernet ports, for future identification (model number, serial number, Ethernet ID, AirPort ID); you can fashion a replacement pad out of neoprene rubber.
adlerpe -
Mine completely ripped I have no back cover now its in multiple pieces…. mine was giving off way to much heat and hard drive errors so I decided to replace hard drive and fan wish me luck BUT if yours is overheating do not expect to get back off without ripping the rubber to
William -
Using a fan to heat the plate up was helpful
Michael Zimmermann -
I wish I read Michael Zimmermann’s suggestion before I tore the first half into about 15 pieces! On the second half I used a hair dryer to heat the rubber. With enough heat and a very slow steady pull on the rubber it came of as a single piece :-)
mfred2 -
Do I need to put back on the rubber? will it overheat if I don’t?
Strider -
It is almost impossible to keep the bottom rubber covering intact in one piece. The rubber is covering the whole base section and it won’t be a problem without it I guess. This is not an epoxy because it is still gummy and sticky. This is like the adhesive used on the double side tapes. Goo Gone worked well to remove those residues.
Kenn Sakurai -
The rubber cap like bottom can be replaced with easy to cut in shape cork sheet will do. Just rip off the thin strip where the serial number for the ID and other info that might be needed later. Have it glued or put on a clear tape and put it on the side of the white plastic sidewall will do.
Kenn Sakurai -
With age, the rubber becomes brittle. It is best to heat it up with a hair dryer before trying to gently peel it off.
SirDeck -